The Mac’s Notification Center is a useful way of making sure you don’t forget appointments or birthdays. However, it can also be a distraction if apps persistently display notifications you don’t want to see. For legitimate apps, these notifications can be managed in the Notifications settings in System Settings. However, occasionally, malware that manages to get past your Mac’s security and is able to display notifications that urge you to click on a link or take other action comes along. Those malicious notifications come from websites — if you’ve ever been asked to allow notifications from a website and accidentally clicked ‘Yes’, you’ll know how easily that can happen. Once you’ve agreed to receive notifications from a malicious site, you will be plagued by pop-ups. In this article, we’ll deal with one of those pieces of malware and show you how to remove ‘ask you’ notifications on your Mac.
What are ‘ask you’ notifications?
‘ask you’ notifications are malicious pop-ups that appear on your Mac and urge you to click a link to download a piece of software, protect your Mac from viruses, or view content like breaking news or a viral video. Clicking the link is likely to take you to a malicious website that could install a browser hijacker or other malware.

How did ‘ask you’ notifications get on my Mac
The most common way for the ‘ask you’ notifications to get on your Mac is by clicking something online. When you visit a disreputable website, it sends a notification asking you to permit it to send you notifications. That request may be disguised as, say, a pop-up asking you to prove you’re not a robot or some other seemingly innocent request. However, once you’ve agreed, inadvertently or otherwise, to allow notifications, it will send them frequently, distracting and frustrating you and compromising your Mac’s security.
How to remove ‘ask you’ notifications on your Mac
Removing the notifications themselves is not too difficult. The difficult part is dealing with any malware that may have been downloaded on your Mac as a result of clicking a notification. We’ll show you how to do both.
Stop the notifications in Safari
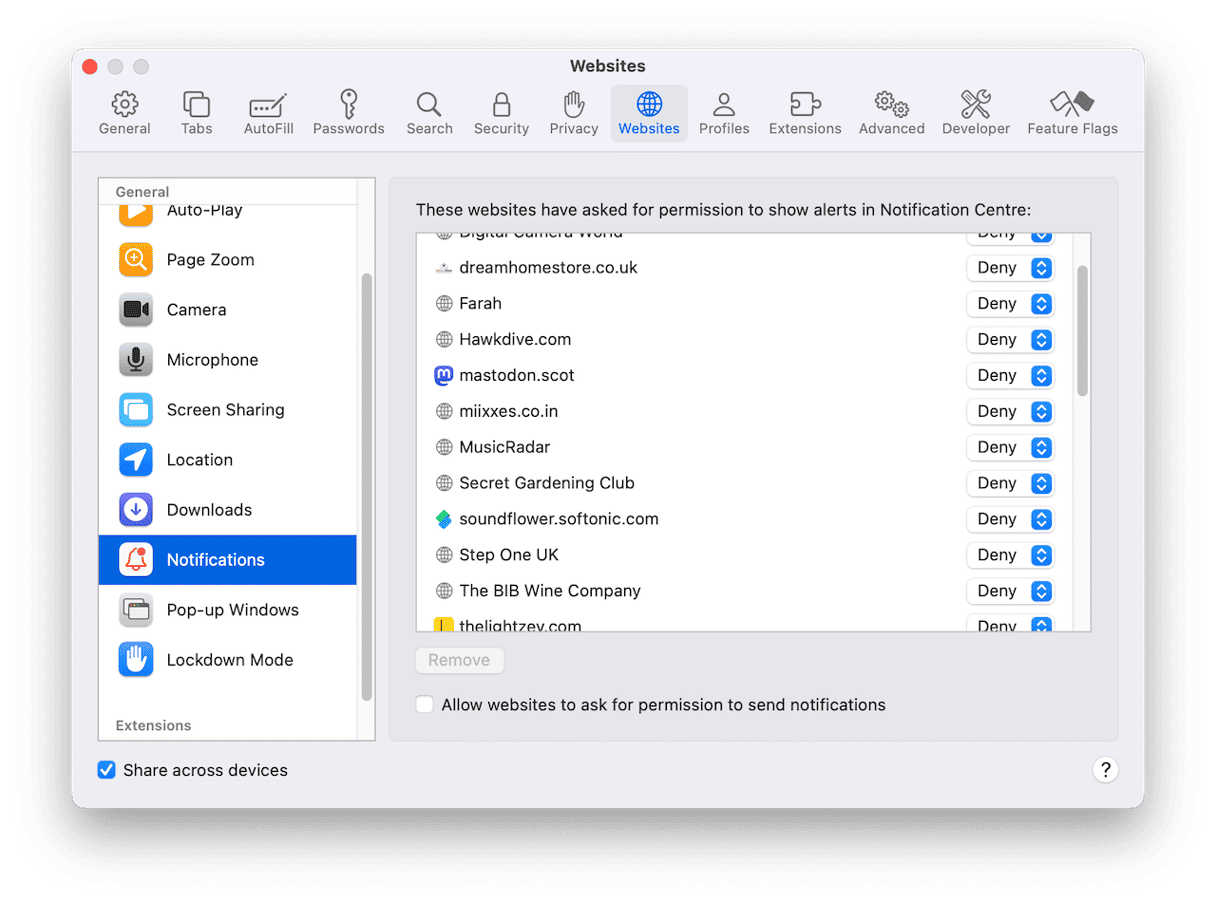
- Open Safari, click the Safari menu, and choose Settings.
- Select Websites and scroll down until you see Notifications in the sidebar.
- Click Notifications and then look in the main window at the list of websites.
- Look for sites that have Allow next to their name.
- If you see one that has notifications allowed and are unsure about whether it’s legitimate or that you want to receive notifications from it, select it and choose Remove.
Stop the notifications in Chrome
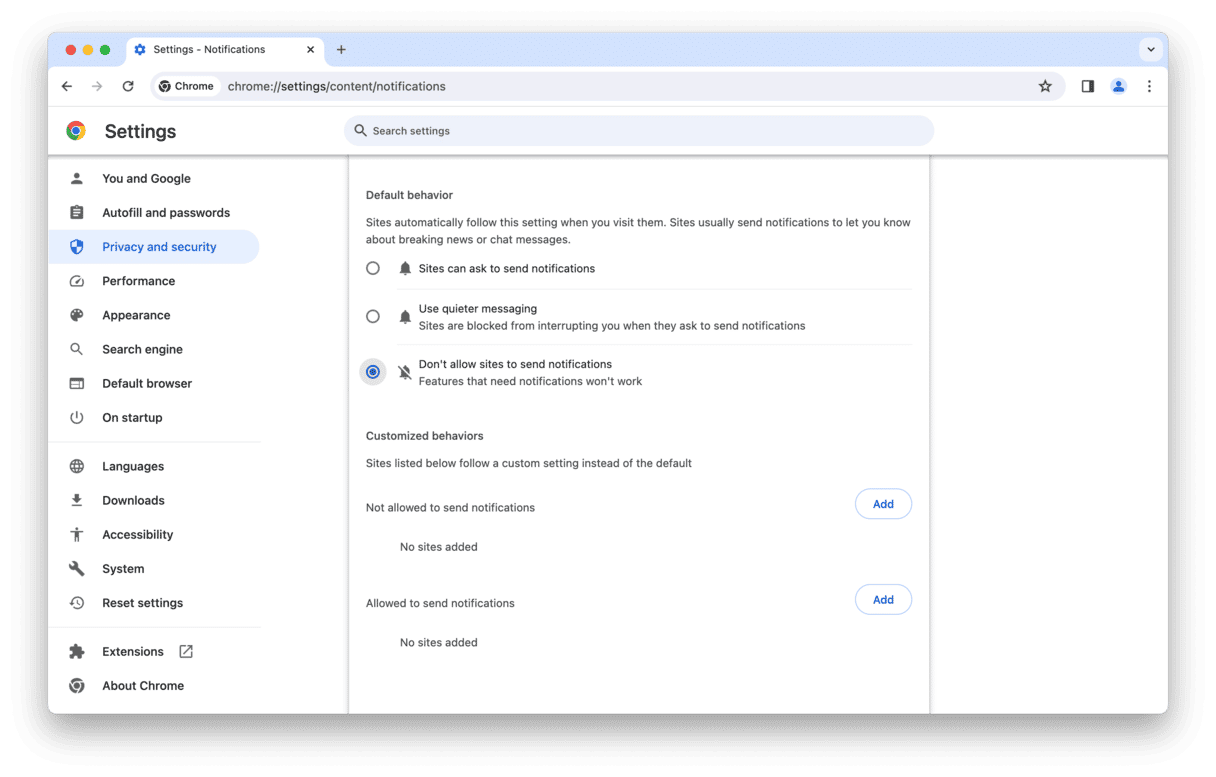
- Open Chrome, click the three dots at the right of the address bar, and choose Settings.
- Select Privacy and security.
- Choose Site Settings > Notifications.
- Scroll down to the bottom of the window and look under the section headed ‘Allowed to send notifications’.
- If you see any sites there that look dubious or you don’t want to receive notifications from, click the three dots and choose Remove.
- You can disable all notifications by clicking Don’t allow sites to send notifications.
Stop the notifications in Firefox
- Open Firefox, click the three horizontal lines at the right of the address bar, and choose Settings > Privacy & Security.
- Scroll down to Notifications and click Settings.
- Look for websites that are allowed to send notifications. If any look dubious or you don’t want to receive notifications from them, select them and click Remove.
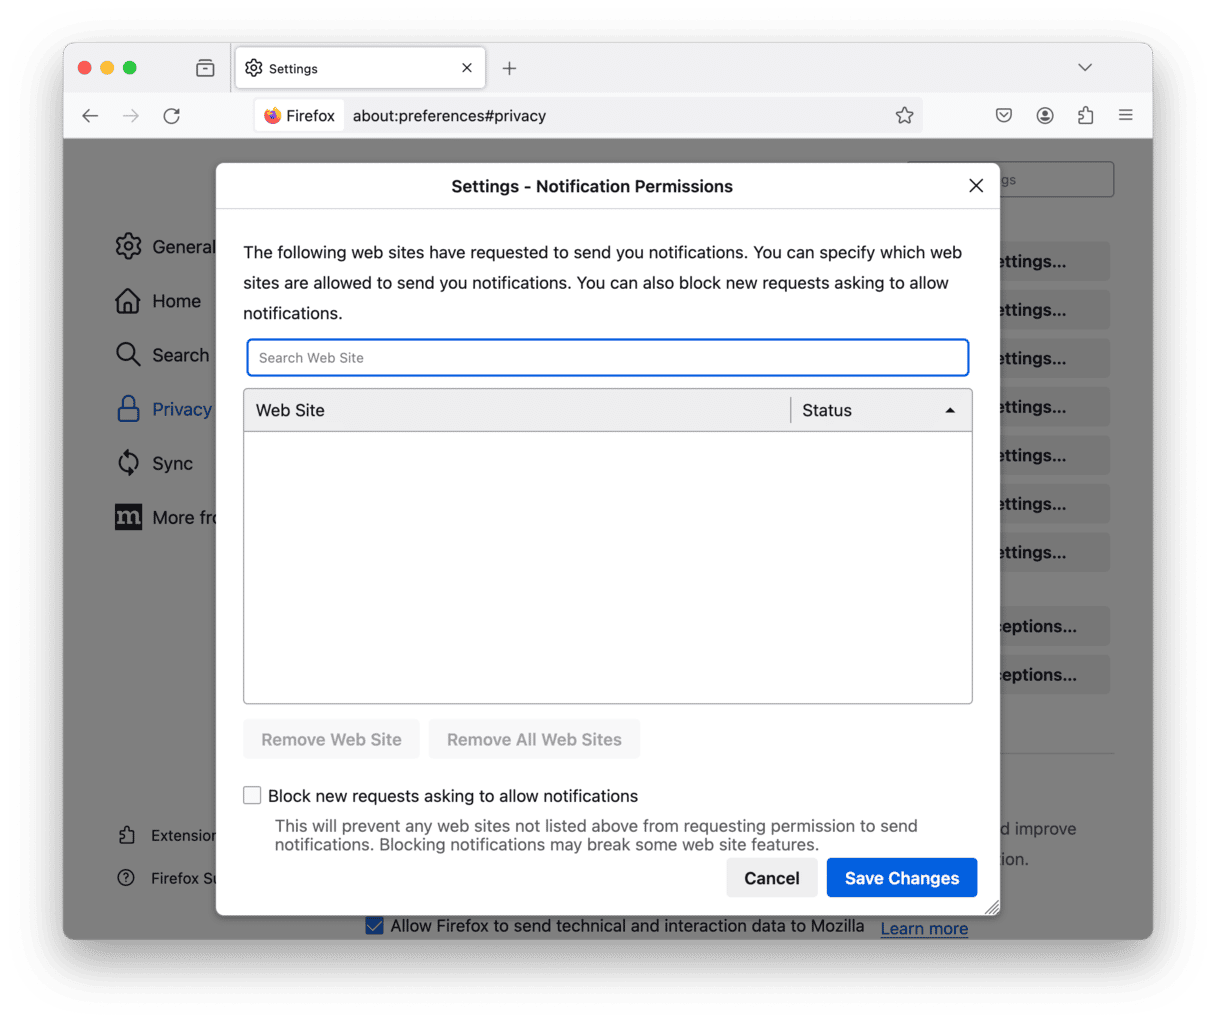
Safari, Chrome, and Firefox all have settings to allow you to block all future requests to allow notifications, though it’s possible malware distributors could get around that. In Safari, you must check a box to allow websites to ask for permission to send notifications, while in Chrome and Firefox, you can block requests by checking an option in the Notifications section of Settings.
Get rid of malicious files
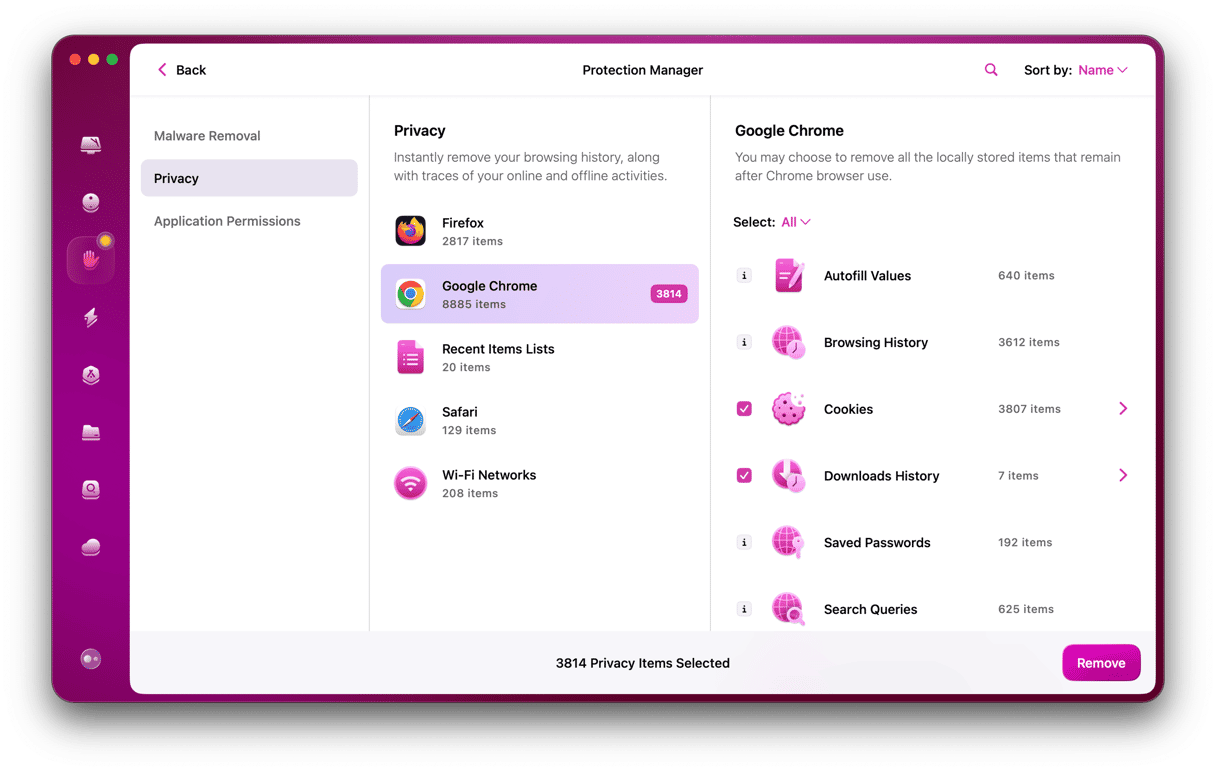
It’s a good idea to clear browser cookies for all the browsers you use in case ask you has placed malicious files on your Mac. One easy way to do that for Safari, Chrome, and Firefox at the same time is to use the Privacy module in CleanMyMac. It can remove cookies, downloads history, and autofill data for all three browsers, as well as clear out your Recent Items list and list of Wi-Fi networks you’ve previously connected to. You can download CleanMyMac for free here. When you’ve done that, follow the steps below:
- Open CleanMyMac and click Privacy > Scan.
- Select Safari, Chrome, or Firefox.
- Choose Cookies and any other data you want to remove.
- Click Remove.
Check for malicious launch agents
Launch agents are extensions that launch when you log in to your Mac and run in the background. They are sometimes installed by malware to allow you to display notifications on your Mac. Login Items can be applications or parts of applications that launch when you log in and continue running until you quit them. You should check that ask you is not using them to display notifications to do that. The easiest way to do that is to use the Optimization module in CleanMyMac. It allows you to quickly see what launch agents and login items are enabled on your Mac and disable them.
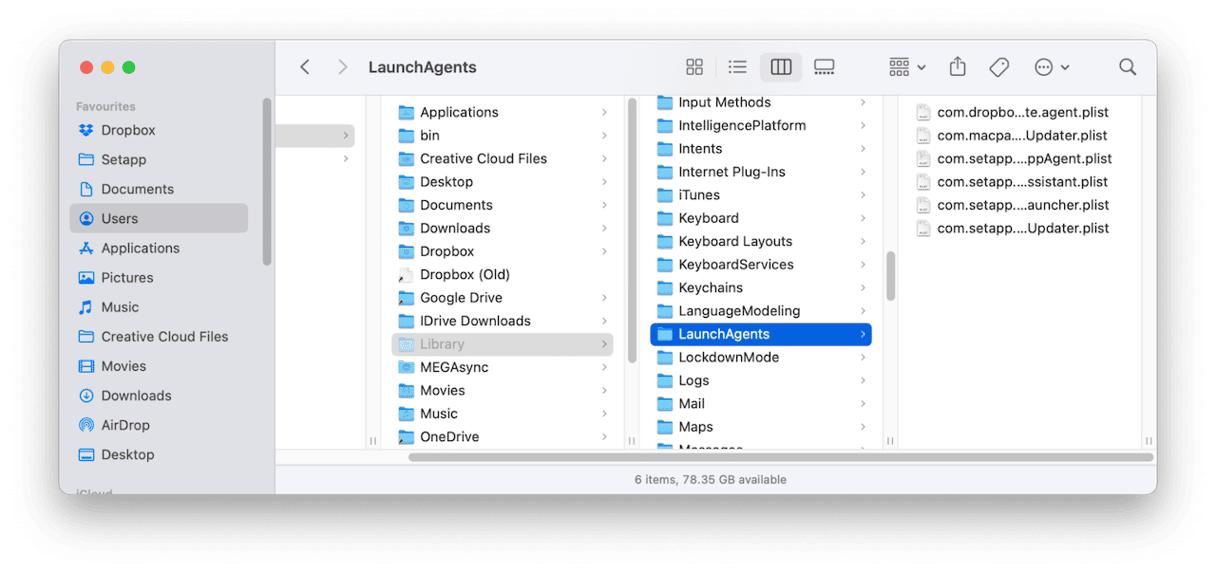
Alternatively, you can check for launch agents manually by following the steps below.
- Click on the Finder in the Dock.
- Choose Go > Go to Folder.
- In the text box, paste or type this path:
~/Library/Launch Agents - Look for any launch agents with ‘ask you’ in their name and drag them to the Trash.
- Repeat step three for the paths below:
/Library/Launch Agents
/Library/LaunchDaemons
~Library/LaunchDaemons
Reset your browser homepage and default search engine
If your browser homepage and default search engine have been changed by malware since you noticed ask you notifications, you should change them back:
- In Safari, go to Safari > General.
- In Chrome, go to More (three dots) > Settings > Search Engine and then Settings > On startup.
- In Firefox, it’s More (three horizontal lines) > Settings > Home and Settings > Search.
Scan for malware
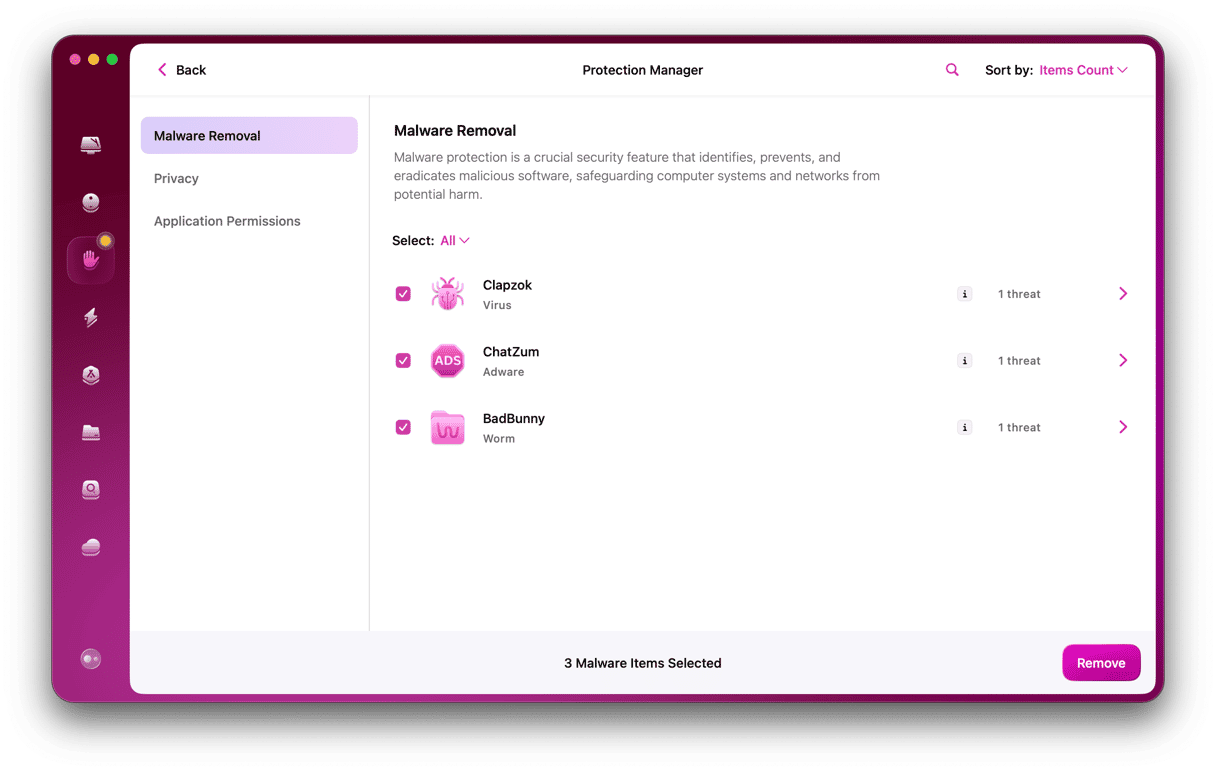
The final step is to check your Mac for malware. You can’t do this manually; it needs specialist software to scan your Mac and compare what it finds with a database of known malware. The Malware Removal module in CleanMyMac can do exactly that. You can set it to run automatically in the background or trigger scans with a click. And you can choose whether to run a deep scan, a quick scan, or a balance of the two. Here’s how to use CleanMyMac to scan your Mac for malware:
- Choose Malware Removal in the sidebar.
- Click Configure to choose the type of scan and what to scan.
- Click Scan.
- If it has found malware, you will see the Remove button.
Once it’s finished, any last remaining bits of malware will have been eradicated from your Mac.
If you noticed lots of strange and unwanted notifications on your Mac, it could be ask you malware. Follow the steps above to remove ask you notifications on your Mac.


