Since the introduction of the iPhone, the camera has improved dramatically, and it’s now possible to take high-resolution photos that rival many DSLR cameras.
These gorgeous high-resolution photos come with enormous file sizes, making it very difficult to share them over email and text. These large photo files also take up a lot of room on your iPhone, so it’s beneficial to know how to resize images to take up less space.
Three basic cropping options
Did you know that you can easily resize an image on your iPhone using the Photos app? While this method won’t make the file size smaller, the editing tools in Photos make it simple to crop photos to different orientations so that you can share them on social media or send them to your friends and family.
Built-in editing tools are the easiest way to crop and resize an image, and you can resize an image without cropping by the Shortcuts app, or by using Apple Mail and sending a photo to yourself at a smaller resolution.
Let’s take a look at these three different methods for resizing photos on your iPhone without using a third-party app.
Three simple methods are:
- Use the built-in Photos app to crop and resize images (won't reduce the file size).
- Send photos to yourself via email to reduce the file size.
- Create a shortcut using the Shortcuts app.
Why you might need to resize an image on an iPhone
The most obvious reason to resize your photos is to save space on your iPhone.
Sure, modern phones give you lots of room, but it’s not infinite, and you’d be surprised how fast you can gobble up storage when you take a lot of photos. You may also want to resize a photo before sending it via text or email, or to change the aspect ratio or orientation before sharing your image on social media.
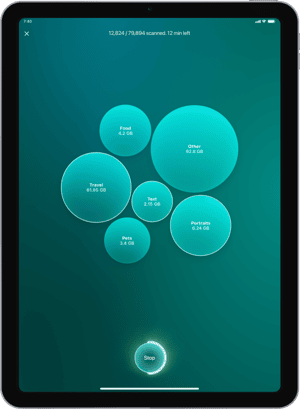
In addition to resizing your photos to make them smaller, be sure to use an app like CleanMy®Phone to quickly get rid of digital clutter.
If you have a massive photo library, CleanMy®Phone makes the job of deleting unwanted photos quick and painless. It uses an AI model to analyze and sort your media files so you can delete the ones you don’t want to keep.
With just a few taps, you can sort and delete, saving you so much time and frustration.

Reduce image size before taking photos
The easiest way to reduce the file size of your images is to change the settings on your iPhone so that you don’t have to worry about giant files taking up room on your phone. Here’s how to reduce file size without reducing the quality of your images.
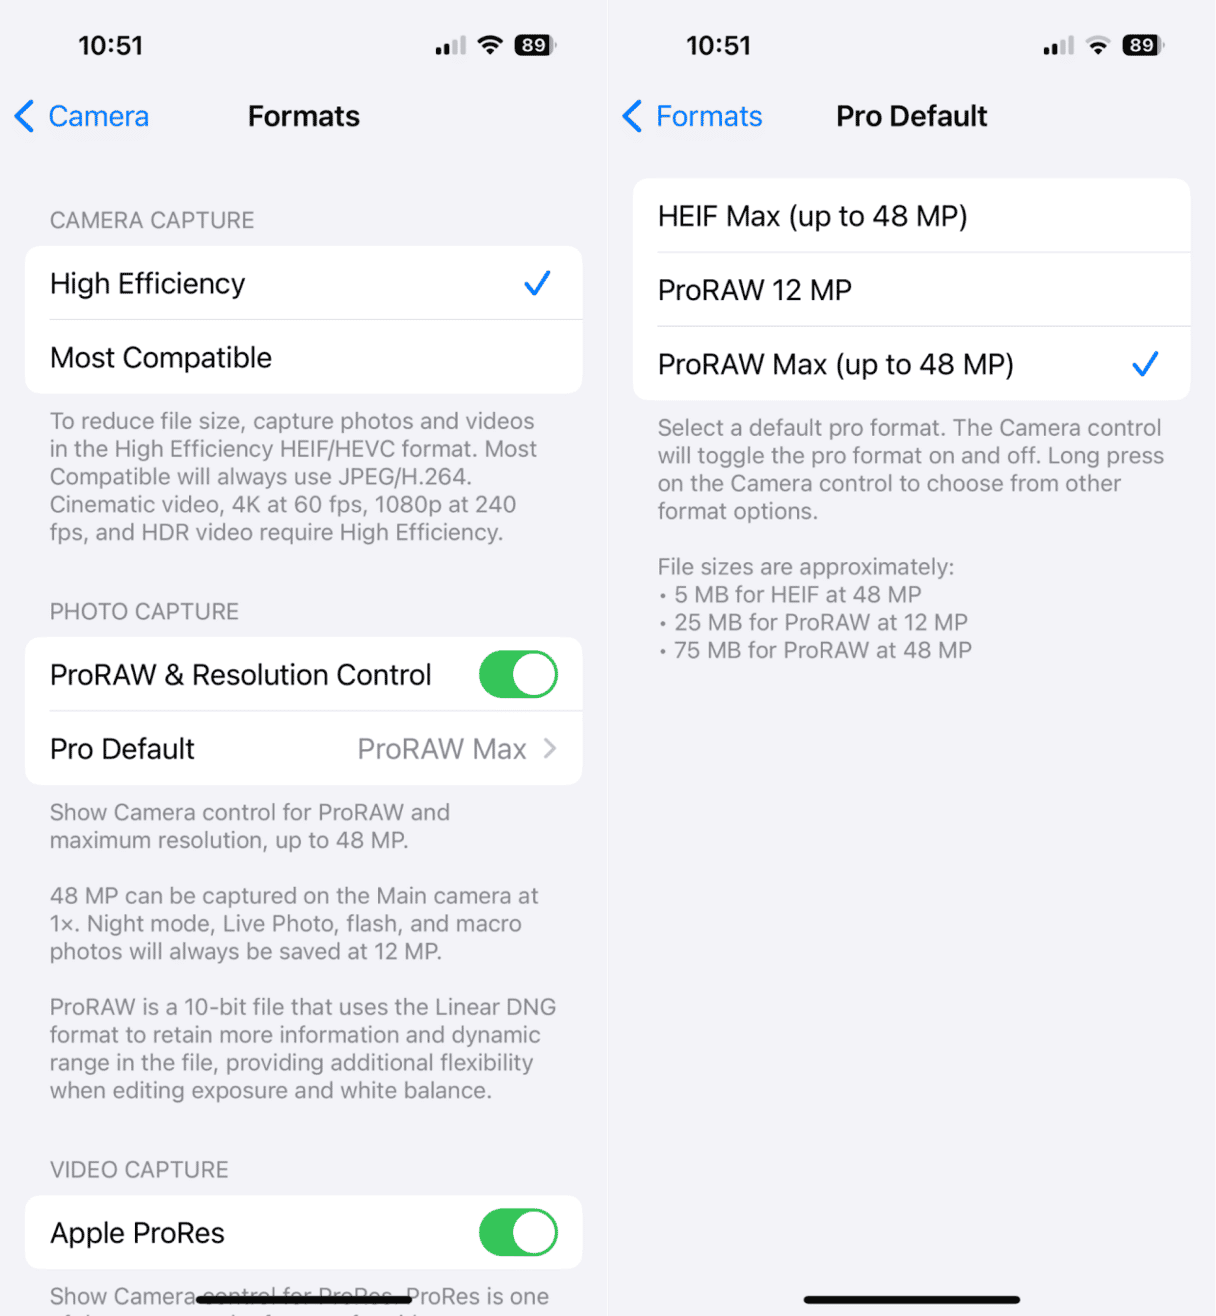
- Go to your iPhone’s Settings.
- Choose ‘Camera’ and then ‘Formats’.
- Choose ‘High Efficiency’ to give you the smallest photo size without reducing the quality of your image.
- You can further reduce the size of your iPhone images by tapping ‘Pro Default’ and choosing ‘HEIF Max (up to 48 MP.’ This will limit your photo size to approximately 5 MB).
This article has more detailed instructions for reducing the image sizes on your iPhone.
How to resize an image on an iPhone in Photos
To resize a photo using the Photos app, you will have to crop the image to make it smaller. This is a useful method if you are already planning on cropping the pic, and it will save you the additional steps of using the other methods mentioned here.
This method will not free up space on your iPhone, as your phone will still retain the original image in case you ever want to restore it. If you are resizing an image to reduce the overall size, follow one of the methods mentioned below.
Follow these steps to crop and resize your photo using the iPhone’s Photo app:
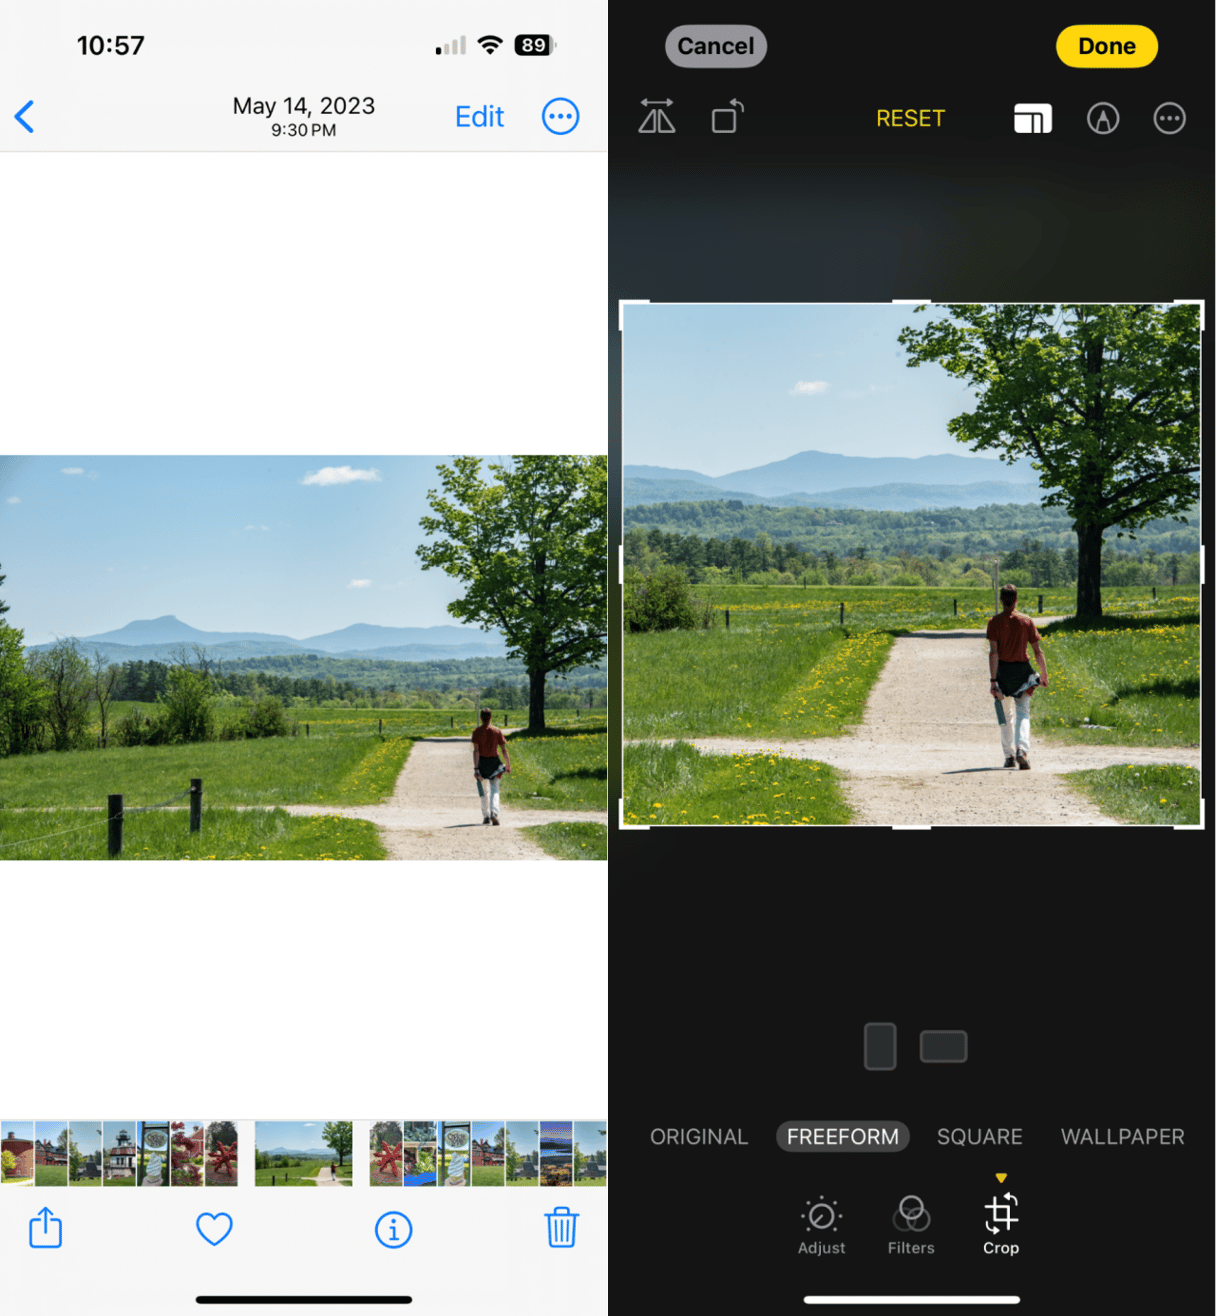
- Open the Photos app and choose the image you want to crop.
- Tap ‘Edit’.
- Tap ‘Crop’.
- Drag the corners of the photo to move the borders until you are happy with the results, or tap the crop icon and choose an aspect ratio to crop your photo to a standard format.
- Drag the image using your finger so that it fits in the assigned aspect ratio.
- Tap ‘Done’ when you are happy with the results.
How to resize a photo without cropping using Mail
If you only need to resize an image once in a while, the easiest method is to send yourself the photo using mail, which will give you the option to compress the image, reducing the file size. Once the file size has been reduced, you can share it on social or send it along in a text or email. Here’s how to do it:
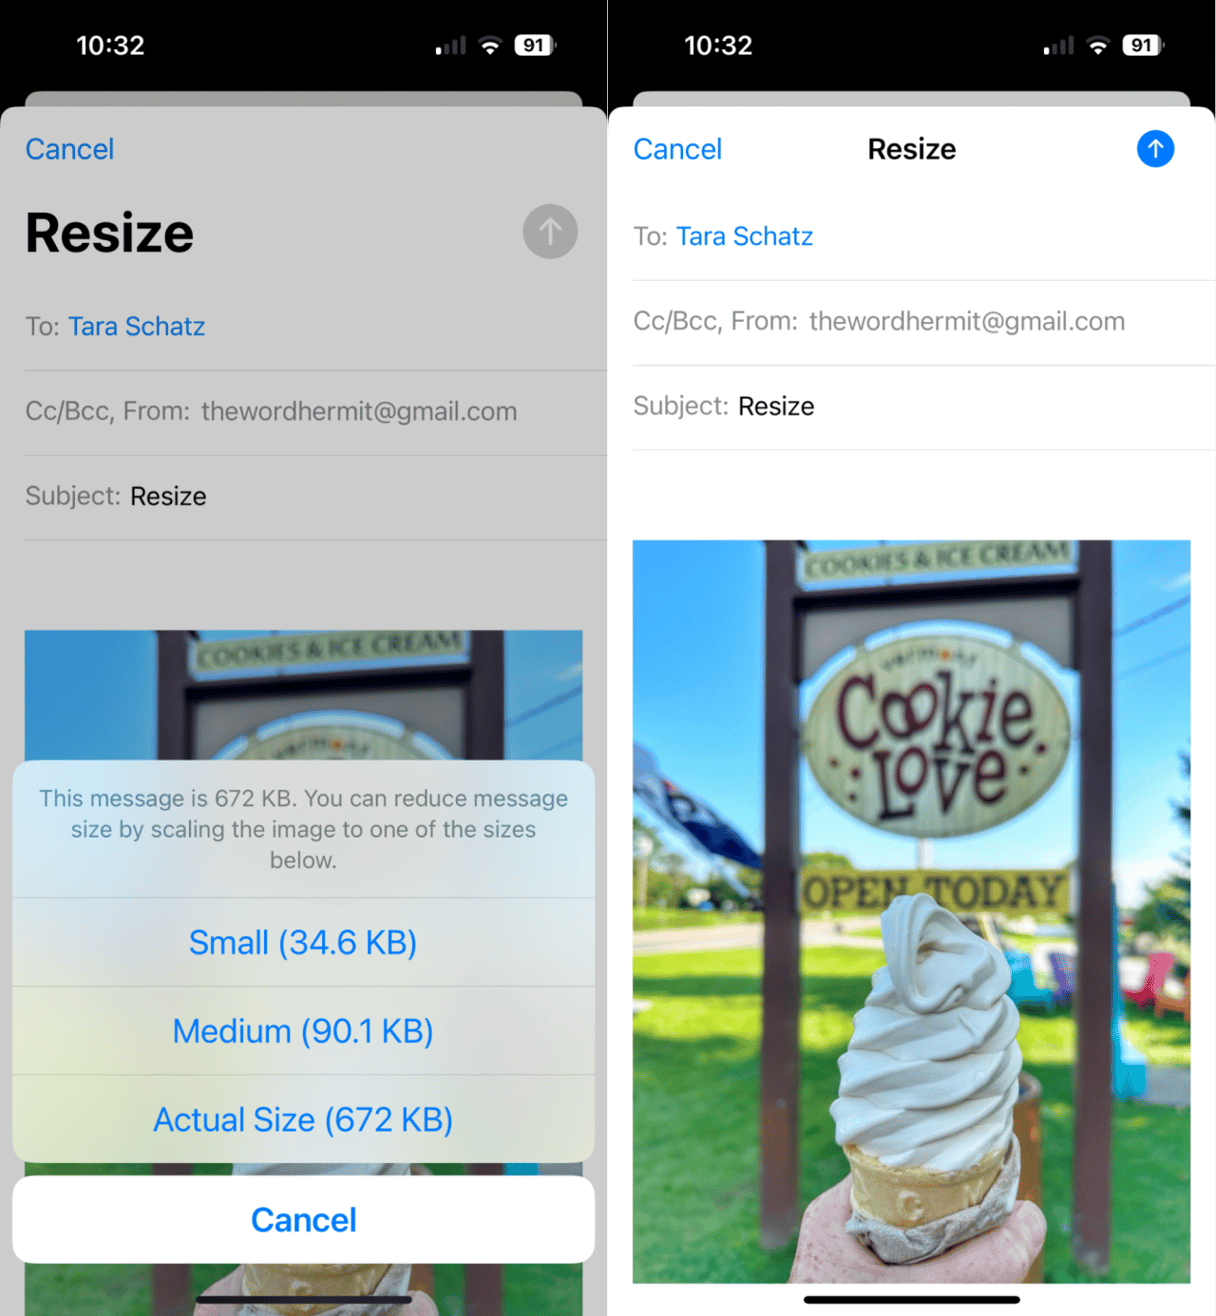
- Open the photo that you want to resize in the Photos app.
- Tap the share icon at the bottom of the screen.
- Tap the Mail app.
- Type your own email address into the recipient field.
- Tap the Send arrow.
- Choose the file size you want to use from the pop-up menu.
Once you choose the file size, the photo will be sent automatically. Once you receive your photo via email, you can save it to your photo library, or forward it to another recipient.
How to resize a photo without cropping using the Shortcuts app
The Shortcuts app allows you to quickly reduce the photo size on an iPhone. This is useful if you find yourself resizing photos more often than is convenient for the email method to work well. Follow these steps to create a shortcut for resizing photos.
You can use this method on iPhones with iOS 11 and newer updates. This will change the overall dimensions of your photos. The Shortcuts app is a default program for iPhones and iPads.
This method is available only on iPhone and iPad with iOS 11 and its more recent updates, and once you set it up, you can use it over and over again to resize your images on your iPhone.
Here’s how to set up a shortcut for resizing images on iPhone:
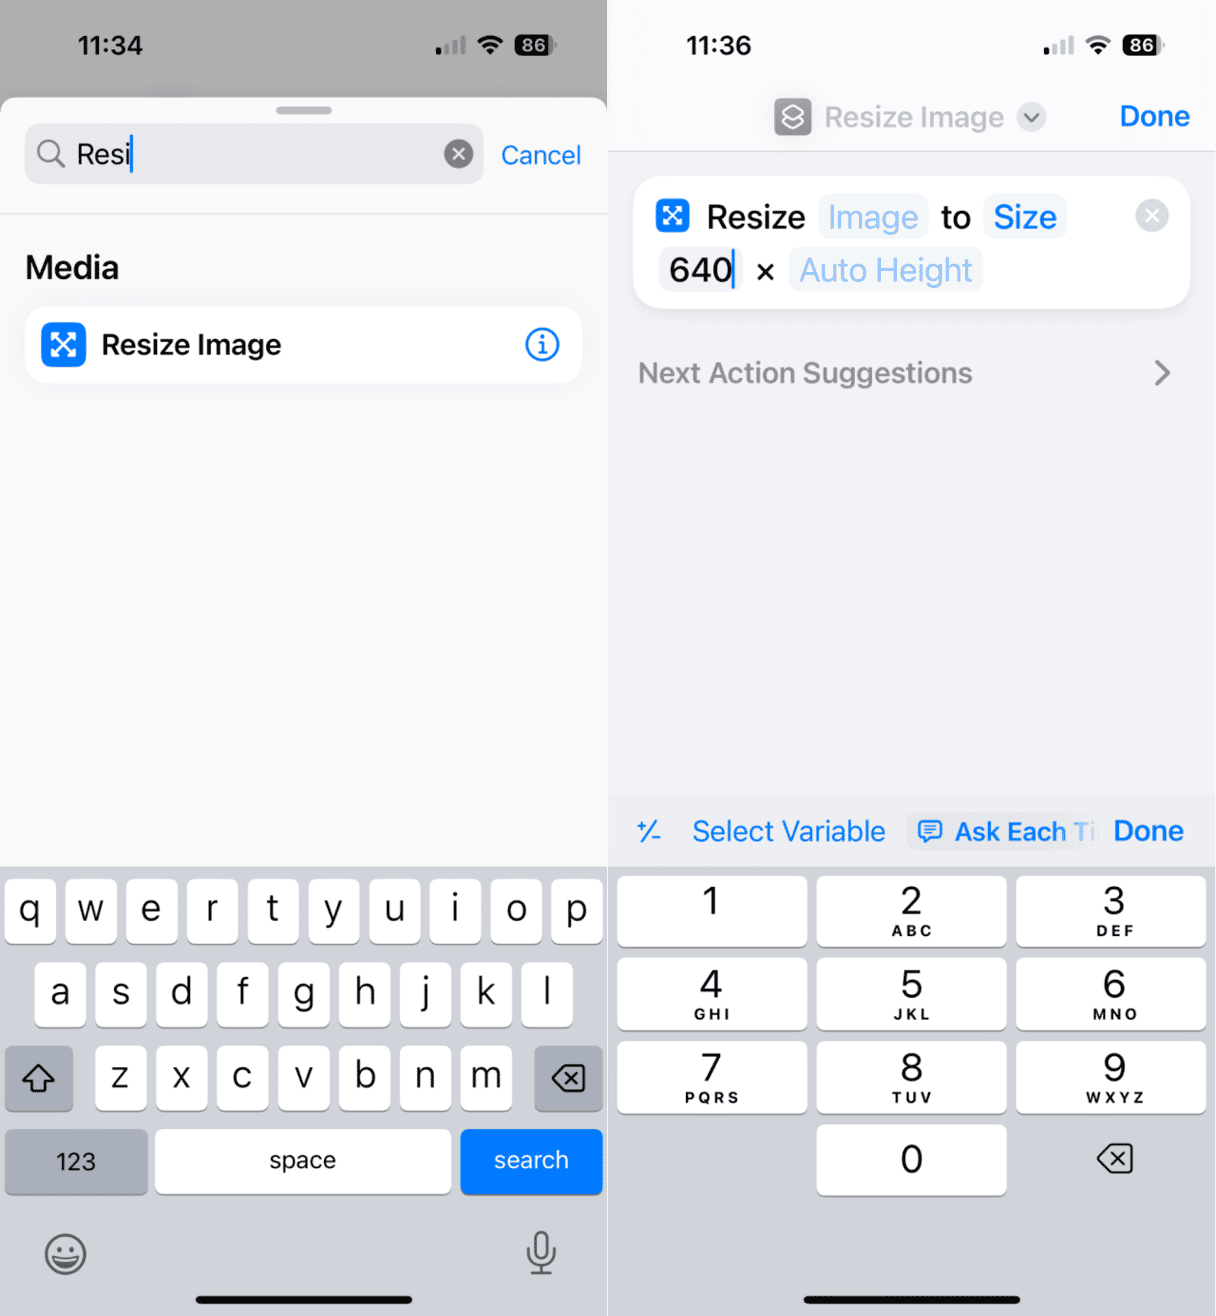
Locate the Shortcuts app on your iPhone. If you’ve never created a shortcut before, you may need to search for it on the last home screen on your phone.
- Tap the ‘+’ to create a new shortcut.
- Tap ‘Add Action’.
- Search for ‘resize’ in the search bar and tap ‘Resize Image’.
Using this shortcut, you can choose parameters for the default size of the images. I suggest entering either a width or height and then having the other dimension populate automatically based on your image's aspect ratio.
- You can tap on the name of your shortcut at the top of the screen to change the name.
- Go to the Shortcuts home screen and hold your finger down on the new shortcut you just created.
- Tap ‘Details’ and toggle on ‘Show in Share Sheet.’
To resize your photo using the shortcut:
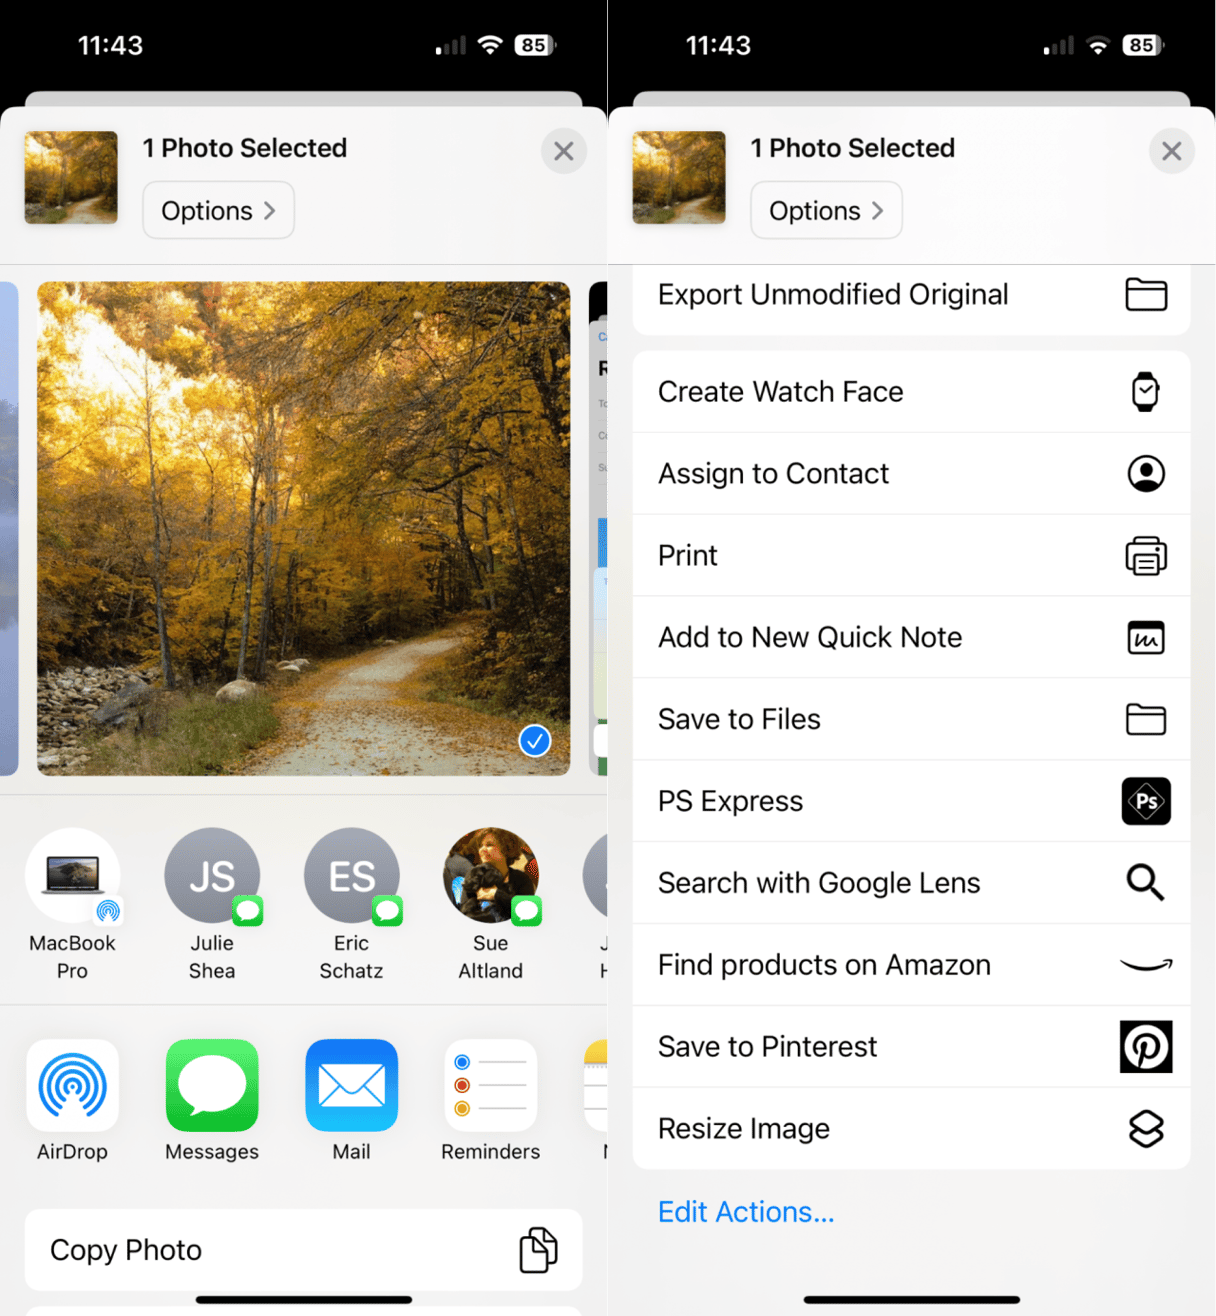
- Open the photo that you want to resize.
- Tap the Share icon.
- Scroll down and tap the shortcut you just created.
- Your image will be automatically resized.
Once you know how to quickly resize images on your iPhone, you’ll find yourself doing it often, especially if you take a lot of photos. This can create multiple similar photos that cat clutter up your storage. If you want to find the best ways on how to find and delete duplicates, read this article.


