If you’ve ever used a Wacom graphics tablet on your Mac, you will have installed the Wacom driver to access its settings. If you no longer use the tablet, or you suspect the driver is causing problems with your Mac, you can uninstall it. We’ll show you how to do that here.
What the Wacom driver does
Wacom’s tablet and pen combinations have a number of different user-configurable settings, such as pressure sensitivity and the functions of the buttons on both the tablet and the pen. In order to modify these settings, you need software on your Mac, and that software is a Wacom driver, typically downloaded from Wacom’s website when you install the tablet.
How to uninstall the Wacom driver manually
There are several steps to uninstalling the Wacom driver. Firstly, you should quit any running processes:
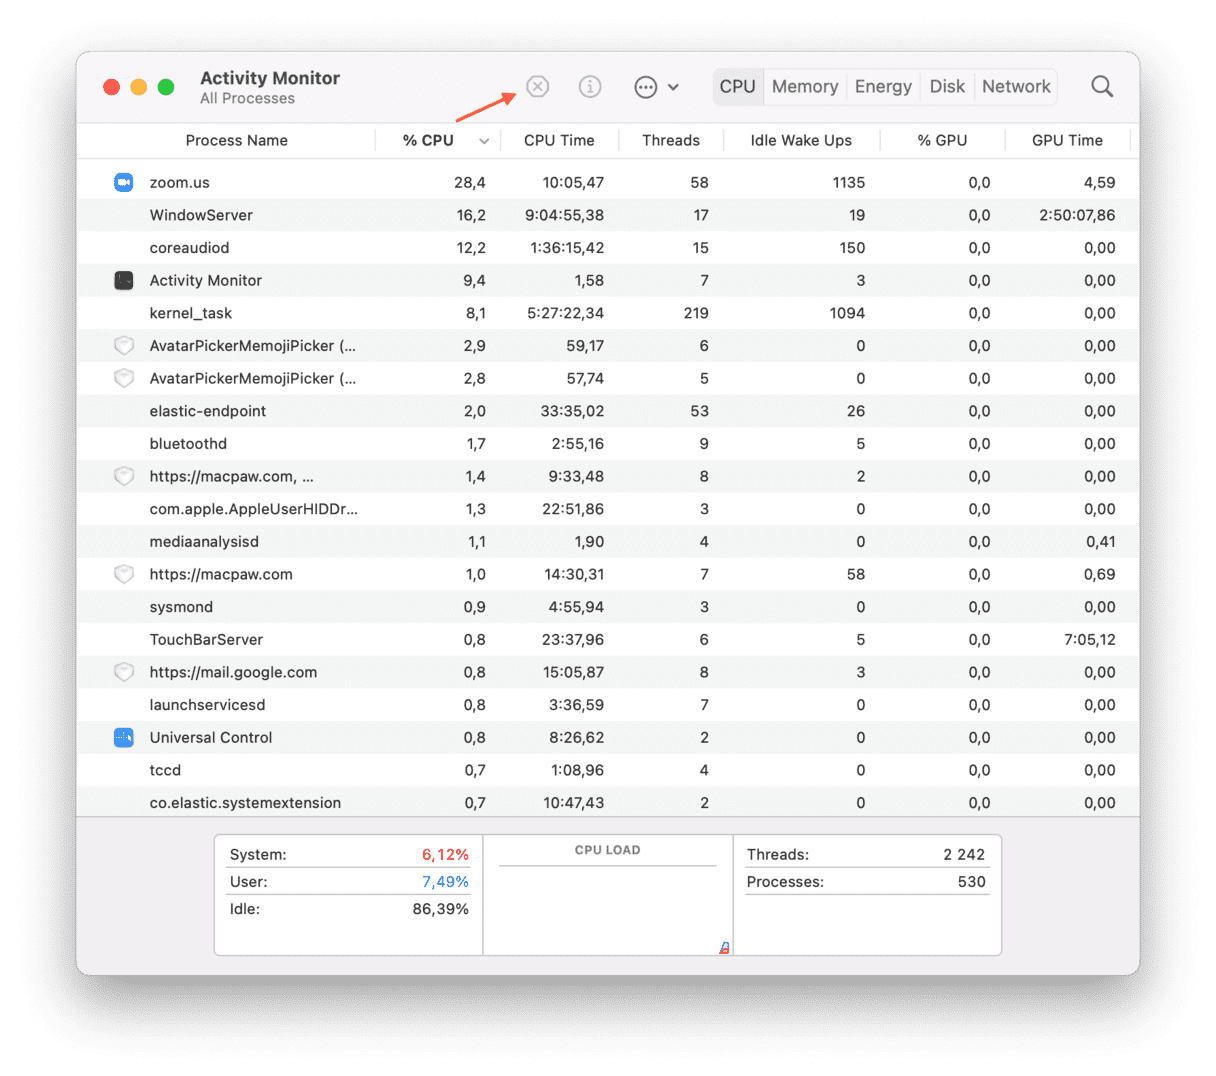
- Go to Applications > Utilities and open Activity Monitor.
- Look for any processes with Wacom in their name.
- If you find any, select them and click the Quit Process (x) button in the Activity Monitor toolbar.

Now, go to your Applications folder and find the Wacom Tablet folder. Drag it to the Trash and empty it.
Next, get rid of the Wacom System Settings pane.
- Go to the Apple menu and choose System Settings.
- Look at the bottom of the main System Settings window and locate the Wacom Tablet pane.
- Right-click it and choose Remove “Wacom Tablet” Preferences Pane.
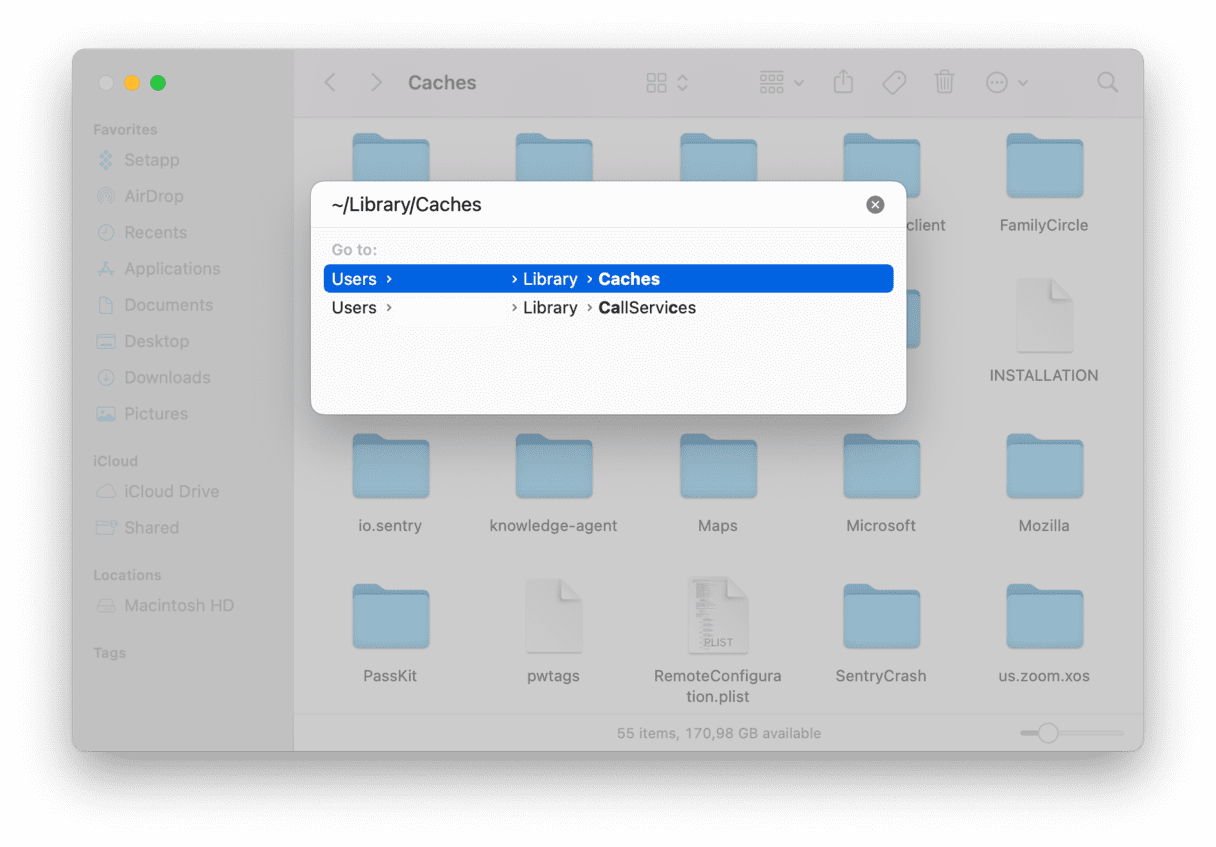
Finally, you need to remove any stray files that are lying around on your startup disk. Normally, you’d check these three locations in the Finder:
~/Library/Caches
~/Library/Container
~/Library/Preferences
Go to the Go menu in the Finder, choose Go to Folder, and then paste each location, one at a time, into the text box.

You may not find any Wacom files. If that’s the case, there’s another location to check, one that’s normally hidden from view.
- Go back to the Go menu and choose Go to Folder again.
- Paste this location into the text box:
/private/var/db/receipts - Look for files and folders that start “com.wacom”
- Drag them all to the Trash and empty it.

How to delete Wacom driver with CleanMyMac X
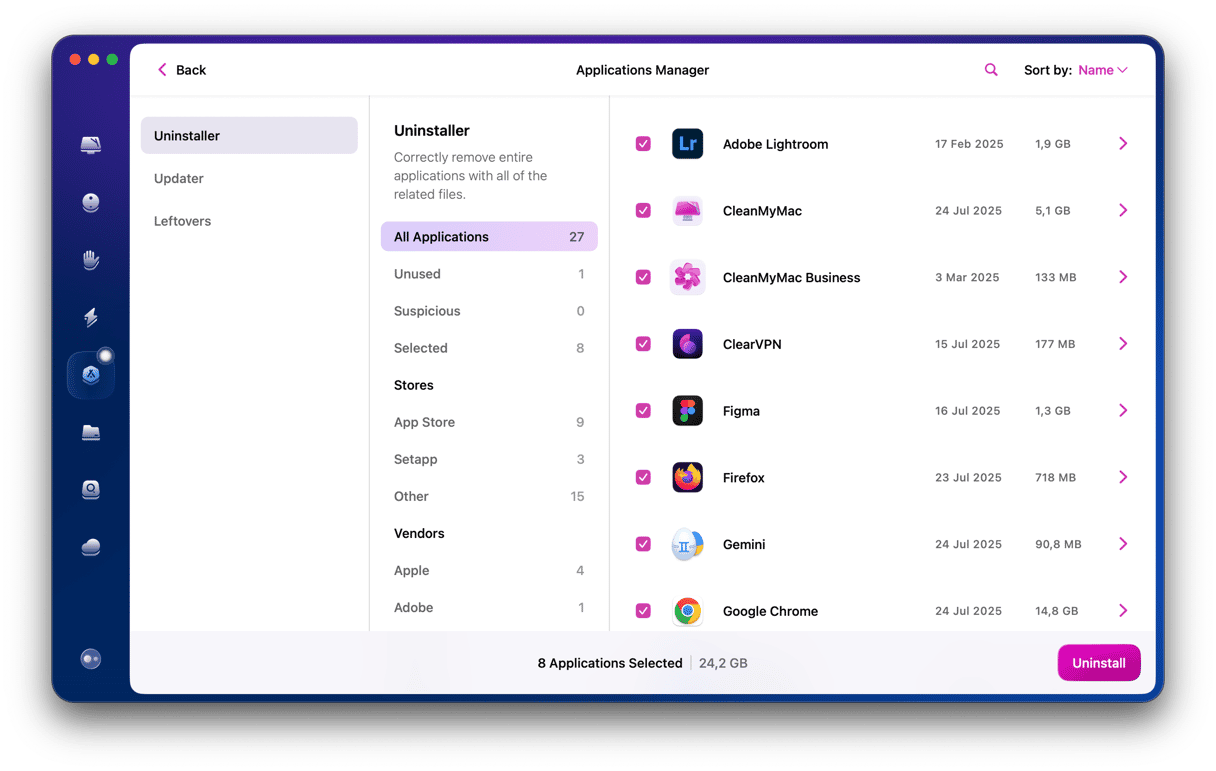
The Wacom driver should be completely uninstalled once you’ve completed all those steps. However, there is a much easier way to complete the same task — use a dedicated uninstaller such as the one in CleanMyMac. This utility can uninstall any application with a couple of buttons, automatically removing all the files associated with the app.

There is an alternative to uninstalling the Wacom Driver completely. If you think you might use the tablet again in the future, or if your reason for uninstalling is because it’s causing problems for your Mac, you can try resetting it to see if that helps. Resetting an app means removing all of its preferences and settings files and forcing it to start again with a clean slate as if it had just been downloaded. You can do that manually. However, it’s much quicker to use CleanMyMac. Here’s how:
- Download, install, and open CleanMyMac.
- Choose the Uninstaller tool in the sidebar.
- Locate the Wacom driver in the list of apps and select the box next to it.
- Click the menu that currently says Uninstall.
- Choose Reset.
- Click the Reset button at the bottom of the window.

The Wacom driver will now be reset, and all its preferences and settings will be gone. You’ll have to set it up and choose your preferences for the buttons and pressure sensitivity when you next run it. However, it should run smoothly and not cause problems for your Mac.
As you can see, it’s straightforward to uninstall the Wacom driver from your Mac, especially if you use CleanMyMac. However, it’s worth considering resetting it instead of uninstalling it completely — that way, you won’t have to re-download and install it again if you need to use it. You can do that with CleanMyMac, too.


