In this article, we’ll show you different ways to add a second screen to your Mac, including:
- How to use an iPad as a second monitor
- How to add a MacBook or MacBook Pro external monitor
- How to mirror your Mac’s display
If you’re working out of a public place or you’re regularly on the move with your MacBook, using an iPad is the most practical way of adding a second screen for productivity purposes. Unless, of course, you’re happy to carry a 27-inch monitor with you everywhere you go.
If you have a permanent place of work, you should opt for an additional display that gives you plenty of extra real estate — one that offers a desktop-like experience. This will really enhance your working day.
Before we show you how to add a second monitor, you need to make sure your system is prepared to handle it.
Monitoring your Mac’s health with CleanMyMac Menu App
Older versions of the MacBook Pro and MacBook Air, particularly the 2016 and 2017 Retina Display models, have been known to overheat when hooked up to an external display. Some users have reported temperatures of 60 degrees plus. But it may happen to all Macs, even newer ones.
An external monitor puts increased pressure on the GPU, which ramps up the internal temperature. The more you use your MacBook to multitask across two screens, the hotter it’s going to get.
An overheating Mac doesn’t just result in sluggish performance; it’s dangerous for the overall health of the system.
We recommend using CleanMyMac for two reasons:
- It can automatically alert you when temperatures are higher than normal and when RAM is at capacity.
- It lets you clean up your system to remove junk files, freeing up disk space and easing the pressure on your GPU.
Health monitor running as a background process takes care of itself, scanning your system in the background and alerting you when it detects a problem.

The cleanup part requires you to click a few buttons, but it couldn’t be easier to do. To get rid of unwanted files from across your system, follow these instructions:
- Open CleanMyMac (get your free trial here).
- Click Cleanup.
- Hit Scan and wait for CleanMyMac to show you how much space can be freed up.
- Hit Clean to remove junk files.

Run a Cleanup occasionally to keep your MacBook in a healthy condition. If you want to optimize your Mac quickly, run a Performance scan, and to delete even more unnecessary files, check out My Clutter. It finds large and old files as well as duplicates and similar images.
How to use an iPad as a second monitor
With a 12.9-inch display, iPad Pro is great, but isn’t ever going to be as good as an actual monitor. However, it does offer convenience: it’s easy to carry around, doesn’t demand a great deal of desk space, and lets you make use of the touchscreen.
If you want to use iPad Pro (or any other iPad, too) as a second monitor, it’s possible, thanks to the feature named Sidecar. You can use it wirelessly, but it is better to connect your iPad to your Mac via a USB-C cable to keep it charging. Make sure that both your MacBook and your iPad are logged in to the same Apple Account.
Now, once you’re ready, you can either move a window to iPad or mirror your screen. To move a window, click the full-screen icon top left and choose Move to iPad.

To enable screen mirroring, choose the option from Control Center. To learn more about Sidecar, check out this article from Apple Support.
How to add an external monitor to a MacBook
Getting a double-screen Mac operation up and running doesn’t require any additional software, you’ll be pleased to know.
Depending on which type of MacBook you’re using, you’ll either be able to hook up a second screen via USB-C (Thunderbolt 3) to connect to an HDMI or VGA display or, if you have one, via the HDMI port.
Note: If you’re purchasing a USB-C to HDMI or USB-C to VGA cable, make sure that it’s a genuine Apple product. Since the release of Sierra, many third-party adapters have stopped working.
To set up an extended desktop display:
- Connect the monitor to your MacBook and turn it on.
- Go to Apple menu > System Settings > Displays.
- Once in this pane, you’ll see the second monitor you’ve connected your Mac to.
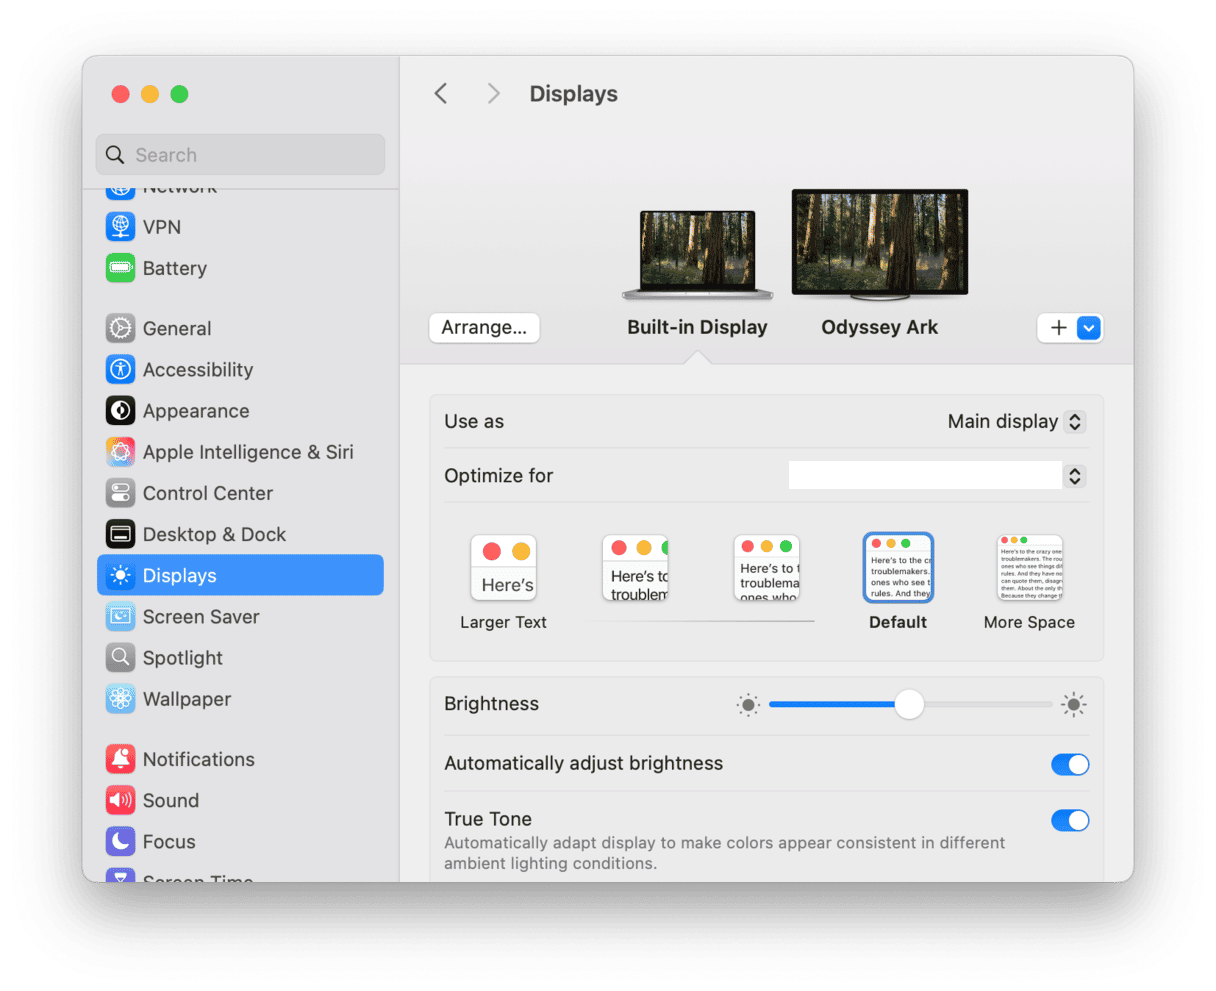
- Arrange the boxes you see to position your external monitor in line with its location on your desk. The box with the white bar at the top represents your primary display. Drag the white bar over to the other box to change it.


How to mirror your Mac’s display
Mirroring projects your desktop onto another screen so that you can view the same display and perform the same actions across multiple monitors.
This method doesn’t aid productivity like an extended display does, but it’s great for viewing photos or watching videos on a big screen.
Setting up mirroring is similar to connecting a second monitor.
- Connect the monitor to your MacBook and turn it on.
- Go to Apple menu > System Settings > Displays.
- Once in this pane, you’ll see the second monitor you’ve connected your Mac to.
- Select your second monitor.
- In the Use as pane, choose Mirror for [your Mac’s display name].

With mirroring, your main monitor will be drawn on top of the second one. This is because they’re both showing the same display.
To stop mirroring, start following the steps above. Instead of Mirror for [...] in the Use as pane, select Stop mirroring and hit Done. Or you can go to Control Center and click Screen Mirroring > Stop Mirroring.

A healthy Mac is a productive Mac
Whether you choose to use an iPad as a second monitor or hook up your Mac to multiple desktops through an external display, you’ll be able to get a lot more done than usual. But while you’re being all productive, don’t forget about the strain a second screen (even a small display like an iPad) puts on system resources. With an additional display connected, run CleanMyMac in the background to monitor the health of your MacBook so that it doesn’t overheat or max out RAM usage.