We all love our Macs for the ease of use and attention to detail developers demonstrate in macOS. It usually goes beyond macOS and is true for most apps we download and install on our Mac computers. One such point is the ability to choose among different languages to make sure that any app we install is translated into the language we are most comfortable with.
However, did you know that these language files can pile up and take up gigabytes of space? Since you don’t speak most of these languages, such files just waste space on your Mac and can be safely removed, and we’ll show you how to do it in this article.
What are language files?
Language files are localization files that contain translations. macOS uses them to switch the interface of a particular app to the language you prefer. In most cases, apps come with quite a few of these files. And we, as users, rarely need more than one.
Where language files are stored
Language files are stored in Package Contents of each application. It is a special folder that is stored locally for every app you have installed on your Mac. To detect these files, you will have to look for the .lproj file extension.

How to delete language files with one click
It is possible to get rid of language files manually, and we’ll show you how to do it further in the article. However, the process of manual removal is cumbersome and time-consuming because you will have to check Package Contents of each app you have on your Mac. A lot of work, huh?
For this reason, we recommend removing useless localizations with an app designed for the job — CleanMyMac. Just get your free trial here, and it will take care of unneeded files. Here’s how to use CleanMyMac:
- Open the app and click Scan.
- When the scan is over, click Run. This will clean up your Mac from various system and application junk, including unwanted language files.

Alternatively, you can click Review under Cleanup and deselect everything except Language Files. Moreover, you can manually edit the list of languages you want to be excluded from your system. After you have done it, click Done to delete language packs for more space on a Mac.
How to clear out unnecessary language files manually
If you are in the mood for some detective work, you can remove language files manually. As noted, they are kept in Package Contents of applications you have installed on your Mac. Here’s how to find them:
- Open Finder and go to Applications.
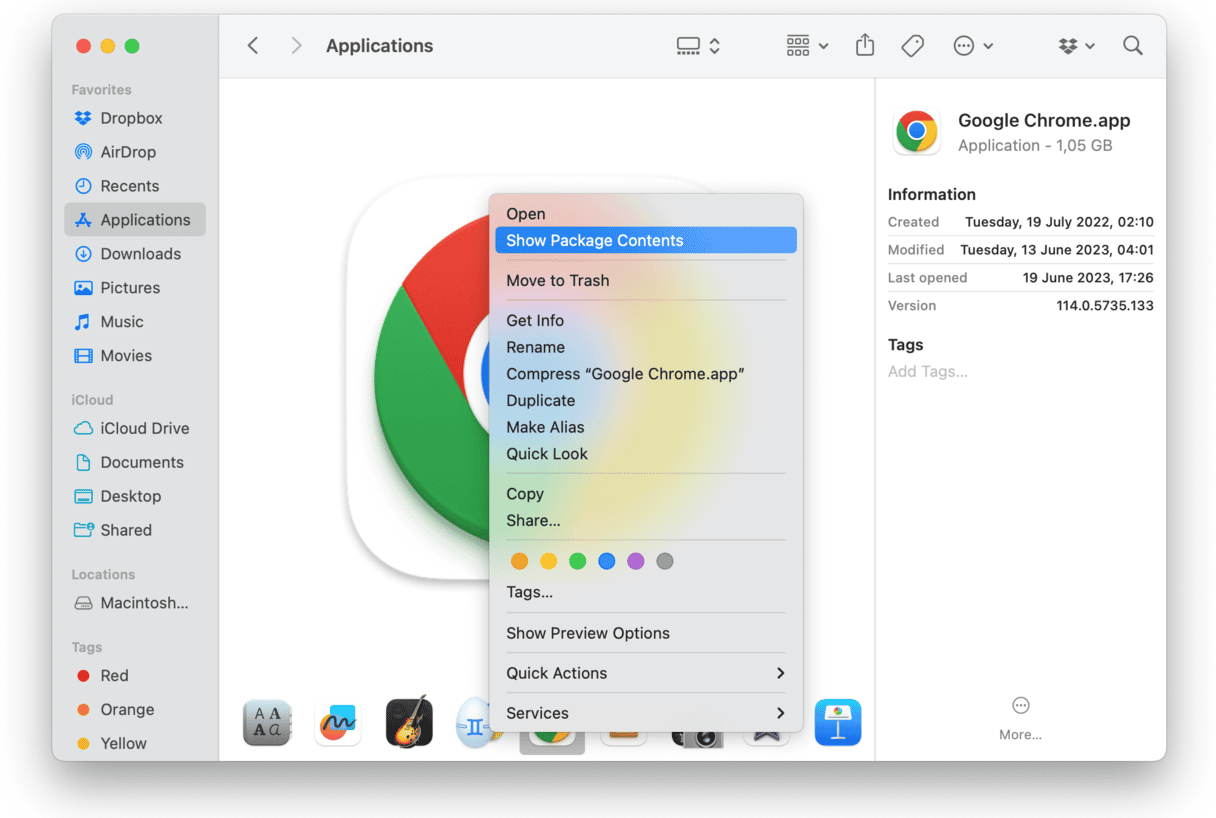
- Right-click the app and click Show Package Contents.
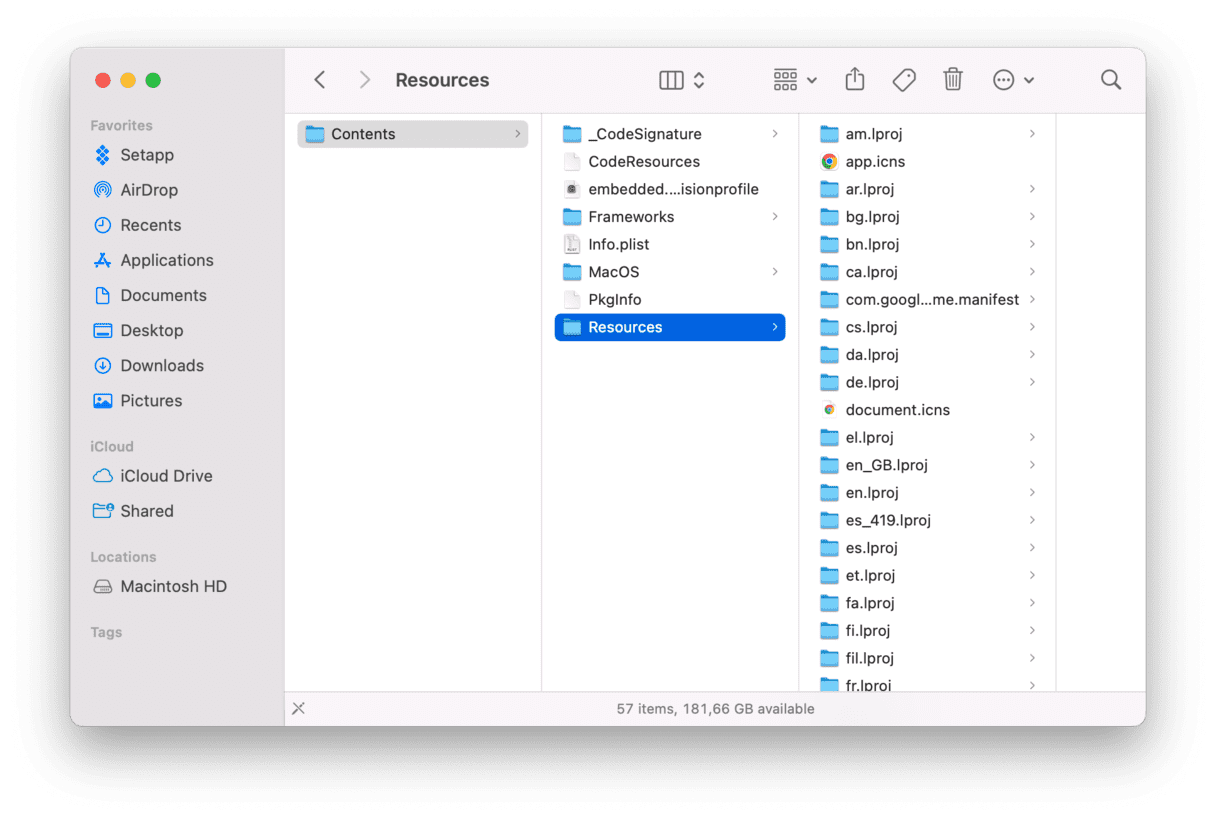
- You’ll see the Contents folder — open it.
- In the Resources folder, you’ll find folders ending with .lproj. Every folder contains language files for one particular language and thus has a name of this language or its shortening. For instance, here are the language files of Google Chrome.

In most cases, you can trash the folders and files for languages you don’t know or don’t speak. Note that you should manually find and select these files for removal for every application. Also, before removing these files, double-check that you do not need the language you are about to trash by conducting a quick online search and deciphering the two-letter code of the language at the beginning of the file name. For instance, en stands for English, and, most likely, you will not want to delete it.
Frequently Asked Questions
What are language files on Mac?
Language files are localization files for apps you have installed on your Mac. So if you need to change the language of the interface, you can easily do it thanks to these files.
Is it safe to remove language files?
It is absolutely safe to delete unnecessary localizations if you follow the steps outlined in the article and double-check everything you move to trash.
What if I need the language file I removed?
If you accidentally remove a language file, you can always restore it from Trash. If you find out later that you need the language you deleted, the easiest way to have it back is to reinstall the app.


