If you’re worried that a keylogger is recording your Mac’s keyboard, there are a number of steps you can take to find out and then remove it.
What is a keylogger?
Keyloggers record the keystrokes typed on your Mac’s keyboard. There are two types of keyloggers: software-based installed as an app and hardware-based, which connect to the USB port on your Mac. Once the keystrokes have been recorded, anyone with access to the keylogger can see what has been typed on the keyboard, including usernames, passwords, bank details, and even the content of your messages and emails.
But what can a keylogger do to your Mac? Actually, the nature of a keylogger is dual, meaning it can be good or evil depending on how it is used. For some, it’s threatening malware; for others, it is a piece of useful software installed on Mac devices. An example of a keylogger that is used for good can be parental control. Also, if the keylogger is equipped with a geolocation feature, it can be used to locate Mac that was stolen.
While there are lots of legitimate (depending on your point of view) uses of keyloggers, there are also lots of ways in which they’re used unethically and even illegally. In these cases, they are a severe privacy threat because they may be used to steal personal and sensitive information.

How to detect keylogger on Mac?
Check for external keyloggers
If you’re wondering how to find keylogger on Mac, the very first thing to do is to check for a hardware keylogger. It applies to users working with an external keyboard, meaning that it is plugged either directly into the keyboard or somewhere between it and the computer.
Check System Settings
Any software installed on your Mac requires some permissions, and a keylogger is not an exception. Sometimes, users grant them deliberately; in other cases, they may do it by mistake. Fortunately, checking permissions granted to apps is easy enough:
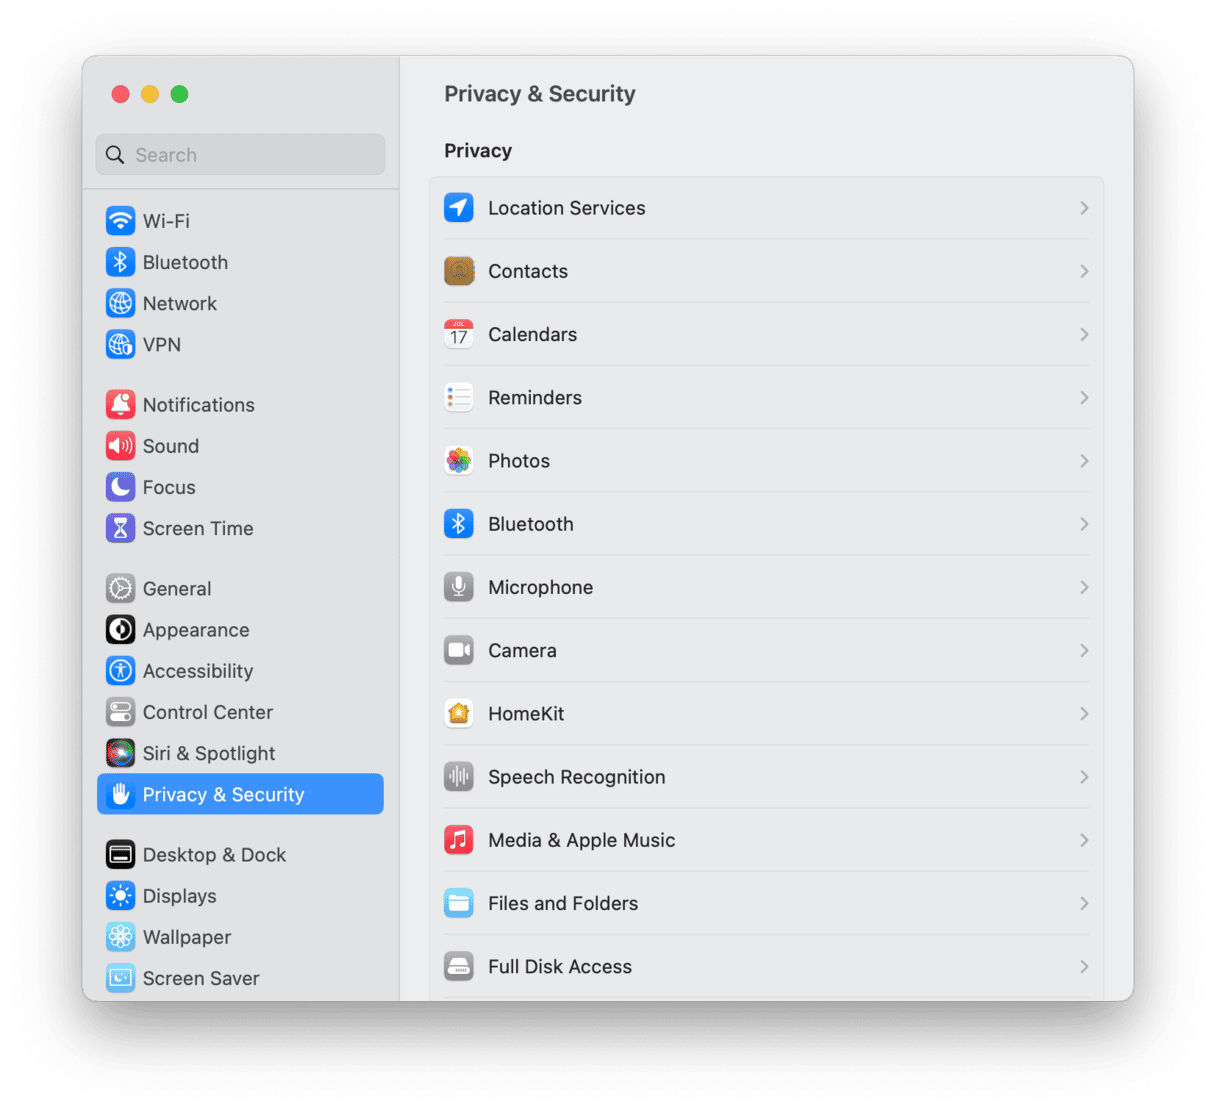
- From the main Apple menu, go to System Settings.
- Navigate to Privacy & Security.
- Under Privacy, you’ll see a list of permissions (Location Services, Contacts, etc.).
- Click them one by one and locate any app that seems suspicious.
- Revoke the permissions by using the switcher.

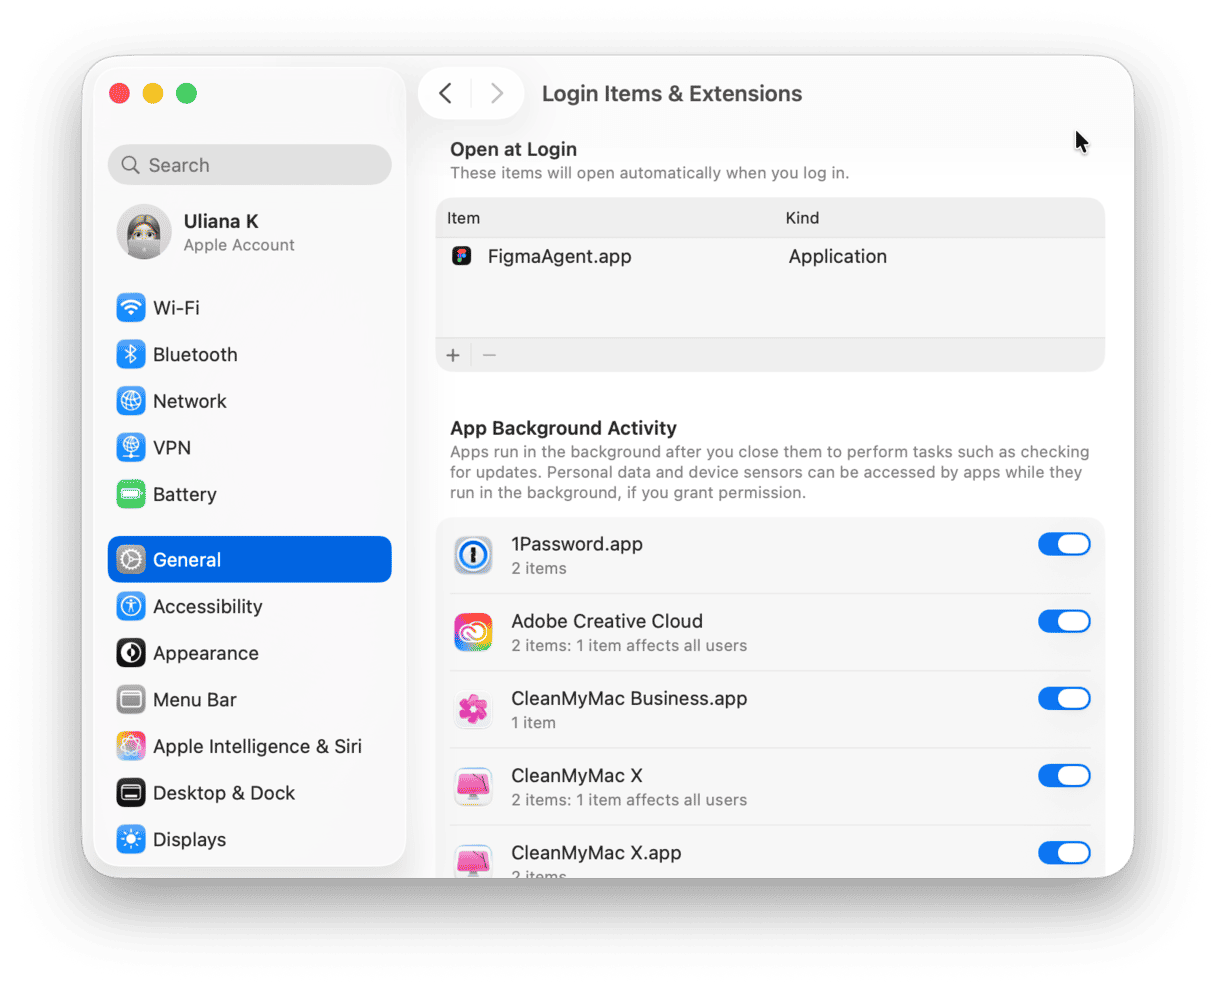
After checking Privacy & Security setting, do not quit System Settings — there is another tab worth checking in there, and it is Login Items. These are apps that open at login, and this behavior is common for different types of malicious software. To check Login Items:
- In System Settings, go to General.
- Navigate to Login Items & Extensions.
- Locate any app that seems suspicious under Open at Login and delete it from the list by clicking the “–” button.
- It is also a good idea to check apps allowed in the background and turn off anything you do not remember turning on or installing.

Monitor background processes
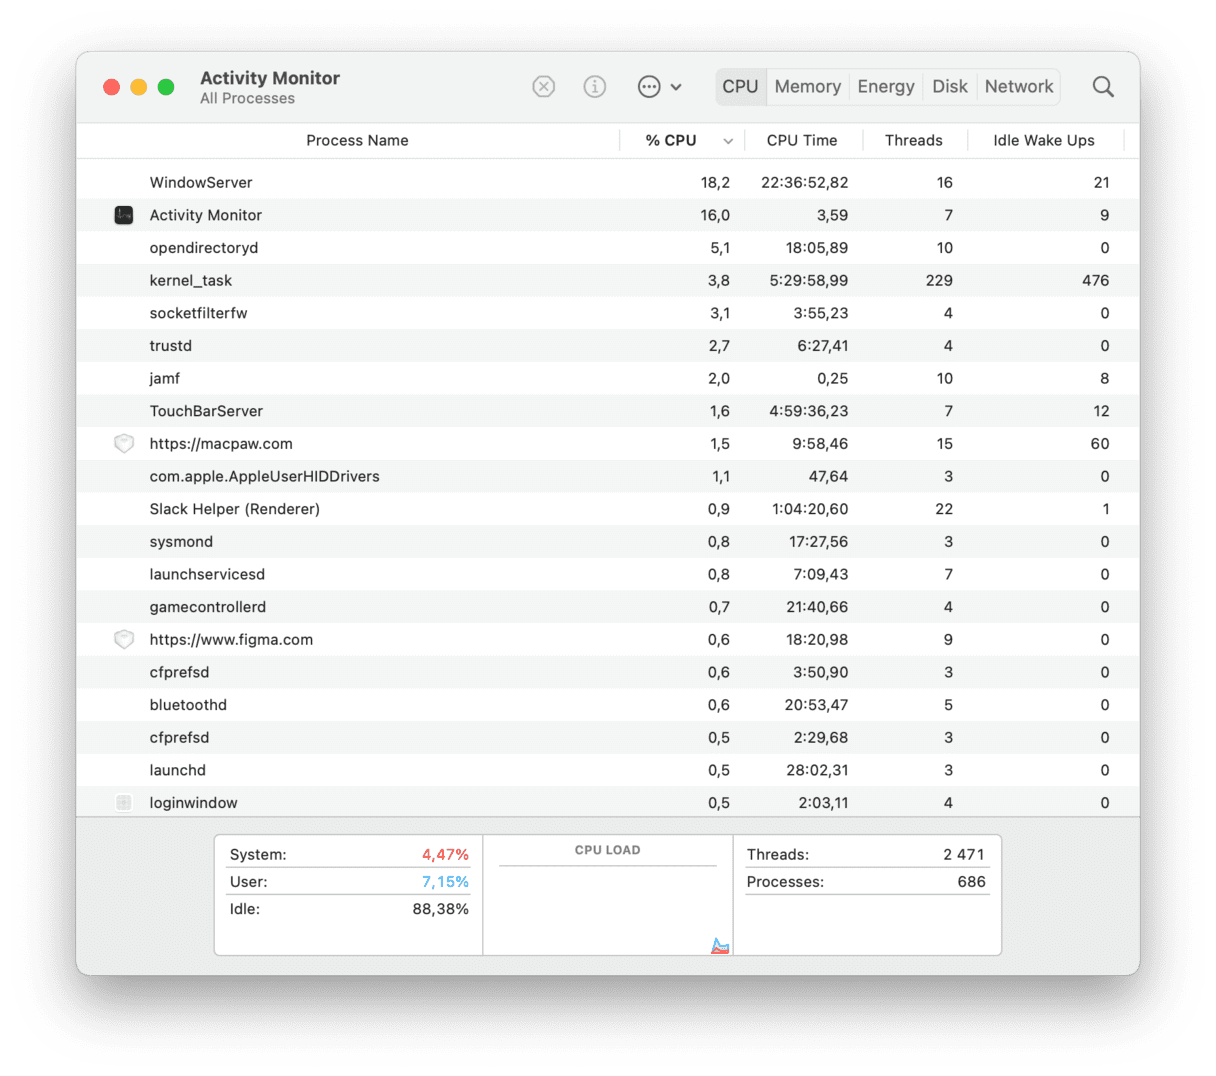
After checking the hardware and making sure that no hardware keylogger is plugged in and reviewing System Settings, it is time to monitor processes. The best way to do it is to open Activity Monitor — a built-in tool designed to display all resources used by the system in real time. Here’s how to use it to detect keylogger on Mac:

- Go to Applications > Utilities and double-click Activity Monitor.
- Check for processes that look like they might be keyboard loggers. For example, the Spyrix Keylogger appears in Activity Monitor as skm.
- If you find one, write down its name.
- Go to Applications > Utilities and open Terminal.
- Type:
man [name of process]— where [name of process] is the process you wrote down. Type its name without the square brackets. - You should see a description of the process in the Terminal window.
This method is pretty effective; however, it requires knowledge of all the apps running on your Mac. Sometimes, the name of the process may seem ominous, but, in fact, it would be a system process necessary for the proper operation of the macOS. It means that some research may be needed even if you are aware of all of the apps you have.
Alternatively, you can use an app called Little Snitch — it is designed to alert you if any process running in the background tries to log to a remote server. The thing is that keyloggers act just like that, so this app may be really helpful because it lets you block similar attempts.
Another way to detect a keylogger on Mac is to run a malware scan. We will cover it further in the article because it is the foundation for removing malicious software from your computer.

How to remove keylogger from Mac?
If you have detected a hardware keylogger, there are several ways to remove it. If you use an external keyboard, the easiest way is to switch to a new product. In this case, make sure that you choose another manufacturer because it may have been built into the keyboard at the production stage. If the keylogger is plugged into your Mac’s keyboard, you may need professional assistance to get rid of it.
If the keyboard logger was installed via malware, you can either try to get rid of it manually (learn more about removing malware and viruses from Mac) or use an antimalware tool. There are numerous antivirus software options out there. Some of them are free to download and scan your computer, while others will scan it only after paying for a full version.
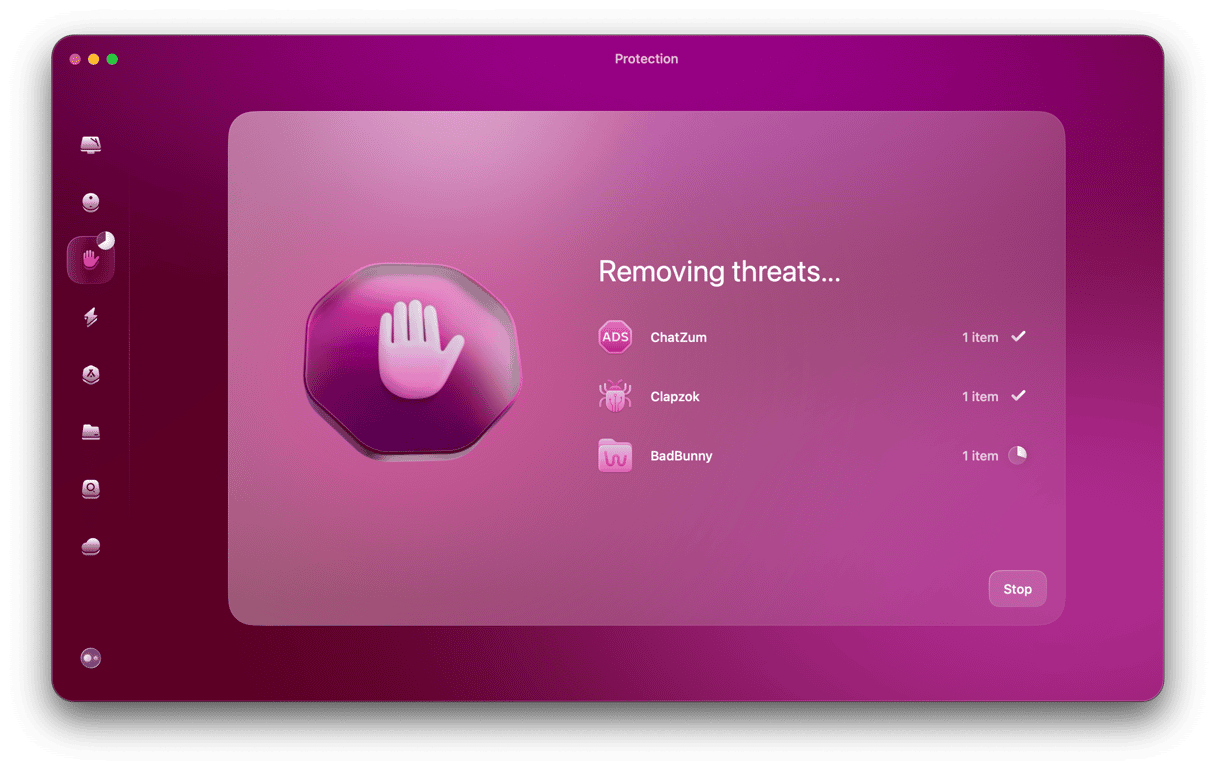
Among all the alternatives, we recommend CleanMyMac. Its Protection feature has a regularly updated database of known malicious code. You can scan your Mac at the click of a button. If CleanMyMac finds anything, clicking another button to remove it is all it takes.
Here’s how to remove keylogger from Mac with CleanMyMac:
- Download the app for free here and install it.
- Open CleanMyMac and select Protection from the sidebar.
- If it detects any threats, click Remove. Otherwise, you’ll receive a clean bill of health.

If you’ve tried running a malware removal or antivirus tool and still suspect you may have a keylogger on your Mac, your next option might be to perform a clean install of macOS. Make sure you back up your data before you do. But don’t restore from the backup — that will reinstall the keylogger. Instead, once you’ve erased your boot drive and reinstalled the OS, start installing applications one by one, then copy your data manually from the backup.
How to protect your Mac from keyloggers?
The best way to protect your Mac from hardware keyloggers is to never leave it unattended. Also, checking it from time to time is recommended, especially if you work in crowded environments.
To avoid keyloggers downloaded as malware, the usual common sense approach works the best. In fact, it is how most of the threats can be minimized. Just follow these tips:
- Never click on a link in any email message or email unless you’re certain who has sent it and where the link leads.
- Install an ad-blocker in your web browser.
- Heed the warning if your browser tells you a site you’re about to visit is unsafe.
- Ignore pop-ups telling you that you need to update Flash or any other part of your Mac.
- Use strong passwords and keep them safe in a password manager instead of writing them down.
- Use CleanMyMac or an antivirus tool to scan your Mac regularly.
- Download software from App Store or trusted developers’ websites.
Discovering a keylogger on your Mac is, at best, unsettling and, at worst, distressing, particularly if you don’t know who put it there or why. However, there are several ways to remove it, whether it’s hardware or software. And once you’ve got rid of it, follow the steps described above to ensure you never have to worry about finding one again.


