

Keep bumping into the macOS Golden Gate not enough disk space warning? Annoying, right? Well, let me save you a bit of time. Unless you’ve got at least 35 GB of free space, you’ll most likely have install issues.
Even though Golden Gate’s installer is around 18 GB, your Mac itself needs the extra headroom for installation files, all the temp data, and new on-device AI models, and I think that’s what a lot of people forget.
If you’re worried about space, don’t be; freeing it up is actually pretty easy. I’ve shared my top five ways to do it in 2026.
What are the macOS Golden Gate space requirements?
I can imagine most people reading this are desperately trying to find quick answers on how much space Golden Gate needs, so let me first put the vital info in an easy-to-read table for you.
Requirement | Amount |
Installer download size | 18 GB |
Recommended free space (Apple) | 35 GB minimum |
Safe buffer (with swap + on-device AI) | 28–35 GB recommended |
Compatible hardware | Apple Silicon only (M1 or later). Intel Macs not supported. |
I think a lot of people get caught out with new major updates, because it’s easy to just look at the installer size and think that’s all the free space you need, but it’s not quite true. Your macOS will also need temporary installation space, plus swap space, and extra headroom for on-device AI models. All of that adds up, and before you know it, you might find yourself running into all kinds of problems, like the upgrade stalling, freezing, or repeatedly crashing.
Most of the time, when a new macOS install fails, it’s usually down to available space, but also don’t forget Golden Gate is Apple silicon-only; Intel Macs won’t even see the update available, so if you’re running an older Mac and wondering why you haven’t even seen the update, that could be why.
If you’re not sure what your current storage situation looks like, here’s a quick little reminder of how to check:
- From your main Apple menu > System Settings > General > Storage.
- Wait for the colored graph to load.
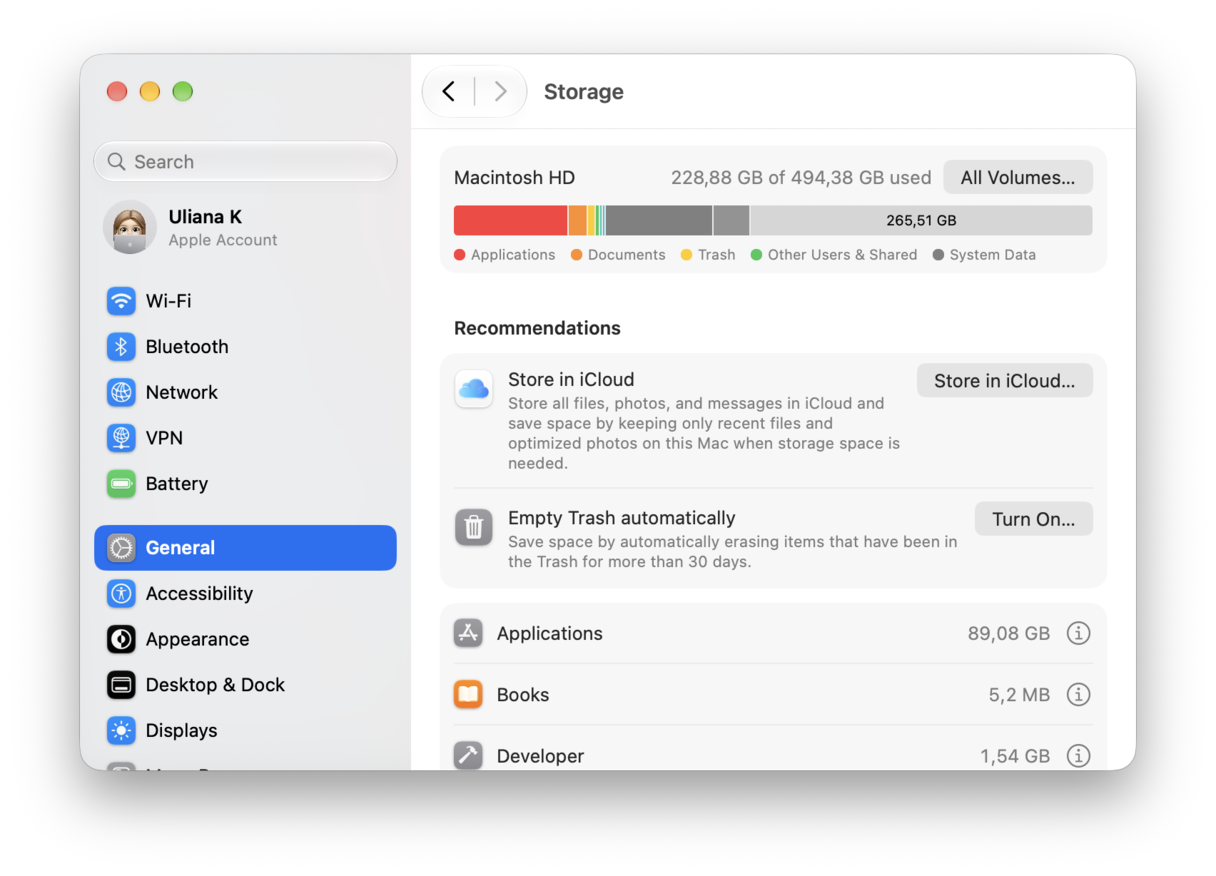
Don’t worry too much if your storage is tight; there is a lot you can do to free up space. Keep reading, and I’ll share my top five tips.
Solved: Not enough space to install Golden Gate
Freeing up space isn’t as tedious or painful as you might think; most of these tips are pretty quick wins.
1. Clean system junk with CleanMyMac
I wouldn’t even attempt to remove all my system junk these days manually — it just takes too long, and it can be harder than you think to find all those pesky cache files, app leftovers, even logs and system language files.
I like the Cleanup feature from CleanMyMac. It’s fast and safe, and just finds way more stuff than I ever could. I’d say this is really one of the best ways to quickly free up space. Test the app for 7 days — get your free trial here.
- Open the app and click Cleanup > Scan.
- After the scan, hit Clean.
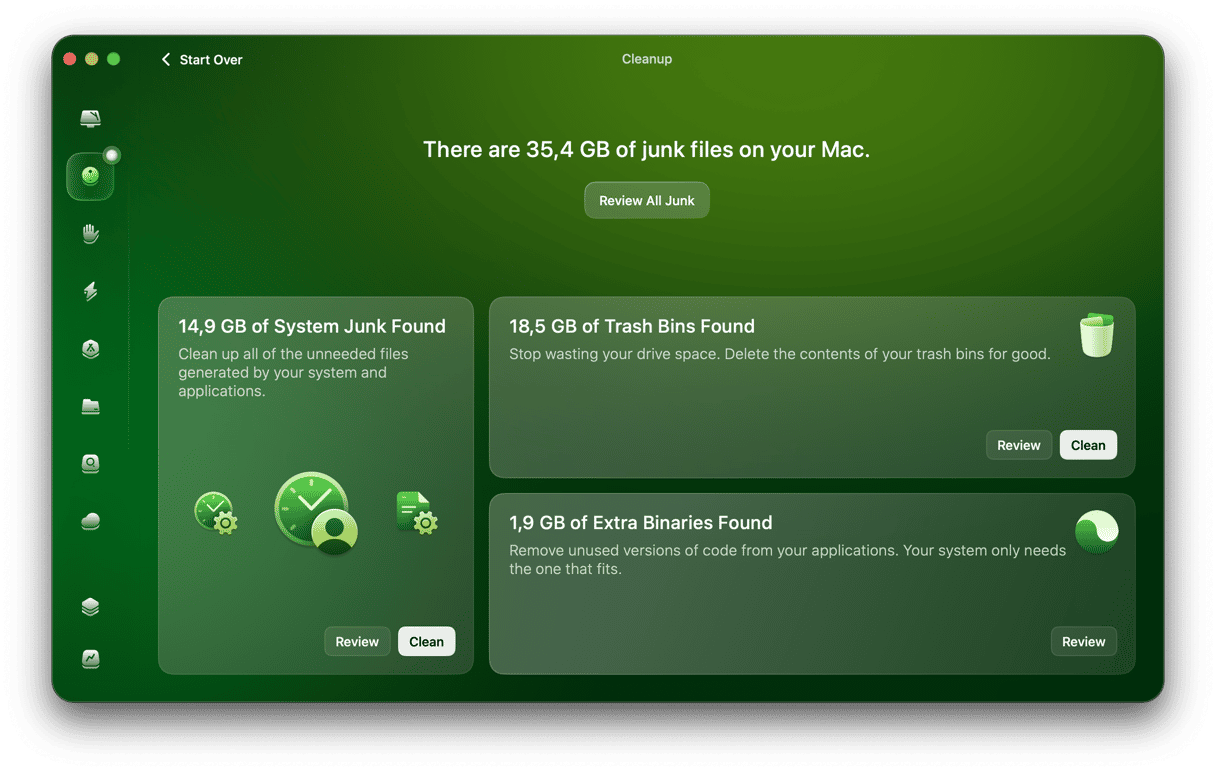
What I think is good is you can always review what it finds first, so you’re not blindly deleting stuff.
2. Find and remove your large old files
When was the last time you went really hunting for all the big forgotten files on your Mac? If you’re anything like me, you might have a Downloads folder stuffed full of ZIP files and installers.
The My Clutter feature from CleanMyMac can scan your entire system and highlight all the overlooked downloads, find any old project archives, and locate a mountain of duplicates.
- Open CleanMyMac > My Clutter > Scan > Review All Files.
- Select what you no longer need and click Remove.
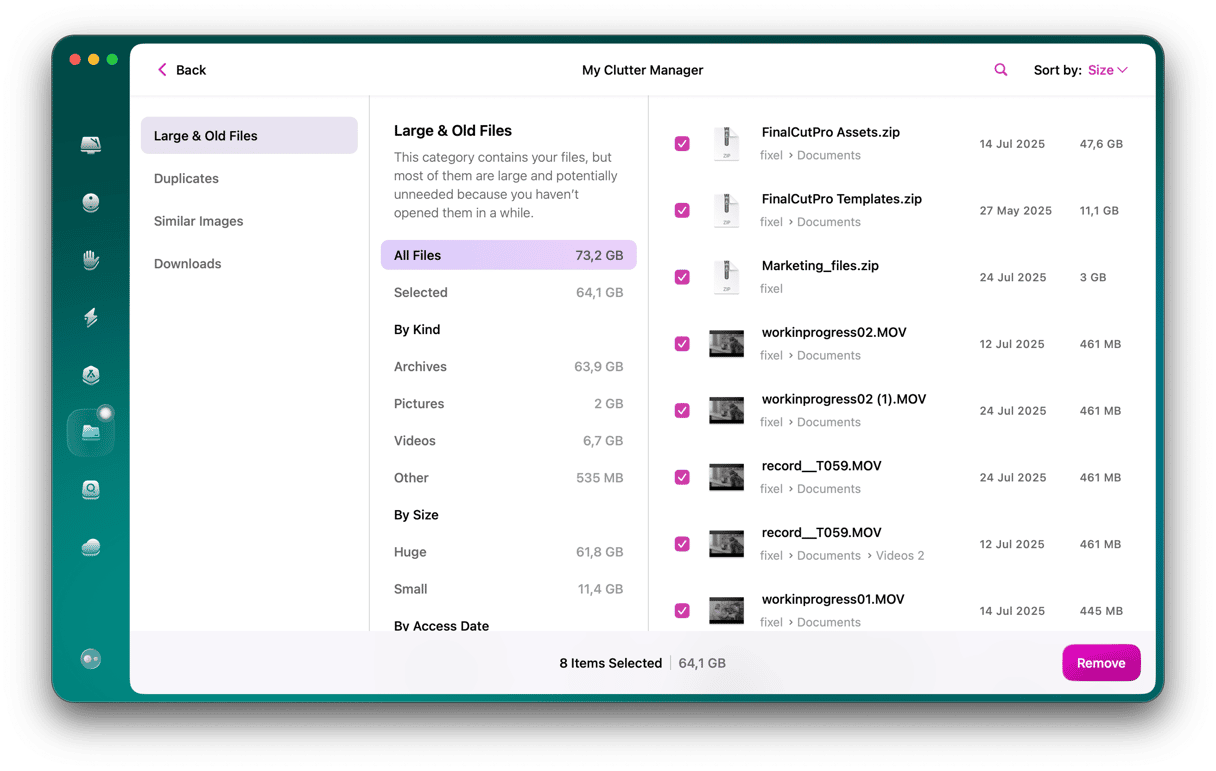
Take a good look at what it uncovers in Large and Old, then just remove what you don’t want. This beats scouring through files manually.
3. Delete any iPhone or iPad backups
Another way to claw back storage is to remove any old device backups. They can actually take up a surprising amount of space, and if you’ve upgraded phones a few times, these might be considerable. It’s the kind of storage you forget exists because it doesn’t sit in Downloads or Documents, but it still counts against your Mac’s available space.
- Connect your device to your Mac and open Finder.
- Under Locations, select it in the sidebar.
- Under General, press Manage Backups.
- Delete any you no longer need.
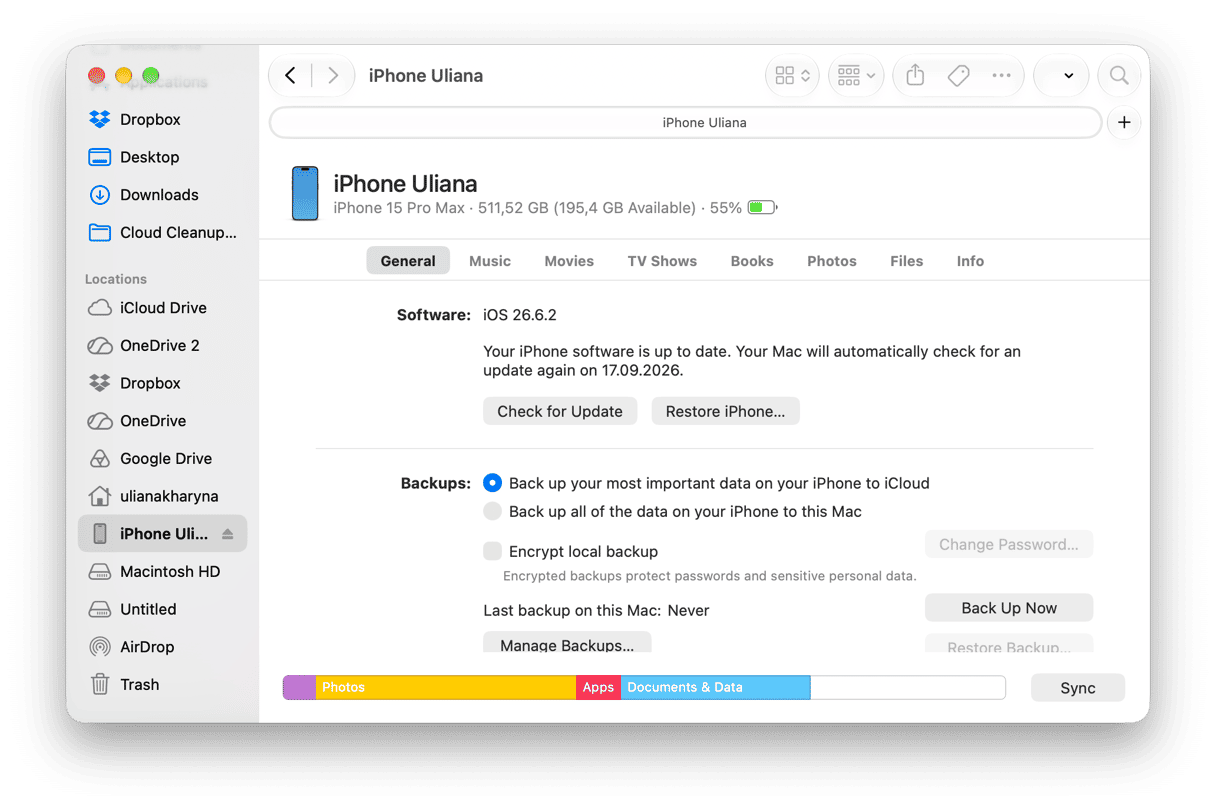
Before you do delete anything, I’d just check the date and device name carefully. I always tend to keep my most recent backup (if you still rely on local backups rather than iCloud). Once deleted, that backup is gone, so make sure there’s nothing important in there before you remove it.
4. Optimize storage with macOS built-in tool
It’s still worth using the macOS built-in storage tools to free up space; you won’t recover masses of space here, but it does help.
- In System Settings, go to General > Storage.
- Once all your storage has been calculated, review the Recommendations section and follow the prompts, like emptying the Trash and reviewing large files found.
It’s not as detailed in here as a dedicated cleaner tool or app, but I think it’s still useful, and it’s native, so why not.
5. Uninstall unused apps
If you’ve got a ton of unused apps installed, then obviously they’re going to take up space, so always check what's sitting around, and remove any you don’t actively use, and don’t forget about their leftovers too. Dragging an app to the Trash usually removes only the app itself, not all the support files it created while you were using it. And that's the stuff that sits around on your Mac taking up space.
- Open Finder > Applications.
- Right-click anything you no longer use and send it to your Trash.
- Empty the Trash.
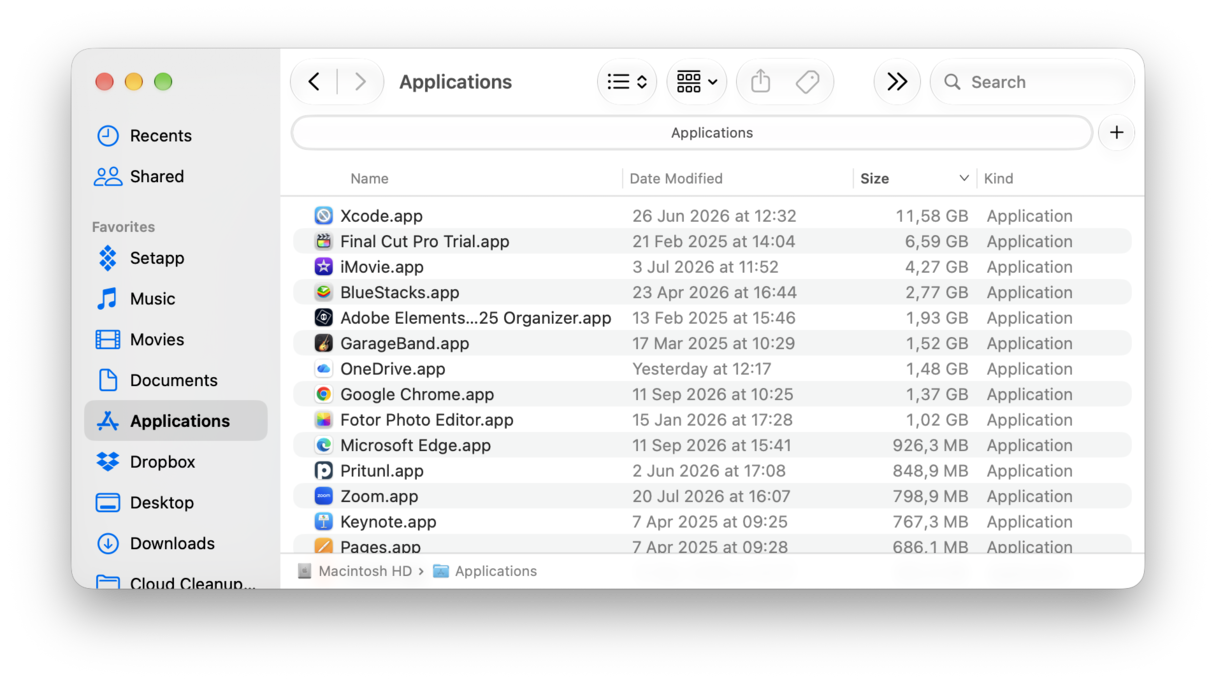
You’ll also need to check for any leftover app files in:
- ~/Library/Application Support
- ~/Library/Caches
- ~/Library/Preferences
You need to look for any files that contain the name of the app you just deleted, and remove them too. These leftovers can include all kinds of things like old caches, settings, logs, and support folders, and they can quietly hang around for months and sometimes years after the app is gone.
How big is macOS Golden Gate and are you ready to upgrade?
Once you’ve cleared space, I would check your storage again before starting the upgrade, and really make sure you’ve got at least 35 GB free.
If you’re close to the limit, I’d go back through these clean up tips and try and see what else you could find. You could always remove some larger media files to cloud storage temporarily to give you that final little boost.
Also, don’t forget to check your Mac model. macOS Golden Gate is only available for Apple silicon Macs, so if your Mac has an Intel processor, the update won’t appear.
Once you’ve made enough room, Golden Gate should install without a hiccup. For more help, this article is pretty useful on how much space macOS takes up. And don’t forget, if you haven’t tried out CleanMyMac yet, you can test it first (get your free trial here).