Like many Mac users, I rushed to install macOS Golden Gate as soon as it came out. And as soon as I started using it, I noticed one thing: it was a little more sluggish than I was expecting. Everything I’d read said that Golden Gate makes performance improvements on Tahoe, so why did it feel slower? In this article, we’ll find out why Golden Gate was slow, and I’ll show you what I did to fix it.
Why is Golden Gate running slow?
For most people, one answer is that there are a number of tasks the new OS has to complete as soon as it’s been installed, and these can often slow it down.
- Spotlight needs to rebuild its entire search index from scratch because Golden Gate ships a new indexing engine.
- Apple Intelligence models download in the background.
- iCloud re-syncs documents, photos, and app data.
- Photos analyzes your library for faces, scenes, and subjects.
All of that together puts strain on your Mac’s resources like GPU and memory and may cause it to feel sluggish.
There are a couple of other reasons, not related to one-off tasks, that may make Golden Gate feel slower, especially on M1 Macs with 8GB RAM.
- The refinements in Liquid Glass make more demands on the GPU.
- Some of the apps you’re using may not yet have been updated and optimized for Golden Gate.
How to fix it when macOS Golden Gate is running slow
1. Check Activity Monitor
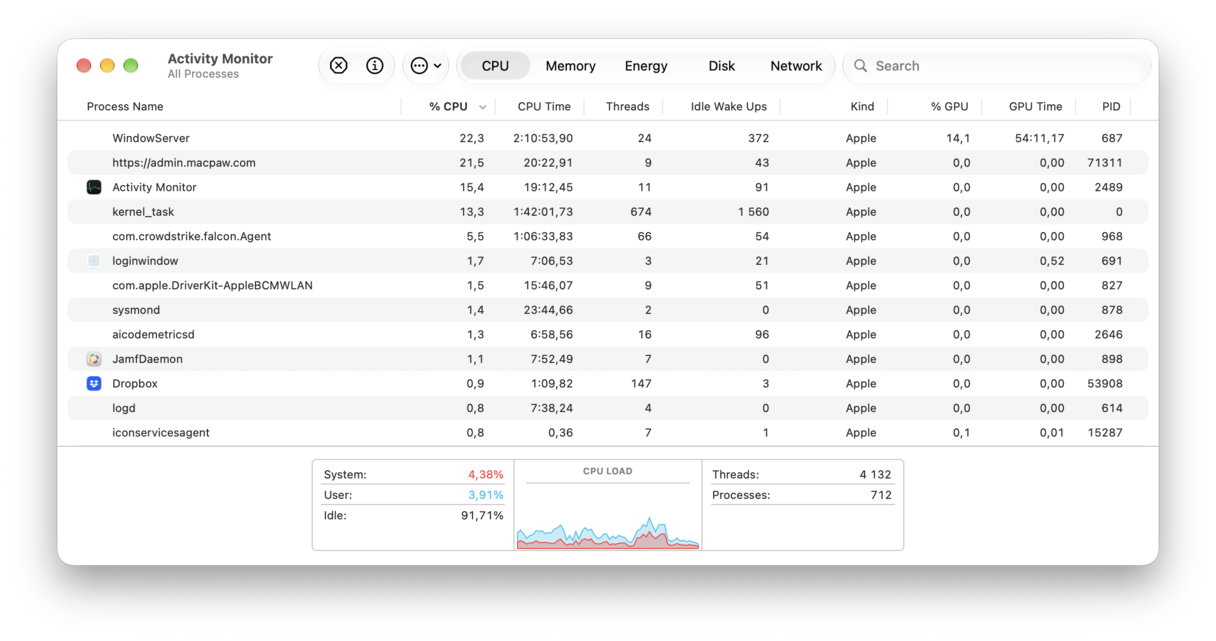
The most likely reason that Golden Gate is running slowly immediately after you install it is that it is running tasks in the background, like Spotlight indexing. You can use Activity Monitor to check that.
- Go to Applications > Utilities and launch Activity Monitor.
- Click the CPU tab and then the top of the %CPU column.
- Look for processes called mds_stores, mdworker, com.apple.intelligenced, and photoanalysisd
- If any of those are running, quit Activity Monitor, plug your Mac into a power source, and leave it to complete the tasks.
- Once the tasks are complete, which could be up to 48 hours, restart your Mac.
Why you should do this: Post-install indexing is the number 1 cause of Golden Gate slowness. It always resolves on its own.
2. Run maintenance tasks with CleanMyMac’s Performance feature
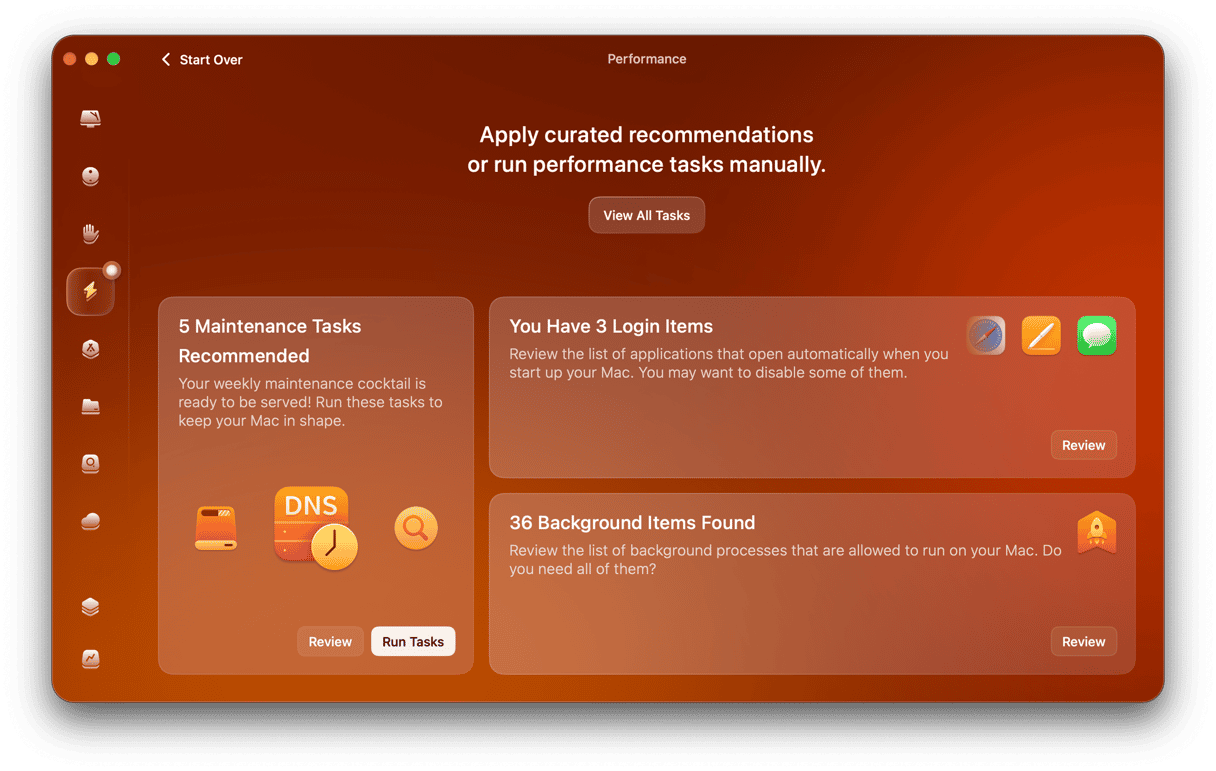
Did you know that you can make your Mac feel faster by running a few maintenance tasks? The easiest way to do it is to use the Performance feature from CleanMyMac. It is designed to run maintenance routines without making you dig deep into System Settings or use Terminal.
Here’s how it works:
- Start your free CleanMyMac trial — you can test it for 7 days.
- Open it and choose Performance in the sidebar, then click Scan.
- Review the recommended tasks and choose the ones you want to run.
- Click Run tasks.
Why you should do this: As you use your Mac, things start to go a bit awry and after a while it affects performance. Running these scripts resets key system processes and frees up RAM.
3. Clean up junk files with CleanMyMac Cleanup
Next stop — removing old cache and other junk buildup. It could slow down a new macOS version by causing all kinds of conflicts. Here’s how to get rid of junk files with a few clicks:
- Open CleanMyMac and choose Cleanup, then click Scan.
- Review results for system junk, cache files, mail attachments, and old iOS backups.
- Click Clean.
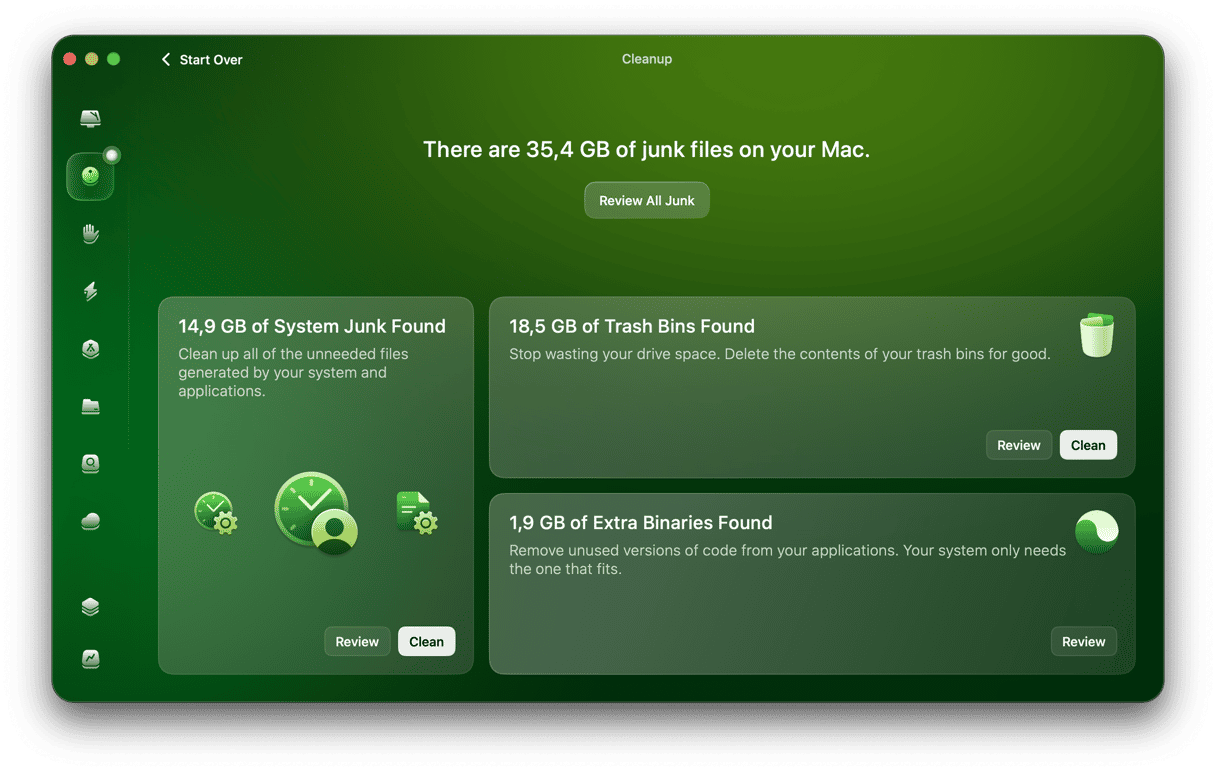
Why you should do this: macOS Golden Gate’s new caching system can accumulate 5-10+ GB of new cache in the first 24 hours after install. Disk pressure slows down the entire system.
4. Reduce Liquid Glass opacity
The option to reduce the opacity of the Liquid Glass interface is welcome not only from an aesthetic point of view but also as a way to reduce pressure on resources.
- Click on the Apple menu, choose System Settings > Appearance.
- Drag the Liquid Glass slider towards the opaque end.
Why you should do this: Rendering translucency puts pressure on your Mac’s GPU and RAM. This Golden Gate-only feature allows you to reduce that pressure and is particularly effective for M1 Macs with 8GB RAM.
5. Cut down login items and background agents
Login items and background agents launch when you log in and run in the background. Here’s how to review and disable them.
- Go to System Settings > General > Login Items & Extensions.
- To remove a Login Item, select it and click ‘-‘. To disable a background item, under the heading ‘App Background Activity’, locate it and toggle its switch to off.
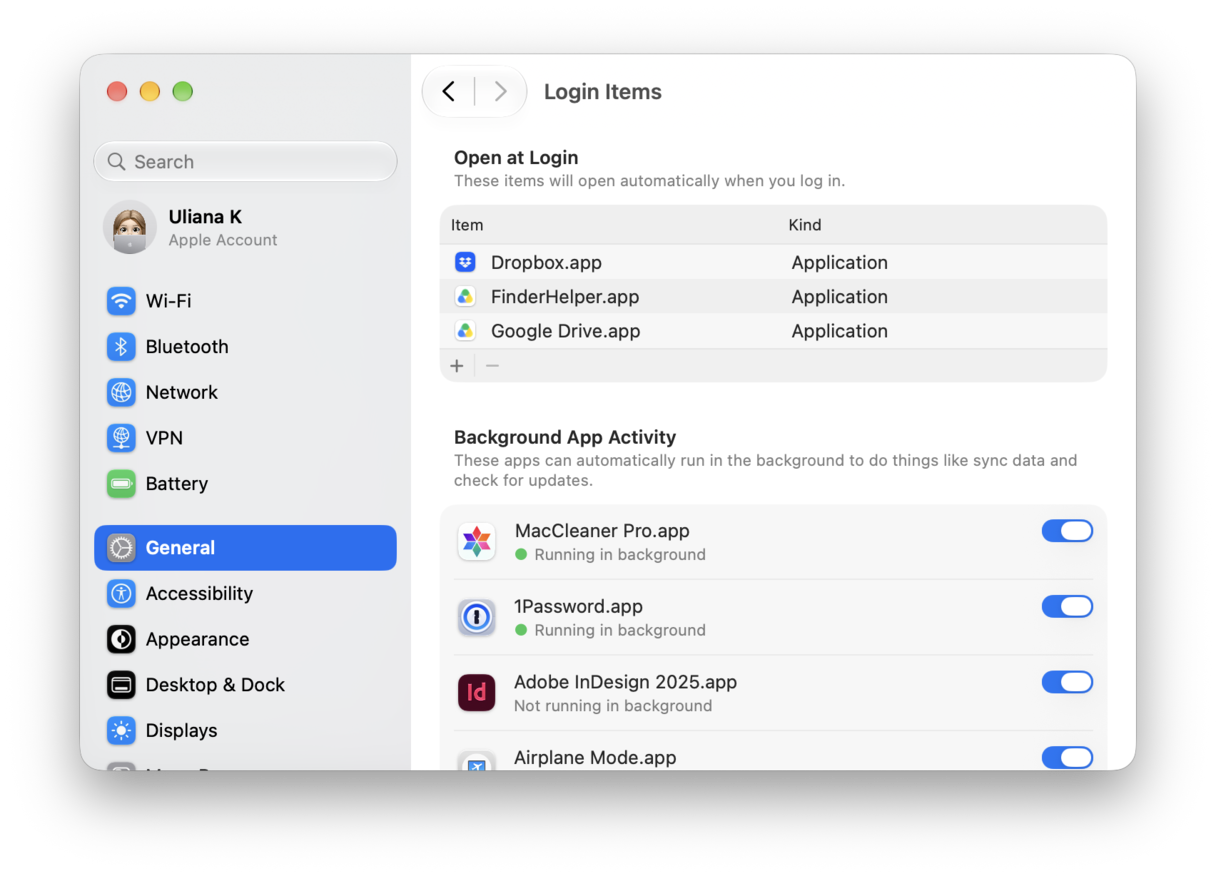
Why you should do this: Every login item and background item uses CPU and GPU cycles, as well as RAM. Allowing only those you need will free up resources and speed up startup time.
6. Update all your apps
For apps downloaded from the App Store, you can launch the App Store app, click Updates in the sidebar and choose Update All.
For non-App Store apps, launch the app, click the app’s name in the menu bar and choose Check for Updates.
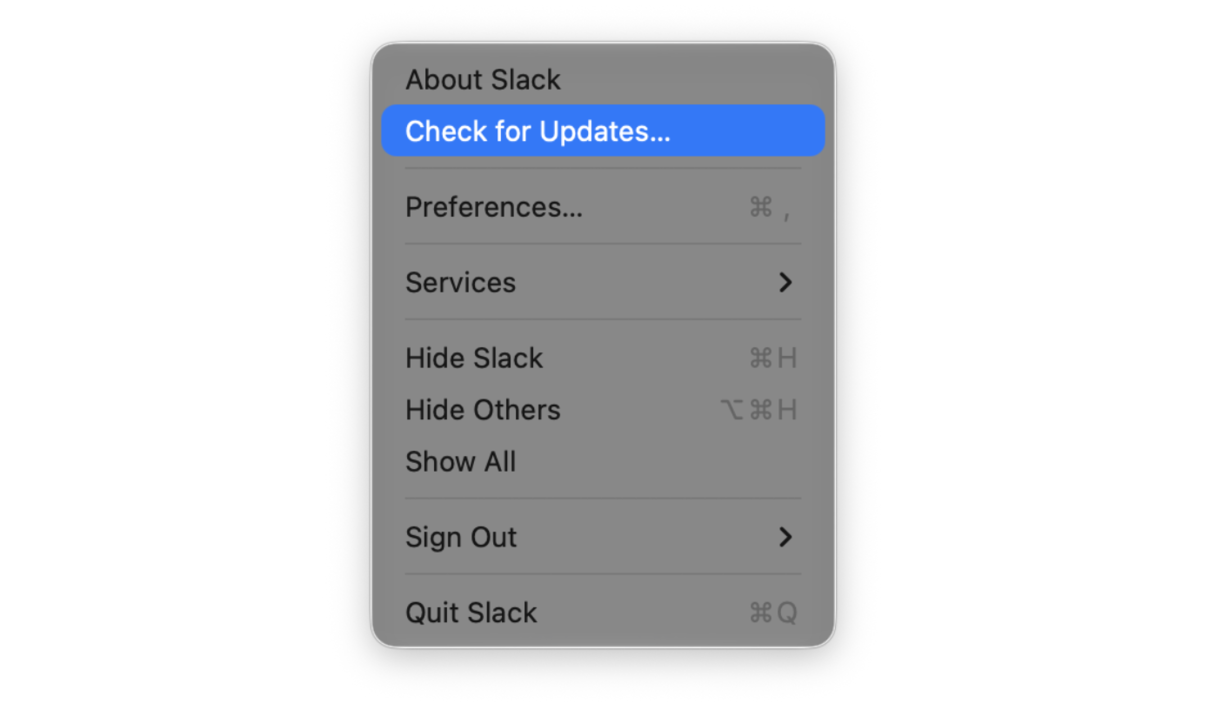
Some apps, such as Microsoft 365 and Adobe Creative Cloud, have their own update process.
Why you should do this: Apps that are not updated for macOS Golden Gate won’t be optimized for the new OS and so will run more slowly than the updated versions. They could also cause problems for other apps or the OS itself.
7. Reduce visual effects
This one is appropriate for older M1 Macs.
- Go to System Settings > Accessibility > Display.
- Turn on Reduce transparency.
- Next, go to Accessibility > Motion.
- Turn on Reduce Motion.
- Finally, head to System Settings > Desktop & Dock and set Minimize windows using to Scale Effect.
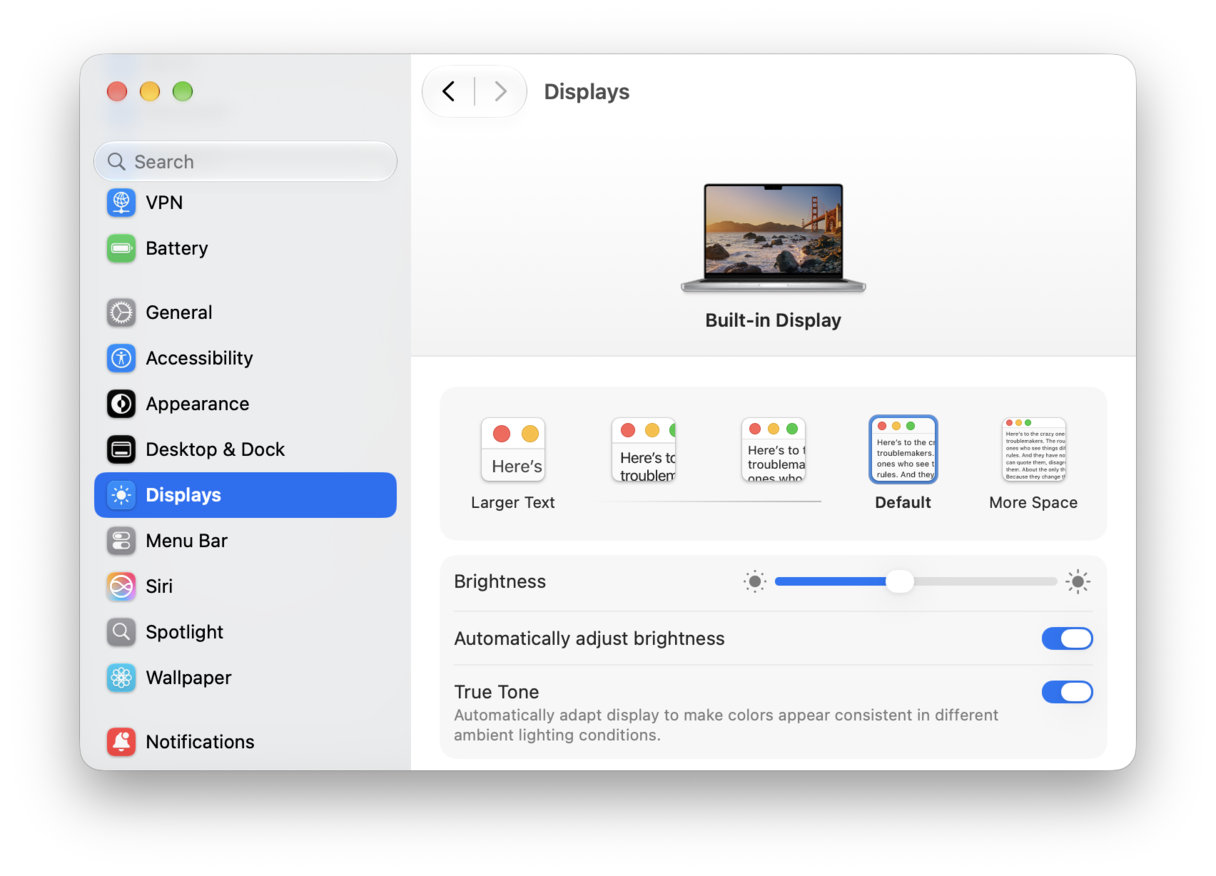
Why you should do this: Visual effects consume GPU resources. On M1 Macs with 8 GB RAM, reducing them noticeably improves app switching speed.
8. Rebuild the Spotlight Index
If your Mac is still sluggish after 48 hours and you’ve done everything above, you can try rebuilding Spotlight’s index.
- Go to System Settings > Spotlight > Search Privacy.
- Click ‘+’ and drag your startup disk onto the window.
- Wait 30 seconds, select the disk and click the ‘-’ button.
- Spotlight will start reindexing.
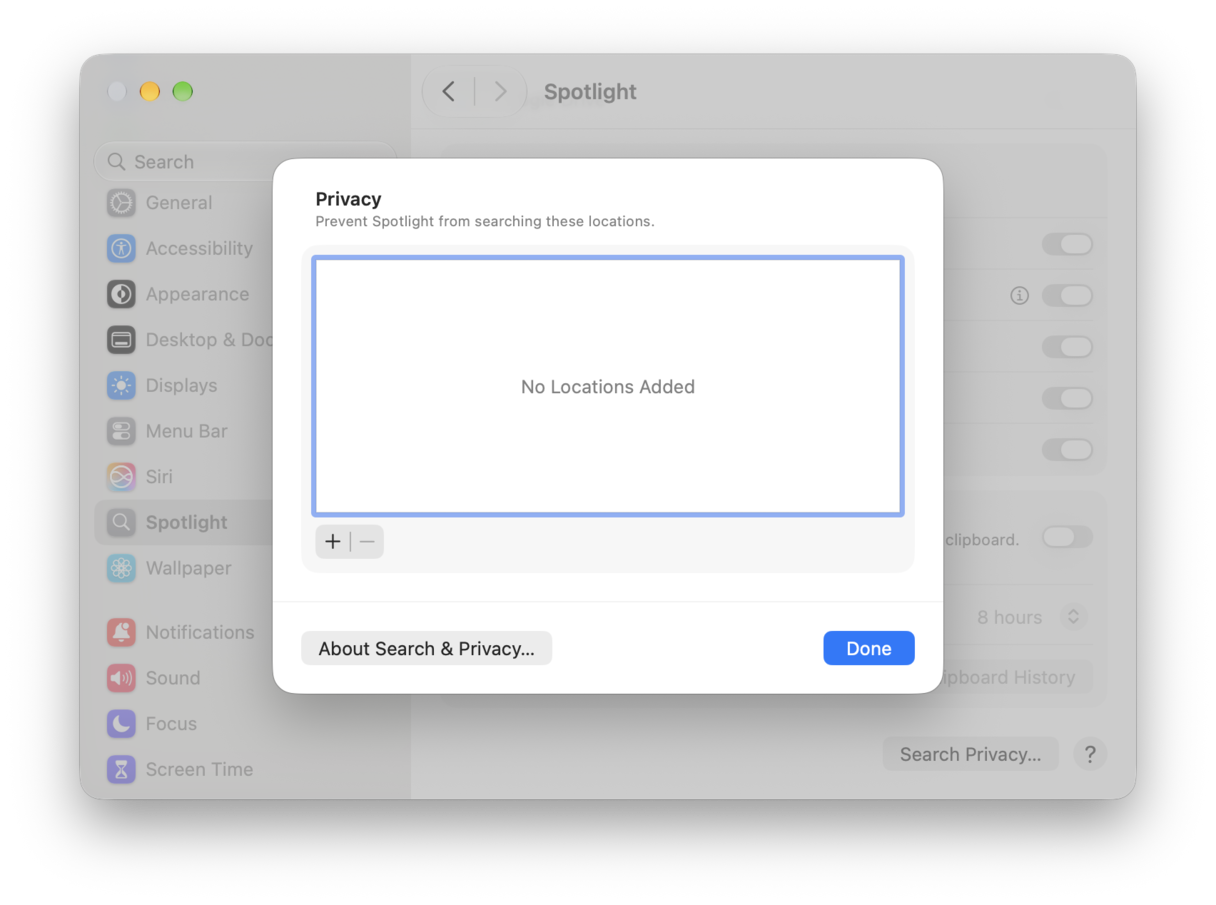
If you prefer, you can rebuild Spotlight using Terminal with the command: sudo mdutil -E
Why you should do this: If Activity Monitor still shows high mds_stores usage after 48 hours, it forces a clean index rebuild.
Hopefully, one of the tips above helped make macOS Golden Gate faster. And if you have any other issues with the new operating system, jump to this article to learn how to fix them all.
Frequently asked questions
Why is my Mac so slow after updating to macOS Golden Gate?
Spotlight reindexing, Apple Intelligence model downloads, and iCloud sync all compete for resources in the first 24–48 hours.
How long does macOS Golden Gate take to stop being slow?
Most users see performance return to normal within 24-48 hours. If lag persists past 72 hours, run the fixes in this guide.
Does the Liquid Glass opacity slider help with performance?
Yes — particularly on M1 Macs with 8 GB RAM. System Settings > Appearance > drag toward opaque.
Will macOS Golden Gate be faster than Tahoe?
Apple designed Golden Gate as a performance-focused release (similar to Snow Leopard). Tests confirm faster app launches and snappier single-core performance vs Tahoe, once post-install indexing completes.