The myth that Macs are immune to malware has been debunked years ago. Given a significant rise in MacBook-specific attacks, knowing how to check for viruses is a must. Right now, you can start by removing suspicious apps, but there’s more to virus removal. So, keep on reading, and by the end of the article, you will know not only how to completely delete apps but also how to quickly find and remove any infection from your beloved computer.
Do Macs really get malware?
Your Mac may be safer from malware than the average Windows PC, thanks to its Unix core and Apple’s default security settings. But it’s not completely immune. In fact, there was a 400% spike in Mac malware lately.
The most common threats are:
- Viruses (self-replicating malware)
- Trojans (malware disguising as a legit app)
- Adware (malware bombarding your browser with ads)
- Spyware (designed to steal personal data)
- Ransomware (encrypting your documents and demanding ransom for decryption — avoid the temptation to pay cyber criminals; instead, run your antimalware tool to remove it)
- Browser hijackers (malicious apps altering your browser settings)
- Keyloggers (recording key strokes on a keyboard)
So, answering the Mac-virus question — yes, Mac can get a virus! But the great news is that performing a Mac virus scan is simple, and you will know how to scan your Mac for viruses by the end of this article.
Can I scan my Mac for viruses online?
No, there is no website that can analyze your system deeply and detect threats. Any website that claims it can is a scam. But you can still do a lot to identify any viruses on your Mac.
6 obvious signs that your Mac is infected
Here are some symptoms that your Mac is infected with a virus:
- Your Mac has started freezing or restarting itself.
- Your browser homepage has changed, and you see pop-ups and redirects when they are not expected.
- You start seeing fake pop-ups telling you that your Mac needs an urgent update or your data is in danger.
- There has been a significant increase in CPU and RAM usage and Mac is overheating even though you haven’t installed resource-intensive apps or started doing anything new.
- You can no longer access your private files.
- You have noticed that disk space has disappeared for no apparent reason.
Viruses come in all sizes and shapes. They appear in browser extensions, others run in the background, but some appear as applications in your Applications folder. Before explaining how to scan for viruses on Mac, check these five tell-tale signs an app is a virus.
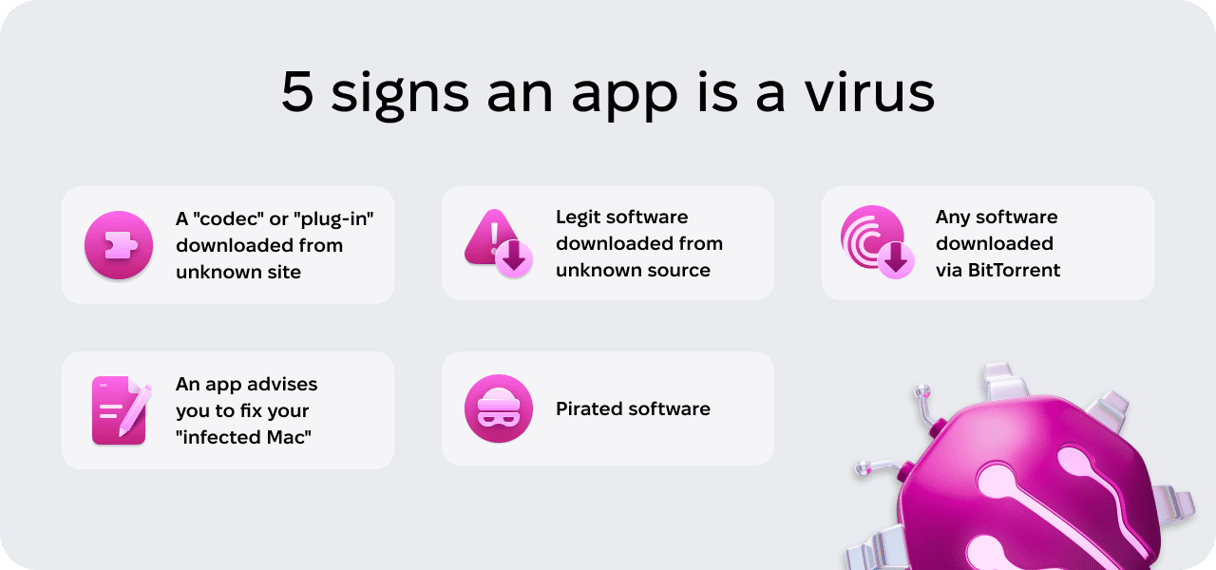
If any of the above is true, it’s possible that your Mac has a virus, but remember not to panic! It may be relatively easy to remove.
How to scan Mac for virus and malware automatically (easy detection & complete removal)
Some Mac users prefer scanning their Macs for malware manually, while others like to have a specialized tool do the job for them. Note, though, that not all apps that position themselves as ’free Mac antivirus software’ are safe to use, and if you download one such app, you can worsen the problem.
So, how to check for malware safely? We recommend using reputable tools. Our personal favorite is CleanMyMac. CleanMyMac detects thousands of malware threats, including adware, spyware, worms, ransomware, cryptocurrency miners, etc. When it finds something suspicious, it offers immediate removal.
Here’s how to scan MacBook for malware and viruses:
- Get your free CleanMyMac trial.
- Click the Protection tab.
- Click Scan and then click Remove.
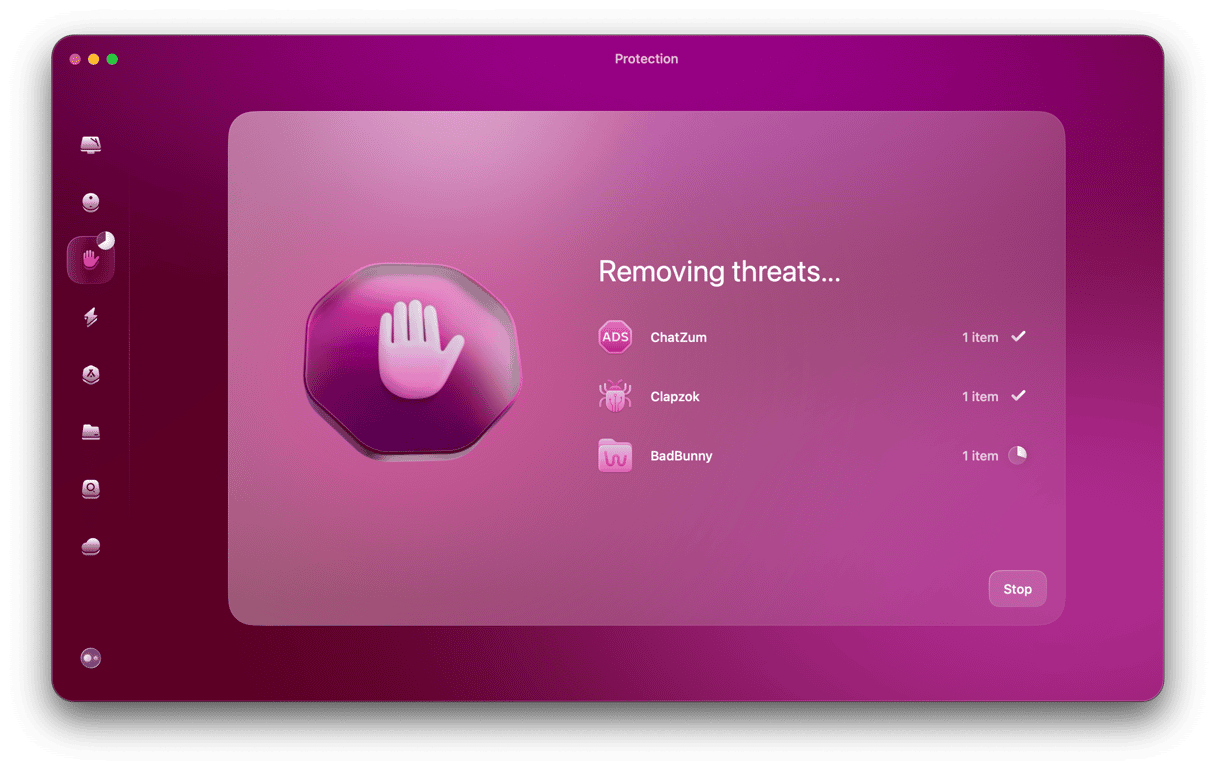
Tip: If CleanMyMac detected spyware or another malware, keyloggers, that may have stolen your personal data, you might want to contact your bank to make sure that your financial information is safe. They will consult you on further steps to protect it.
Malware monitor in CleanMyMac’s Menu App is another thing we love about the app. With its help, we can easily see if our Mac is under malware attack. You can enable it from the Protection tab in CleanMyMac’s Settings.

How to get rid of suspicious apps
We hope our simple tutorial on how to check viruses on Mac was handy. The next logical step is to remove them. Again, if you find an application you didn’t intend to install, you should get rid of it. But don’t just drag it from your Applications folder to the Trash — that won’t remove every trace of it from your Mac.
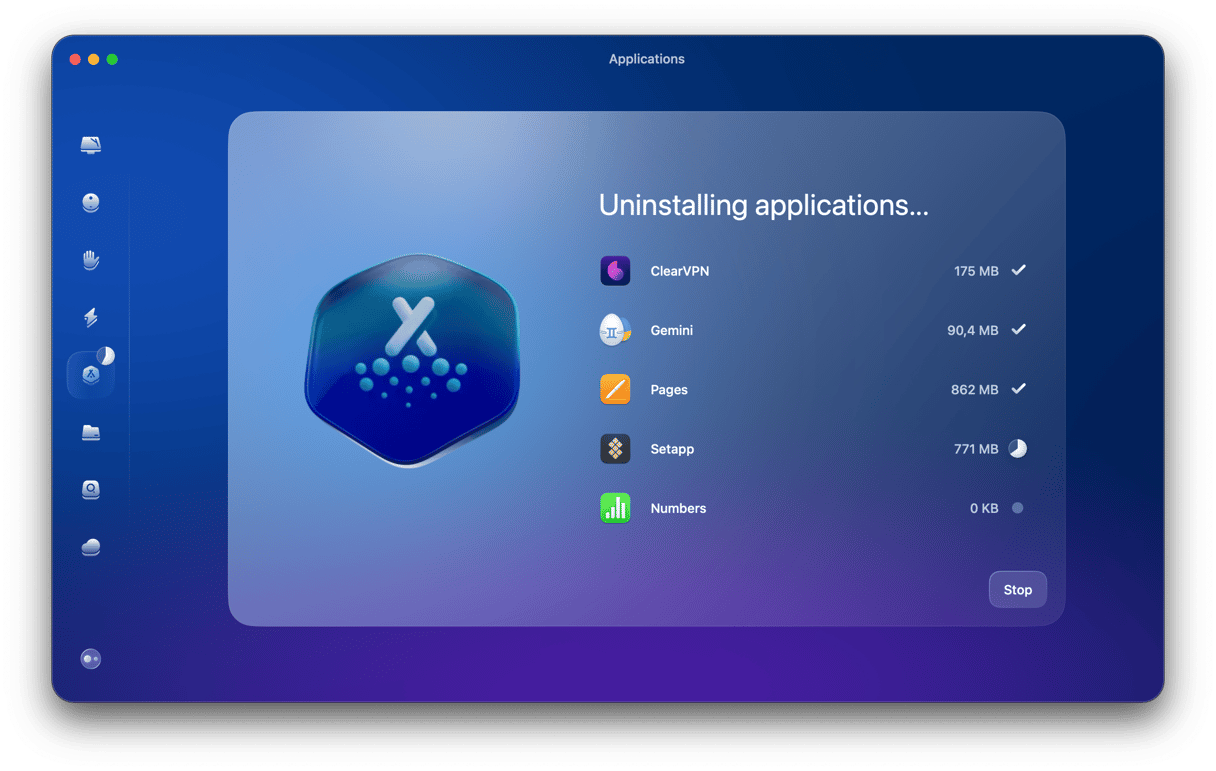
Applications store files in several different places in your Mac’s Library folders. You could track them down and remove them manually, but it’s quicker and easier to use a dedicated uninstaller we mentioned earlier, CleanMyMac. That way, you can remove every application trace, and no stray files will be left behind.
- Start your free CleanMyMac trial.
- In CleanMyMac, click Applications > Scan.
- Click Manage My Applications > Uninstaller.
- Look through the list of applications until you see the one (or ones) you want to get rid of. Select the box next to it.
- Click the Uninstall button.
If you want to use built-in tools to check your Mac for malware, viruses, or suspicious apps, we’ve fetched a list right here that you can use.
Built-in Mac virus scan
Apple protects its macOS users with a unique built-in technology called XProtect. It has an extensive database of virus signatures that scan Macs for malware. Since it’s already built into your system, it runs by default without your involvement. But remember, this is only a basic level of protection that won’t help with serious threats.
How to scan Mac for viruses manually (step-by-step inspection)
Before following the steps below, you may boot your Mac into safe mode to prevent malware from loading at startup. For an Intel-based Mac, simply press and hold Shift while restarting your Mac. Release Shift when the login window appears.
For a Mac with Apple silicon, shut down your Mac and then press and hold the power button until you see “Loading startup options.” Select your startup volume and press and hold the Shift button. Click “Continue in Safe Mode.” You should see “Safe Boot” top right.
Next, disconnect from the internet to make sure that the potential virus is not able to communicate with its servers and does not spread to other devices on the network. Either disconnect your Ethernet cable if you use one or go to System Settings > Wi-Fi and use the switcher to turn it off.
Now, let’s get to hunting down malware!
1. Turn on Mac’s built-in protection
If you’ve ever got a warning on your computer asking whether you’re sure you want to download something, you’ve seen File Quarantine in action. It lets you decline the download of an item in case you don’t completely trust the source it’s coming from.
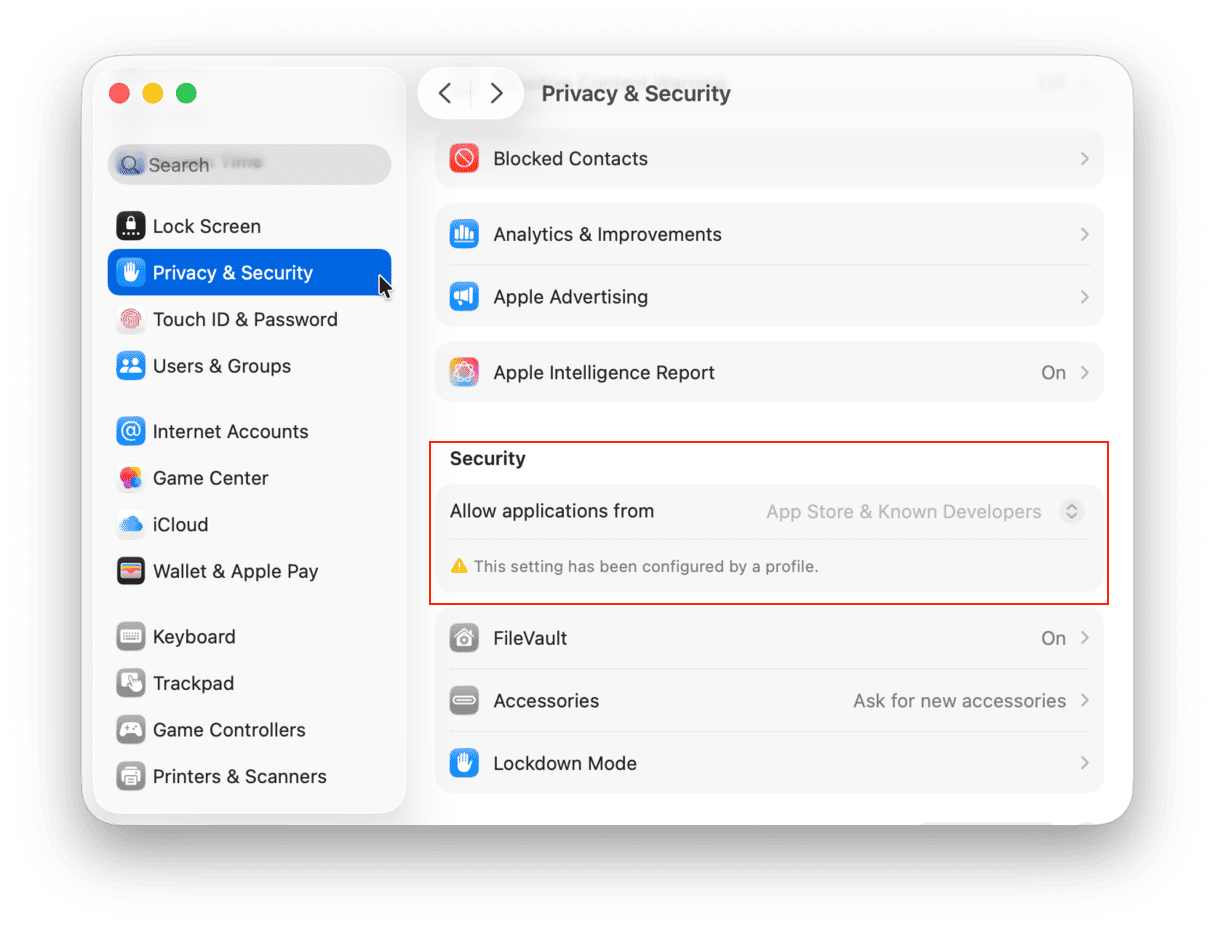
Another built-in utility, Gatekeeper, checks that there’s an electronic signature from an approved Mac supplier on any item you attempt to download. So, making sure it’s turned on is a great way to protect yourself from downloading something malicious.
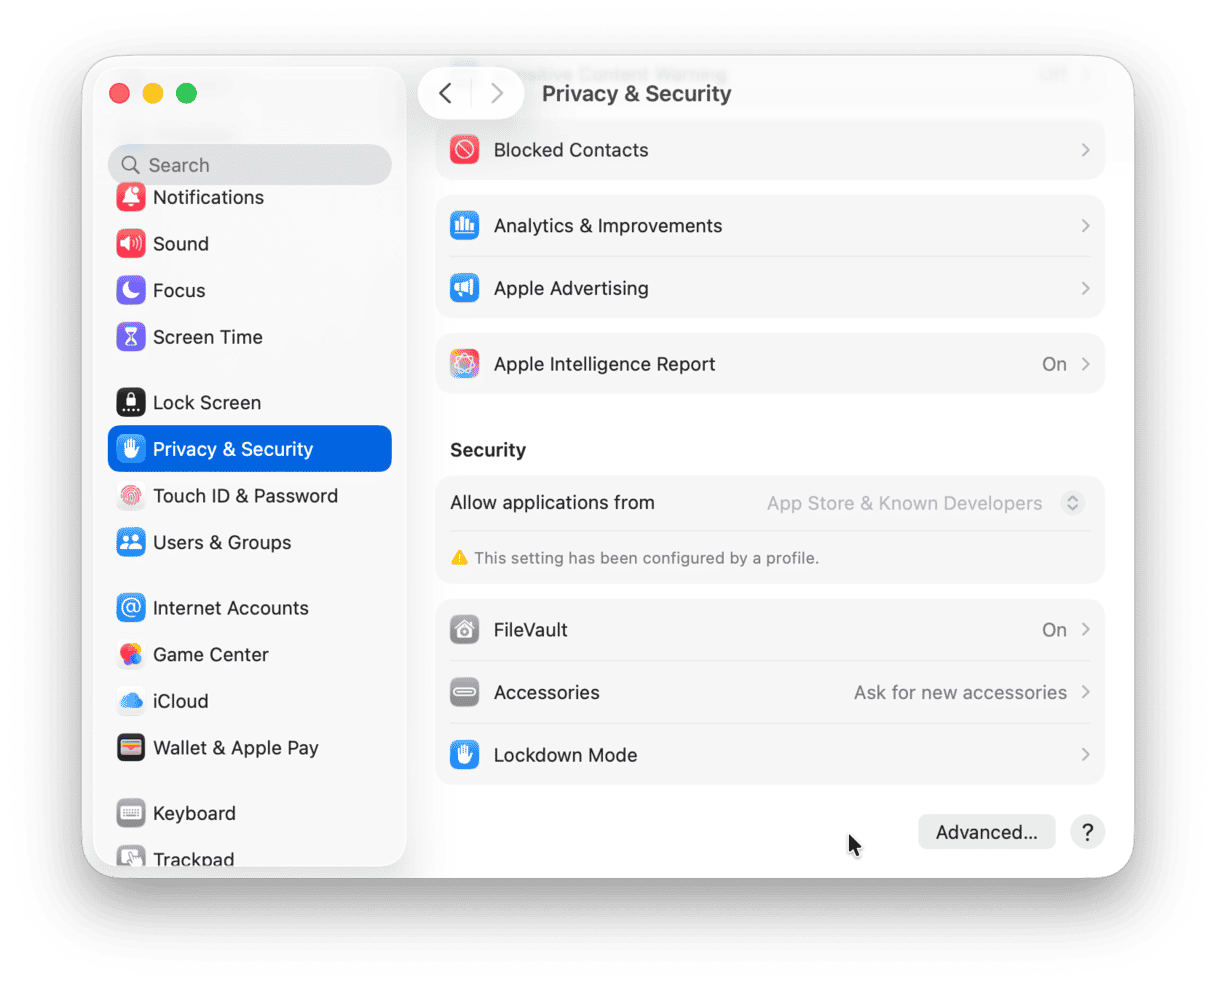
- Go to System Settings > Privacy & Security.
- Under “Security,” ensure that “App Store and identified developers” or “App Store” is selected.
2. Examine your Disk Utility
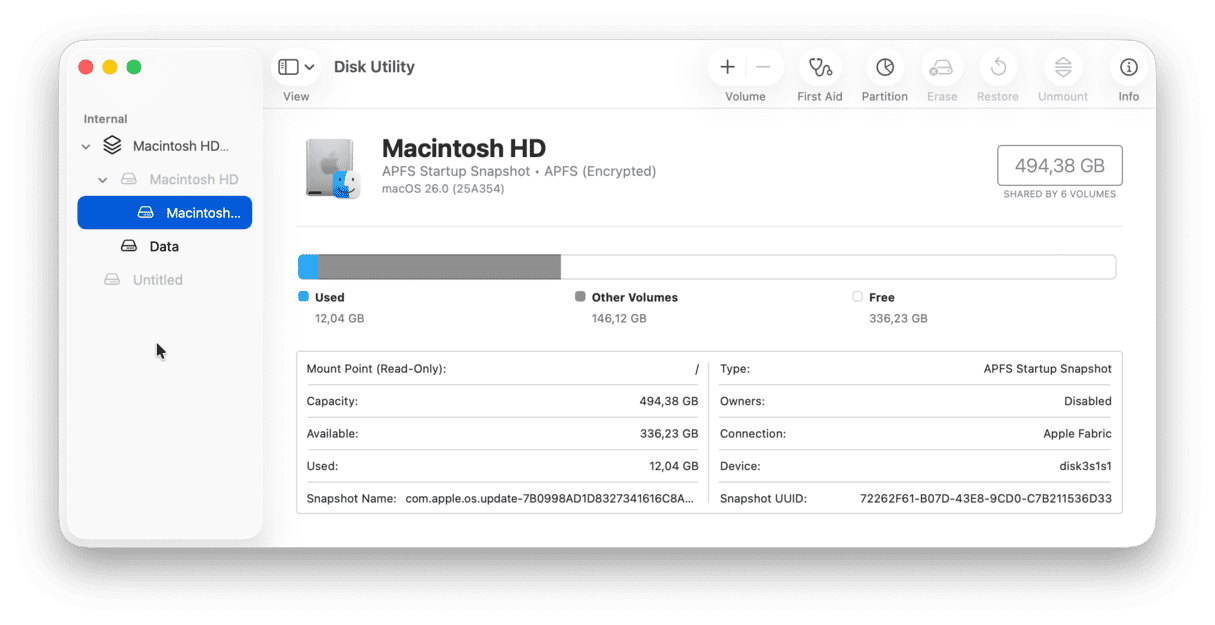
Navigating to Disk Utility will give you a sense of what’s taking up space on your drive. You can also click on First Aid to run a scan of the drive and repair any errors. Make a note of the types of things taking up space, especially if any category is unusually large — this would be a good one to target directly or to check on later to see if it became smaller through the measures you are undertaking.
3. Scan your Downloads folder
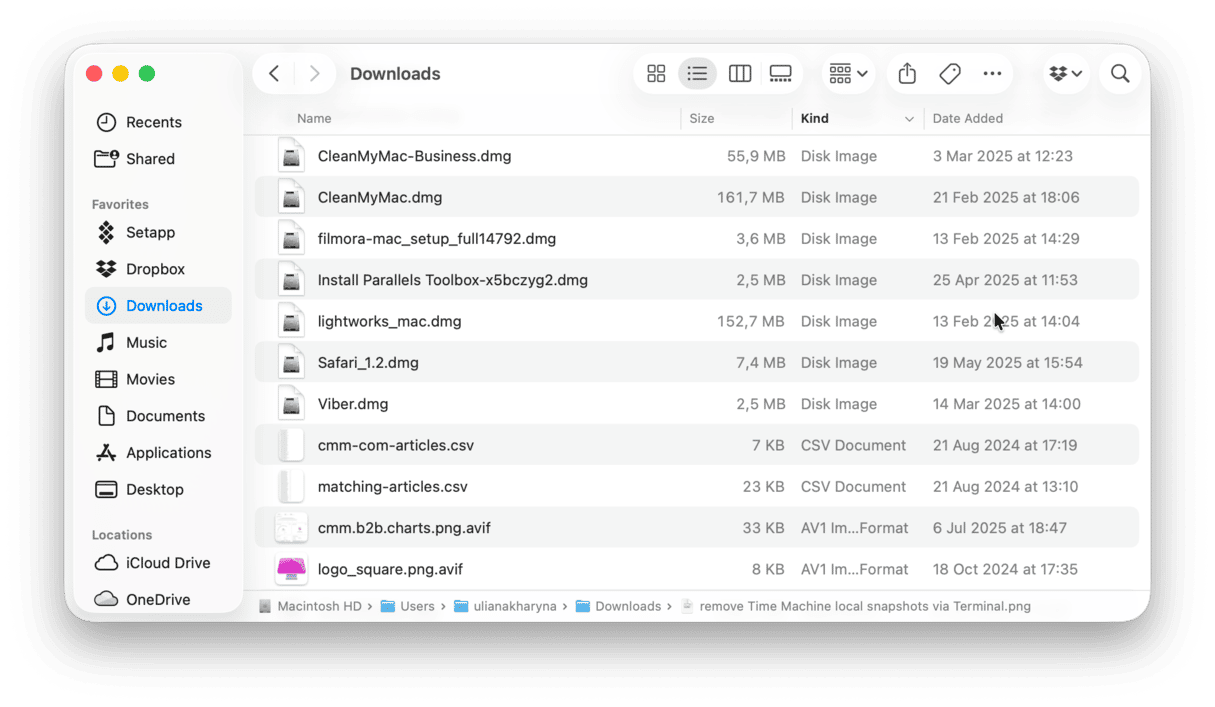
The next stop in scanning your Mac for malware manually is to check your downloads. Have you noticed anything that seems out of place? It may be a document you have not downloaded or an app installer that just appeared there on its own. You can use built-in filters to make the process easier. If you’ve detected something suspicious, send it to the Trash and empty it afterward.
4. Check browser extensions
Some viruses and malware come in the form of browser extensions that sneak onto your Mac. Therefore, another way to detect malicious software is to check these add-ons and plug-ins. Note, though, that you will have to do it for all browsers you have installed on your computer. Below, you’ll find the steps for three most popular browsers.
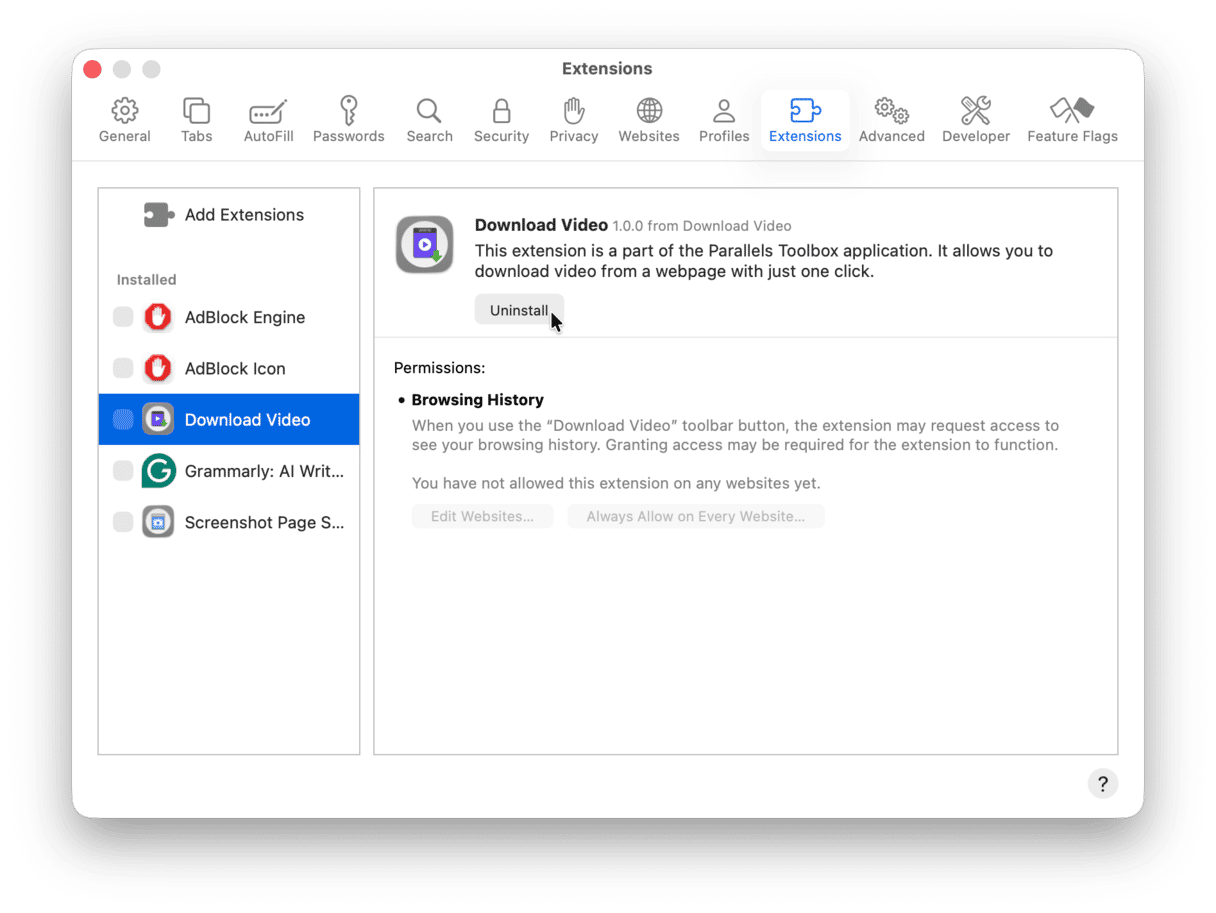
Safari
- Open Safari and click Settings from the menu.
- Select Extensions.
- Next to any extension you don’t recognize, click Uninstall.
Chrome
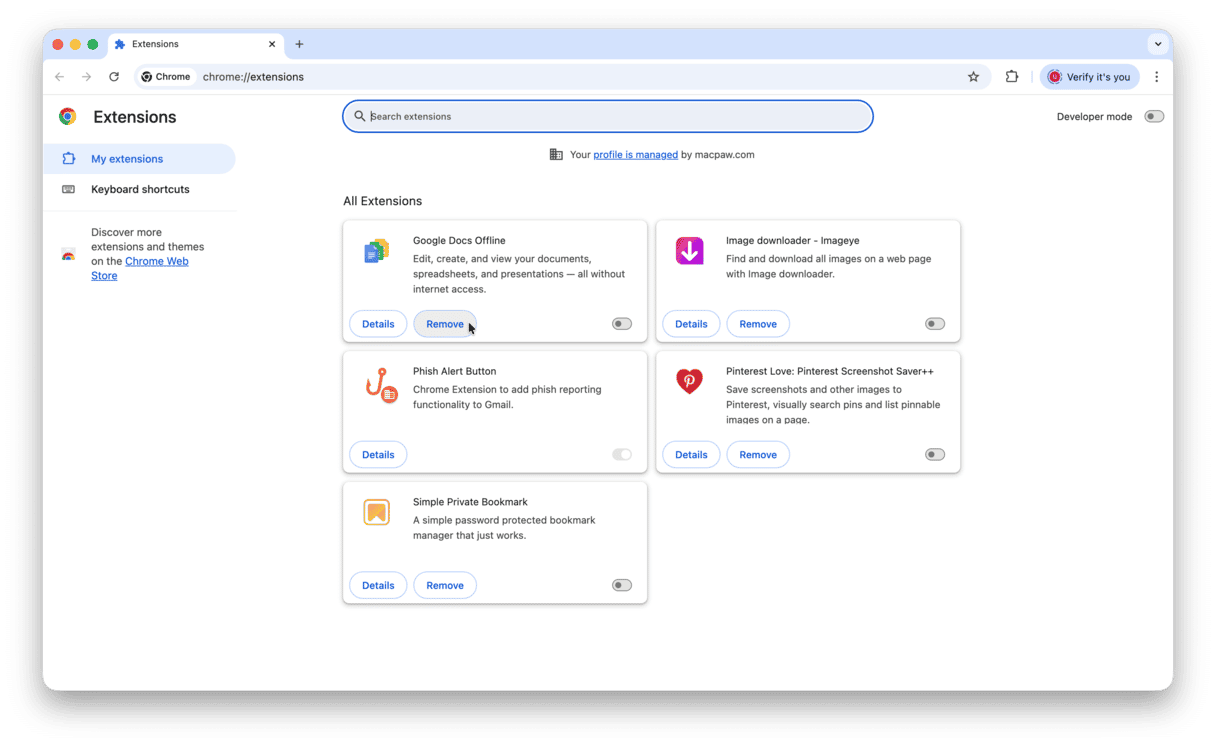
- Open Chrome and go to Window (from the menu bar) > Extensions.
- Click Remove next to any extension you don’t recognize.
Firefox
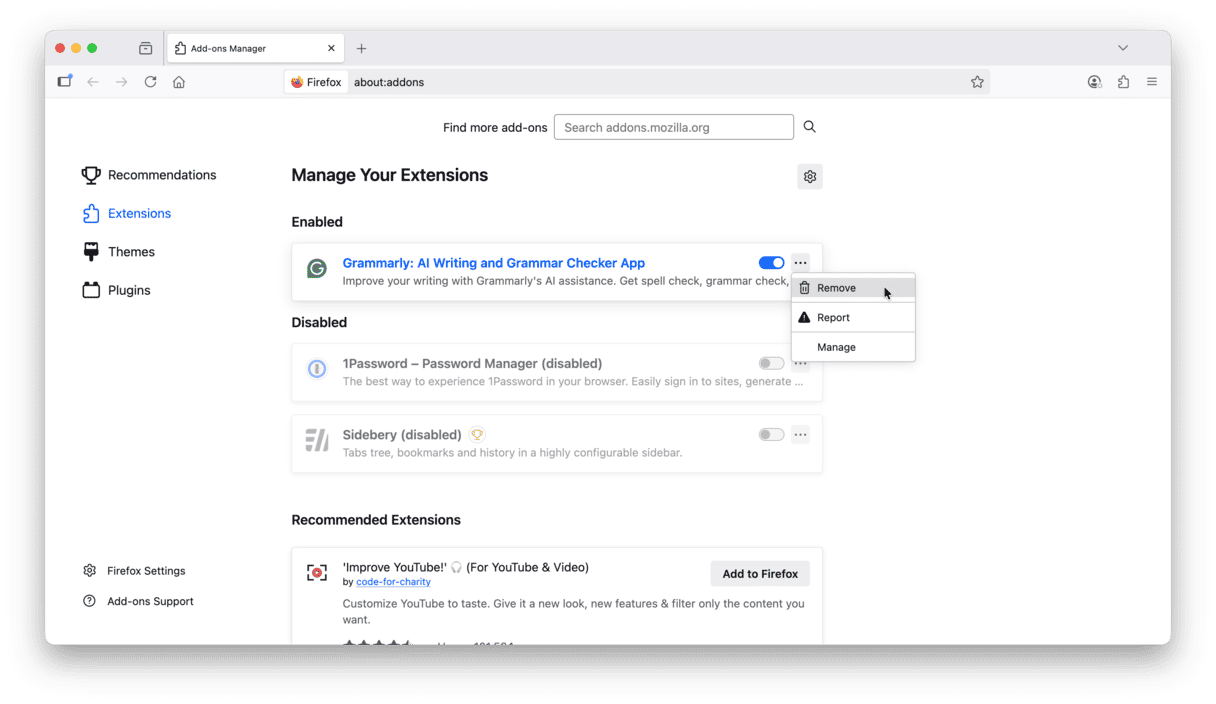
- Open Firefox and click three lines top right.
- Choose Settings > Extensions and themes > Extensions.
- Click an ellipsis next to any extension you don’t recognize and choose Remove.
5. Look for unknown login items and background extensions
Did you know that a lot of malicious apps install their own login items? This way, they start when you boot up your Mac and you won’t even notice it.
Here's a quick reminder of how to check it:
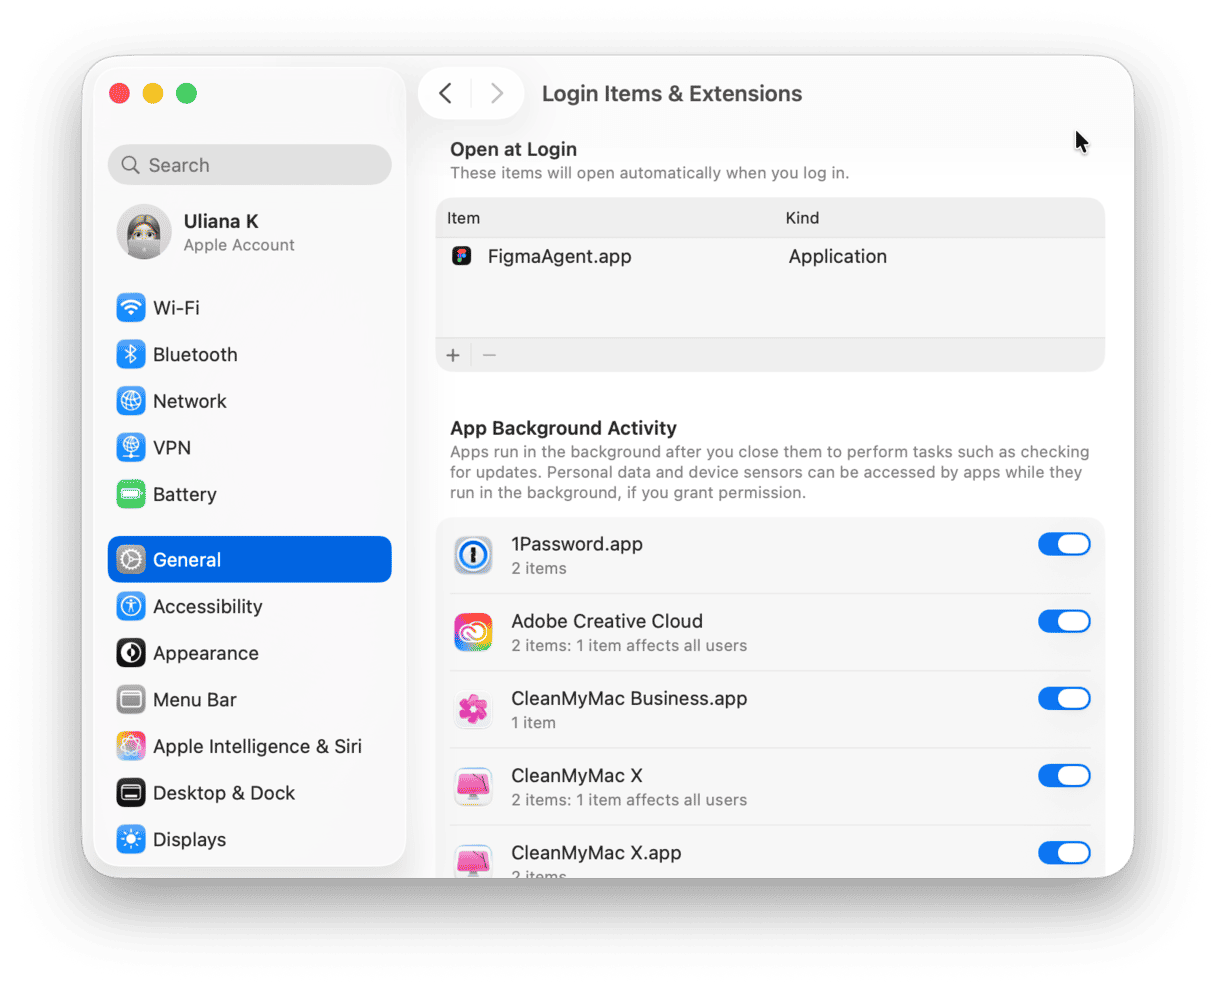
- Go to System Settings > General > Login Items & Extensions.
- Look under Open at Login.
- If you see anything that should not be there, select it and click the minus button.
- Now, look under Allow in the Background and disable any suspicious processes.
6. Encrypt your Mac
It might come as a surprise, but files on your Mac are easily readable to anyone who can gain unauthorized access. They will be able to read your documents, apps, messages, etc. To prevent this, you need to turn on Mac’s built-in encryption engine called FileVault.
- Go to System Settings > Privacy & Security.
- Turn On FileVault and wait for the encryption to finish. Done!
7. Use Activity Monitor and check Applications folder
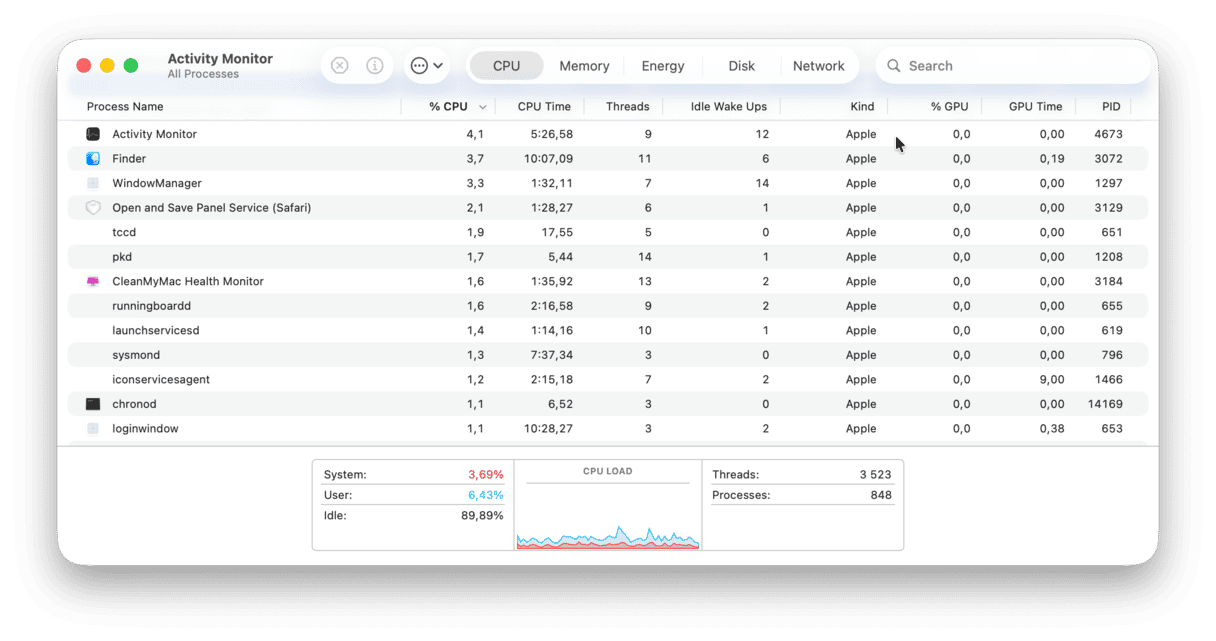
Application or process can stop your system from being responsive. When that is the case, Activity Monitor comes in handy. It allows you to track down troublesome apps or processes, check for the most significant energy consumers, and monitor CPU disk usage and network activity. You can also use it to detect malware.
Follow these steps to run Activity Monitor:
- Go to Applications > Utilities.
- Open Activity Monitor and click % CPU column to see processes and apps with high CPU use. Quit those by clicking the X button in the upper-left corner.
- Find any other suspicious process and simply google it to see if it’s malware.
- Also, check the Network tab — some malware communicates with its servers over the internet, and so there may be a spike in network usage.
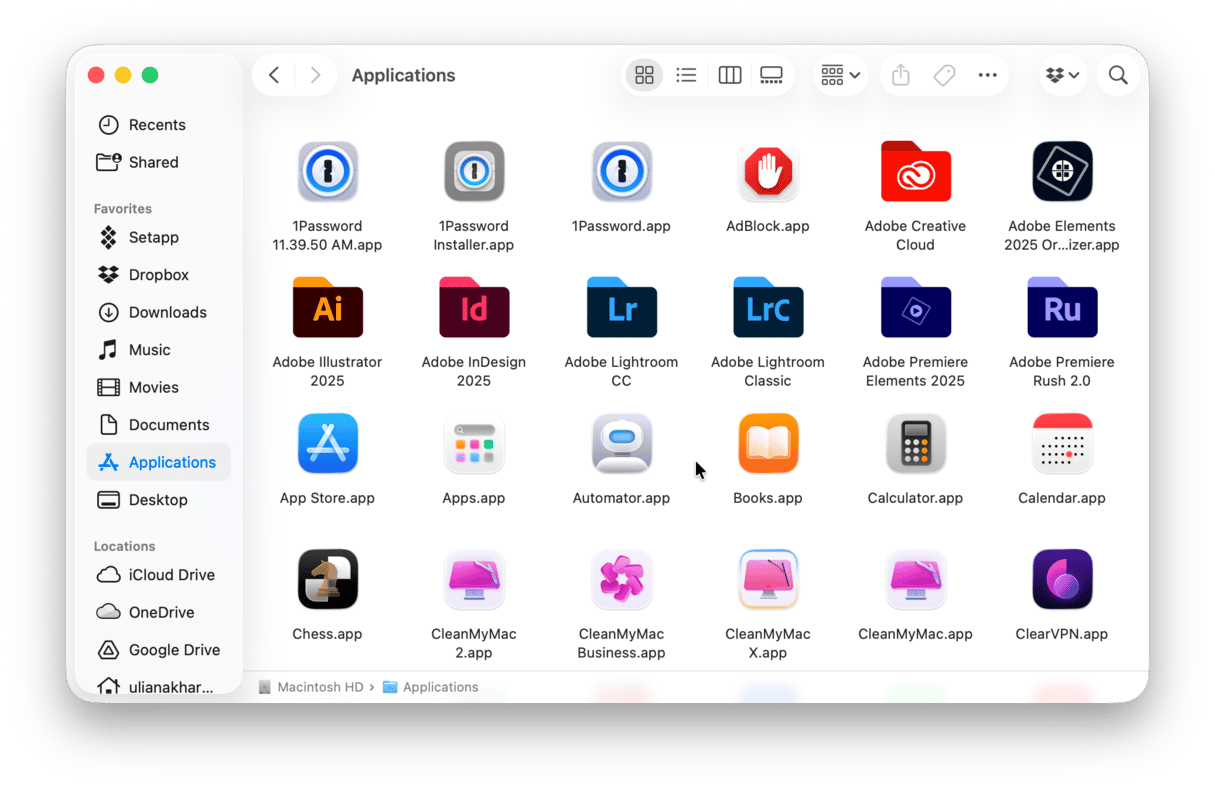
If you want to look for viruses hidden within apps, then try auditing your Applications folder:
- Go to the Applications folder.
- Find any suspicious app you don’t recognize.
- Check it with Google and delete it if necessary.
8. Clean up your drive
In general, cleaning up your computer will improve your day-to-day experience and ultimately mean you won’t have to buy a new one too soon, saving you money. Just look for anything that seems unknown, and do not forget to remove unneeded stuff, too.
- From the Finder, open the Applications folder (Cmd + Shift + A).
- Go through the list and uninstall any programs you’re no longer using.
- Then, check your Documents, Pictures, Movies, and Music folders for files you haven’t been using in a long time.
- Empty the Trash when you’re done.
Here is an ultimate tutorial on how to clean up your hard drive.
It’s easy to forget about keeping your files tidy (sort of like your apartment), so periodic cleanups are a must.
9. Check if your email has been compromised
You hear daily that millions of user emails have been leaked due to the careless policies of Facebook or other corporations. Could your account be one of those? The security expert Troy Hunt created a website that allows you to see if your email has been hacked.
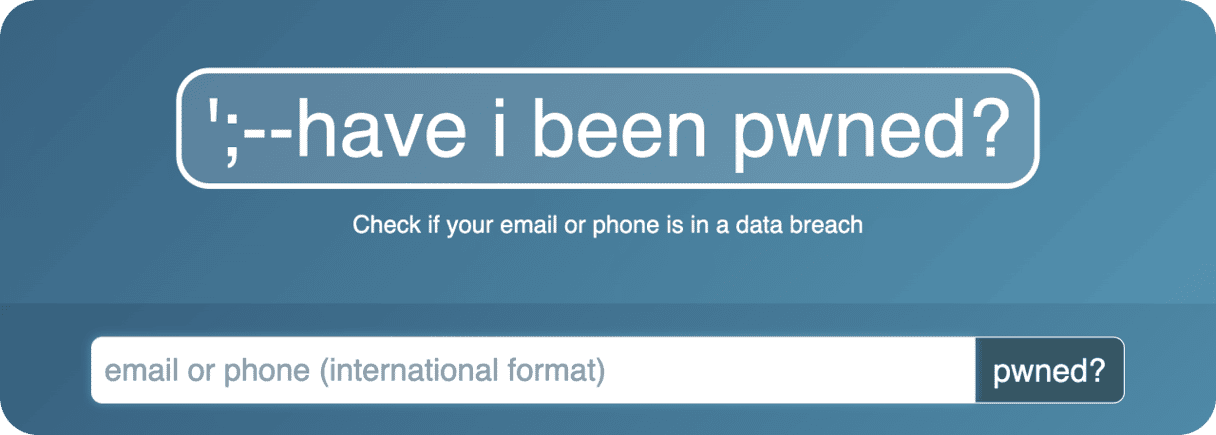
Check out this website https://haveibeenpwned.com/
You can even get a clue as to which company leaked your email.
10. Protect and optimize your Mac in one click
If you have the time and are willing to be methodical about the cleanups you need to do and how often you need to do them — ideally once a month — you can go through the above checklist every time.
However, why not save some time and make sure you do it the right way? The truth is there is no online virus scan macOS would be happy about, but there definitely is some pro software like CleanMyMac that can do it better. It’s fast, automatic, and vigilant — saving you time and doing a more thorough and complete job of taking care of your Mac than you can.
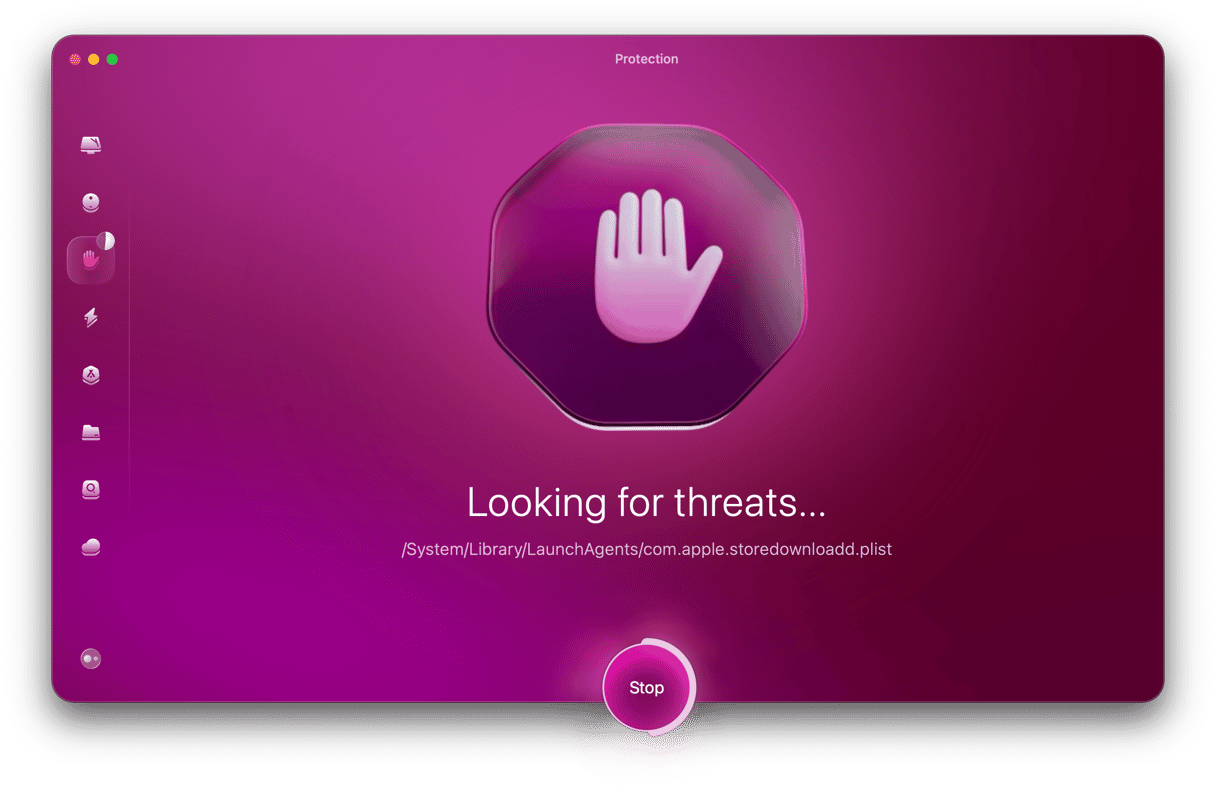
After you finish scanning for malware, as described earlier in the article, don’t forget to perform additional scans in Performance, Cleanup, My Clutter, and an overall Smart Care. In each case, CleanMyMac runs tasks necessary to protect and optimize your Mac. Repeat the process every week or so, and you are set.
CleanMyMac is notarized by Apple, which confirms its safe status for using on Mac computers.
You’ve just learned how to scan for malware on Mac and why it is better to avoid online malware scan tools advertised on the internet. Hopefully, this article will encourage you to study the built-in protection layers of your Mac. In case you did find malware on your Mac, that’s not the end of the world, as we’ve shown you some antidotes you can try. If you want to learn more, check out this handy guide on complete malware removal. And if none of the tips worked for you, contact Apple Support or an Apple-certified repair center for professional cleaning assistance.
How to prevent infecting Mac with malware
Once you’ve removed any nasty viruses and malicious software from your MacBook, it is essential to ensure that you prevent any other infection in the future. Here are a few easy things that can keep your Mac safe:
- Beware of fake updates. If you see a pop-up on the website that tells you that you need to update some piece of software, close that website. Such pop-ups are a common way to distribute malware. To find out if you really need to update your apps, go to App Store > Updates or open the app and choose Check for Updates from its main menu.
- Keep your software updated. In addition to apps, update your macOS from System Settings > General > Software. You can also use the Applications feature in CleanMyMac to update all your apps and macOS in one go.
- Back up your Mac. This one is not directly connected to preventing malware infection but to restoring your Mac to its pre-malware state. It is better to use Time Machine. This way, you can also restore any system files you may have accidentally deleted if you tried to remove anything suspicious manually or work documents affected by malware.
- Practice cyber hygiene. Use strong passwords and change them regularly — say, every three months. It is even better to install a password manager that will keep all your passwords safe and generate more reliable options. Besides, avoid visiting untrusted sources (like websites starting with http:// [without an ‘s’] or freeware websites). Also, do not click links in messages and emails unless you are 100% sure where they lead.
- Enable firewall. It helps reduce network security threats by controlling traffic. You can do it in System Settings > Network.
- Use VPN. If you have to connect to a Wi-Fi network in a public place, use VPN. Better, though, avoid such networks and use your personal hotspot whenever possible.
- Avoid fake tech support. If you get calls or messages from someone pretending to be a support specialist and telling you about problems with your Mac, ignore them and never provide remote access to your MacBook. It is another popular malware distribution technique. If you do need any tech assistance, contact legit Apple Support or a trusted repair center.
Stay tuned for more Mac tips!
FAQ
How long does a virus scan take?
It depends. When you scan Mac for malware, it can take between several minutes and a few hours based on the type of scan you choose, the tool you use, and the space your data, apps, and files occupy.
Does Mac have a built-in virus scanner?
Mac comes with XProtect, which is a built-in database of virus signatures scanning it for malware. It also comes with Gatekeeper — a utility checking whether the apps you are trying to install come from trusted developers. Although effective for protecting your Mac from some threats, they cannot detect the newest ones, so consider investing in a dedicated antimalware app.
What to do if you find malware on your Mac?
If you find malware on your Mac, you should get rid of it immediately by removing suspicious apps, hunting down their leftover files, and resetting browsers, to name just a few steps. But it is better to invest in a trusted cleaner app that can completely remove the virus.
Why won't some malware be removed completely?
It may happen if an infection reinstalls itself after removal, runs in memory, or infected firmware. Running your antimalware tool in safe mode may help, but in most severe cases, you will need to erase your drive to fully remove this type of threat.
Why won't my antivirus scan complete?
It may happen due to a number of reasons: low RAM, outdated software, conflicting apps (especially running another antimalware tool in the background). So, to resolve scanning performance issues, update your macOS and antivirus itself, restart your Mac, quit background apps, and try again. If you do not quit another malware removal tool if you have one, it may not only interrupt the scan but also result in false positive detections.
Why is my Mac still slow after removing malware?
It may not necessarily be slow to a lingering system threat; instead, it may be due to insufficient storage or memory and outdated operating system. To quickly fix it, reclaim some space, quit unneeded apps, and update your macOS and software. Do not forget to restart your Mac, too.
Can I scan Time Machine backups and external drives for malware?
Yes, you can. Typically, you will have to choose custom or advanced scan to do it. However, note that scanning Time Machine backups is not recommended unless absolutely necessary because they can be corrupted or even destroyed due to their fragile structure. In fact, it is better to restore your Mac from a Time Machine and only then scan it after restoration so that the backup remains intact.


