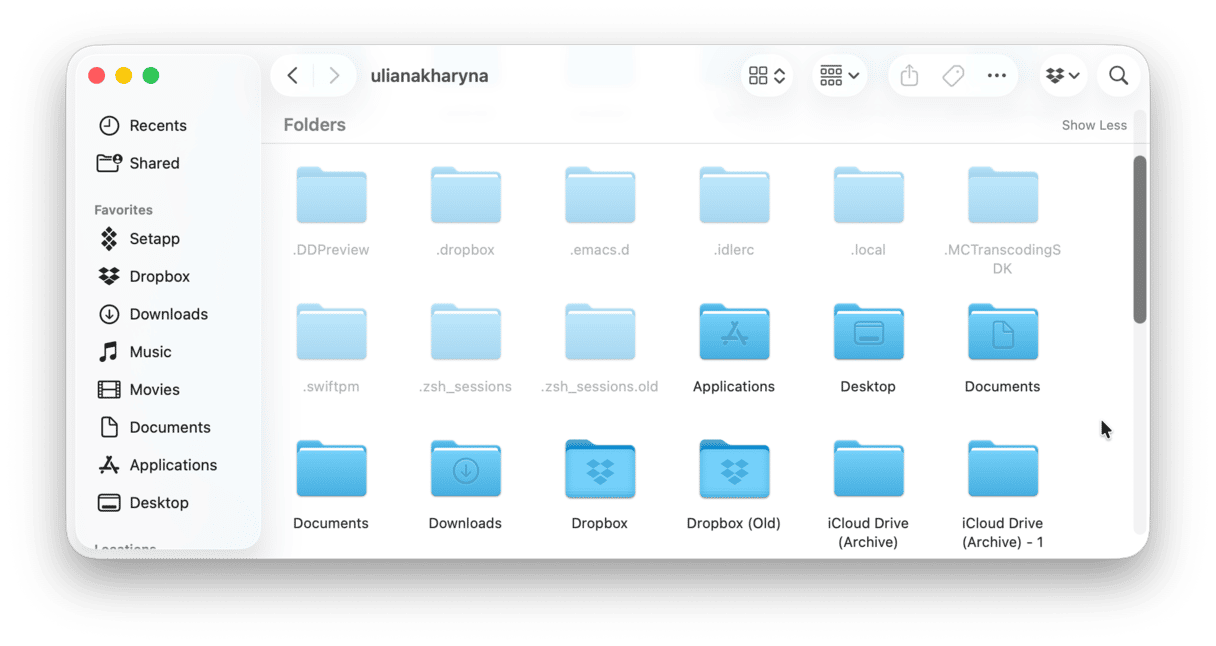
Most people buy Macs with either 256 or 512 GB of storage, so seeing the “Your disk is almost full” notification is inevitable. The quickest way to reclaim some of that space is to reveal numerous large files hidden deep down in your Mac’s memory. Keep reading and you’ll learn how to find large files on Mac and delete them safely.
How to find and delete large files on Mac
Over time, your Mac can quietly fill up with large files like movies, old archives, or system backups, causing storage issues. Keep reading to learn which files typically consume the most space and how to easily locate and remove them.
1. Find largest files with one click
If you have enough time, you can look through all data stored on your Mac using the methods we’ll describe below. In case you want to speed up the process, CleanMyMac can prove useful. Thanks to its Large & Old Files tool, you can look at the bigger picture of all large files found on your Mac and delete them altogether.
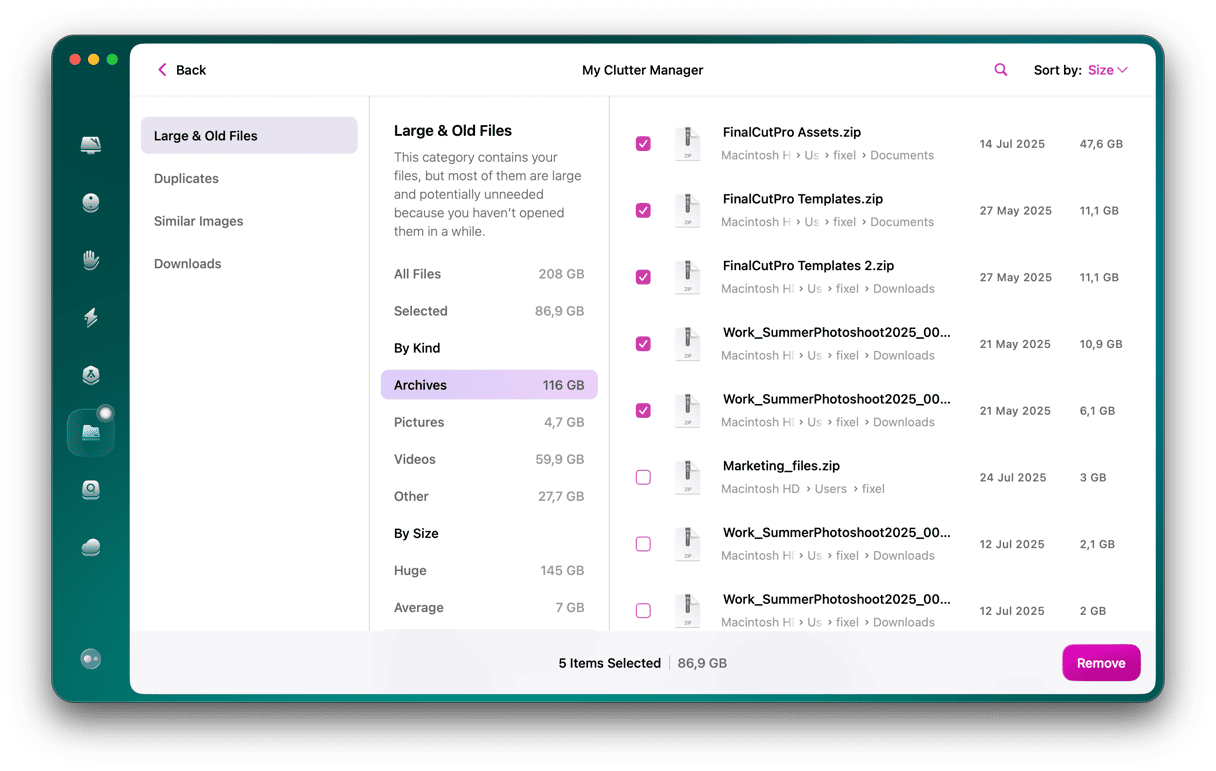
Here’s a short instruction on how to find and delete large files using CleanMyMac:
- Get a free trial of CleanMyMac and open the app once it’s installed.
- Click My Clutter and run a quick scan.
- Click Review All Files.
- In the Large & Old Files tab, CleanMyMac will show you files stored on your Mac. You can sort files based on their size, type, and date to see the large items that can be removed from your Mac.
- Select the checkboxes next to the files you want to delete and click Remove.
If you want a more interactive tool, CleanMyMac has one. It’s named Space Lens, and it can quickly build a storage map of your computer so that you can see the largest folders and select files for removal by using it.
2. Find large files using the Finder
Another way to search for large files is by using search filters in the Finder. It can help you locate the biggest files on your Mac. Here’s how to find large files using Finder:
- Open the Finder and click the search bar in the top right.
- Start typing any symbol. This will reveal the “+” button below the search bar.
- Click the “+” there.
- Click the far-left pop-up menu and choose Other…
- In the window that appears, select File Size.
- Click the second pop-up menu and select "is greater than."
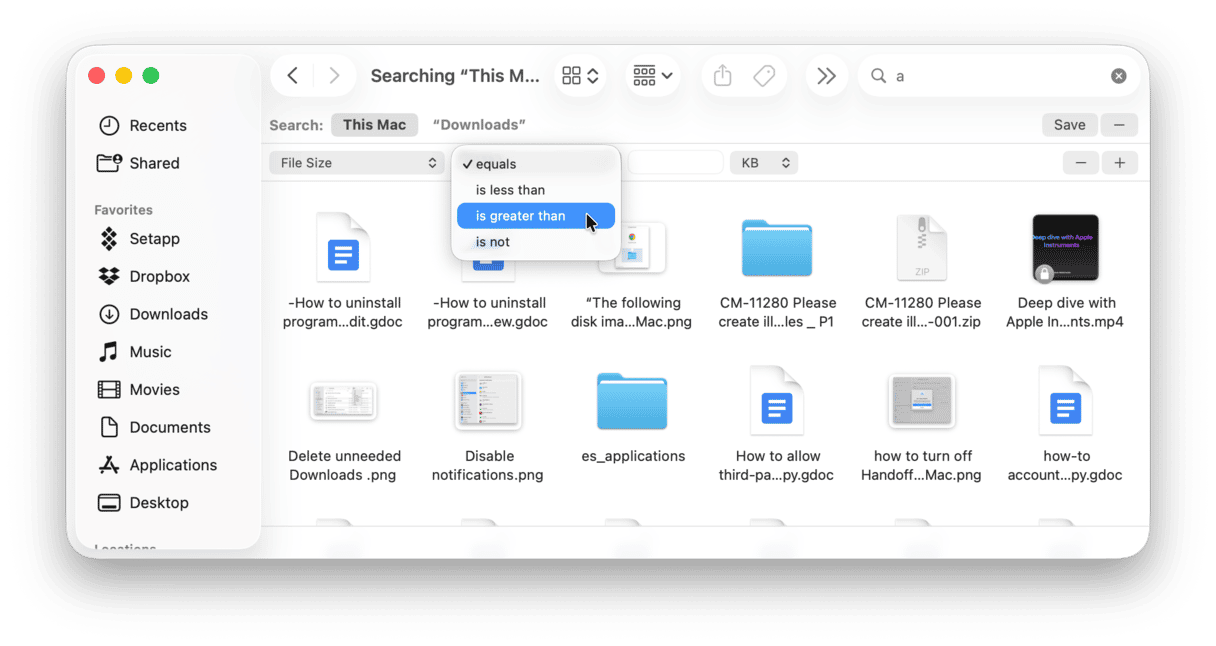
Here you can tell your Mac to search for large files exceeding a specified size. Pick 100 MB for a start. You’ll find some old movies and archives for sure.
Remember to select This Mac to get a full list of results. You will then see all files, the size of which is greater than you defined. Look through the found documents and remove unnecessary items that take up too much space on your Mac.
Although, this method has certain disadvantages. The Finder doesn’t give you a full picture of the large files stored on your Mac. It shows only single files, excluding large folders that comprise a lot of smaller items.
Continue reading to discover how to find the largest files on your Mac using other methods.
3. Create a Smart Folder
While in the Finder, you can create a Smart Folder. It is a great idea for those who want to look for a certain type of files (large files, in this case) from time to time. The best part? It updates automatically, so you can keep track of everything macOS sends to that folder..
Here’s how to create a Smart Folder on Mac:
- Open a new Finder and click File > New Smart Folder in the menu bar.
- Click + and add all the needed filters.
- Click Save.
- If you’ve added it to the sidebar, you’ll be able to quickly access it.
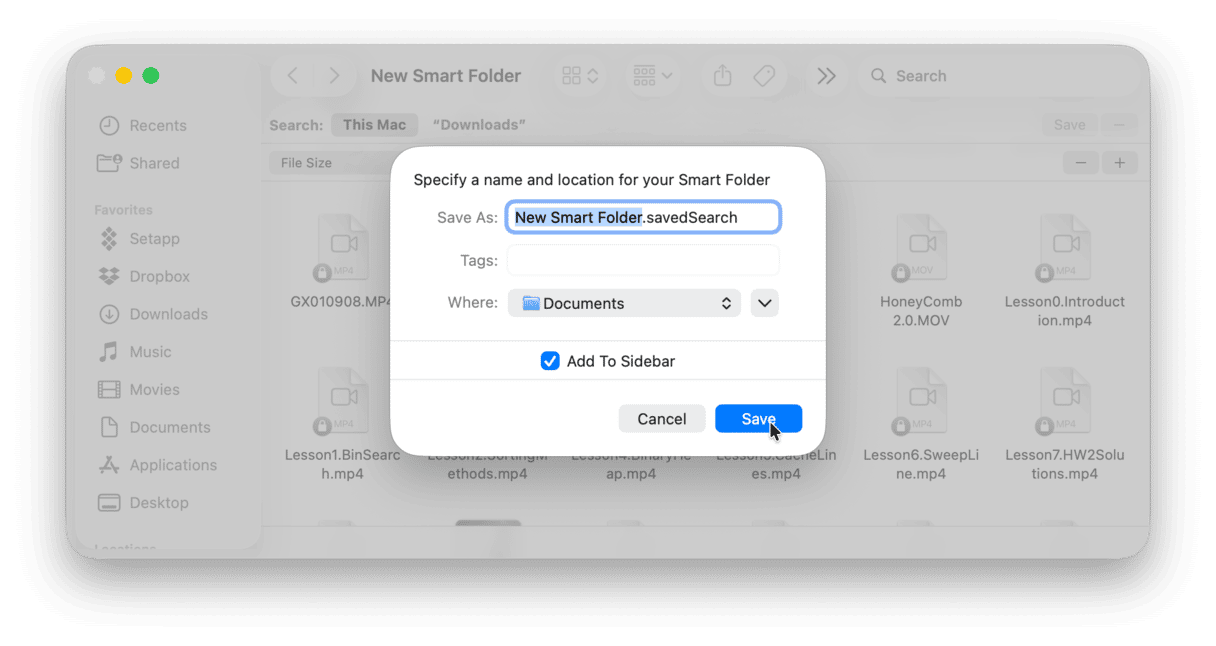
When you no longer need it, send it to the Trash from the location in which it is stored.
4. Find large files using the Storage Manager
Another solution is to use the built-in Storage Manager.
- Open the Apple menu.
- Choose About This Mac > More Info > Storage Settings.
- Here you can see how much free storage you have and view the amount of space used by different categories.
- Browse the categories you see to find large files and delete those you don’t need.
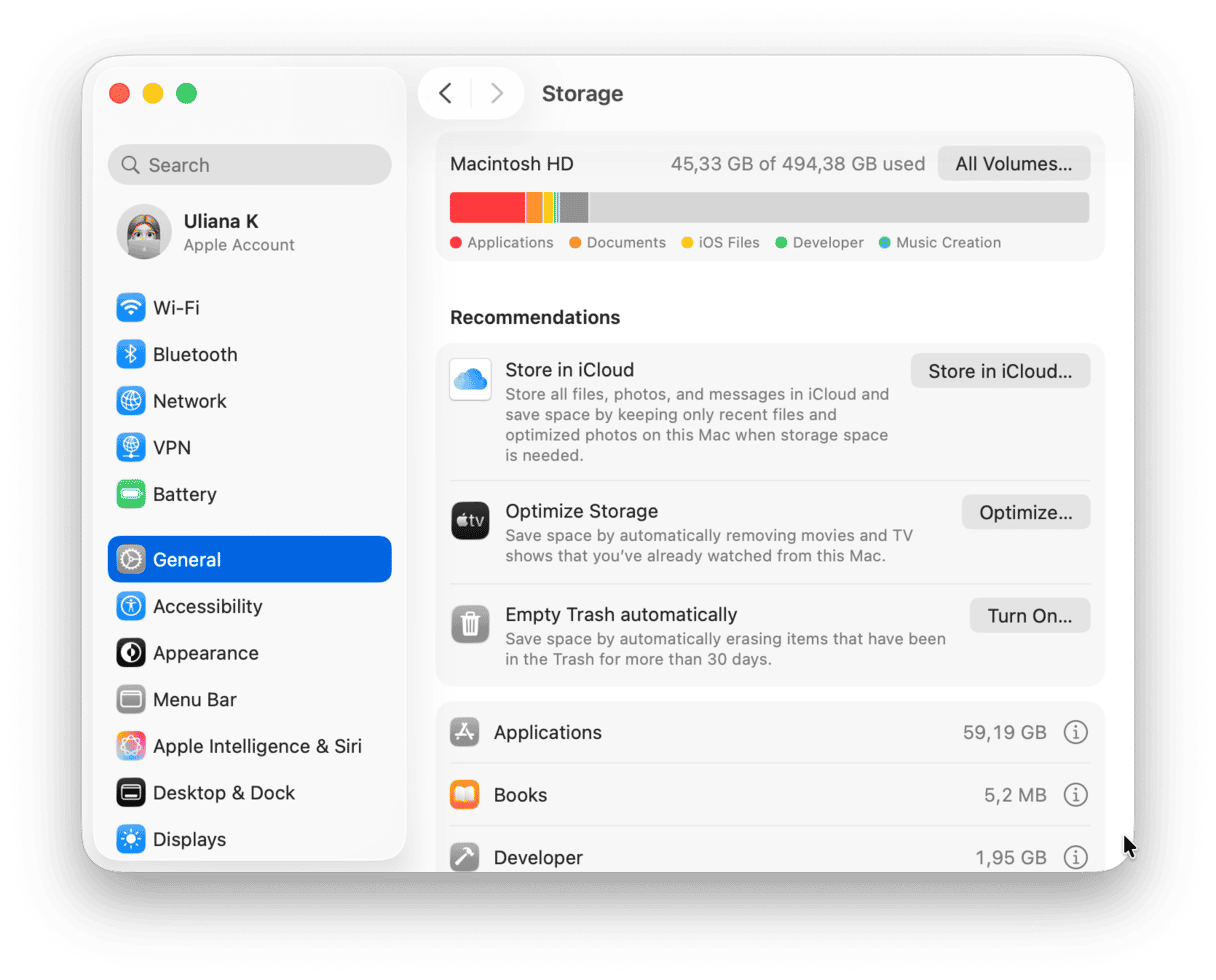
Click any file to see its path at the bottom of the window. The Storage Manager also shows the exact size of each document as well as the date you opened it last.
Here are a few things to pay specific attention to:
- iOS Files — old iOS device backups (e.g., iPhone backups)
- Mail and Messages — attachments
- Music Creation — GarageBand files and libraries from other similar apps
- Applications — you can sort them by size to reveal the largest ones
- Photos — built-in tools allow you to optimize the Photos library directly from System Settings
- System Data — it is listed at the bottom of the window, and you cannot remove these files from the Storage tab, but you can reduce it by removing downloads, caches, and system junk (learn more here)
Apple provides helpful recommendations at the top left to help you optimize your storage. Here you can choose to store all your files in iCloud, remove large files like movies and TV shows, turn on Empty Trash Automatically, and reduce clutter.
This method is great for those who don’t have a lot of large files on their Mac. But if you tend to keep many files on your computer, you may consider using Storage Manager tiresome.
5. Find biggest files via Terminal
Another way to locate large files on your Mac is to use Terminal. Although some users find commands complicated, if you use them correctly, you can find anything on your Mac. So, you can locate the biggest files on your device just like that:
- Go to Utilities and open Terminal.
- Execute find command. If you want to locate all files bigger than 1G under the home directory, for example, type
find ~/ -type f -size +1Gand press Return. - To delete the files, enter
find ~ -type f -name \*.avi -size +2G -exec rm {}and press Return. This command will remove all AVI files that are greater than 2 GB under the home directory.
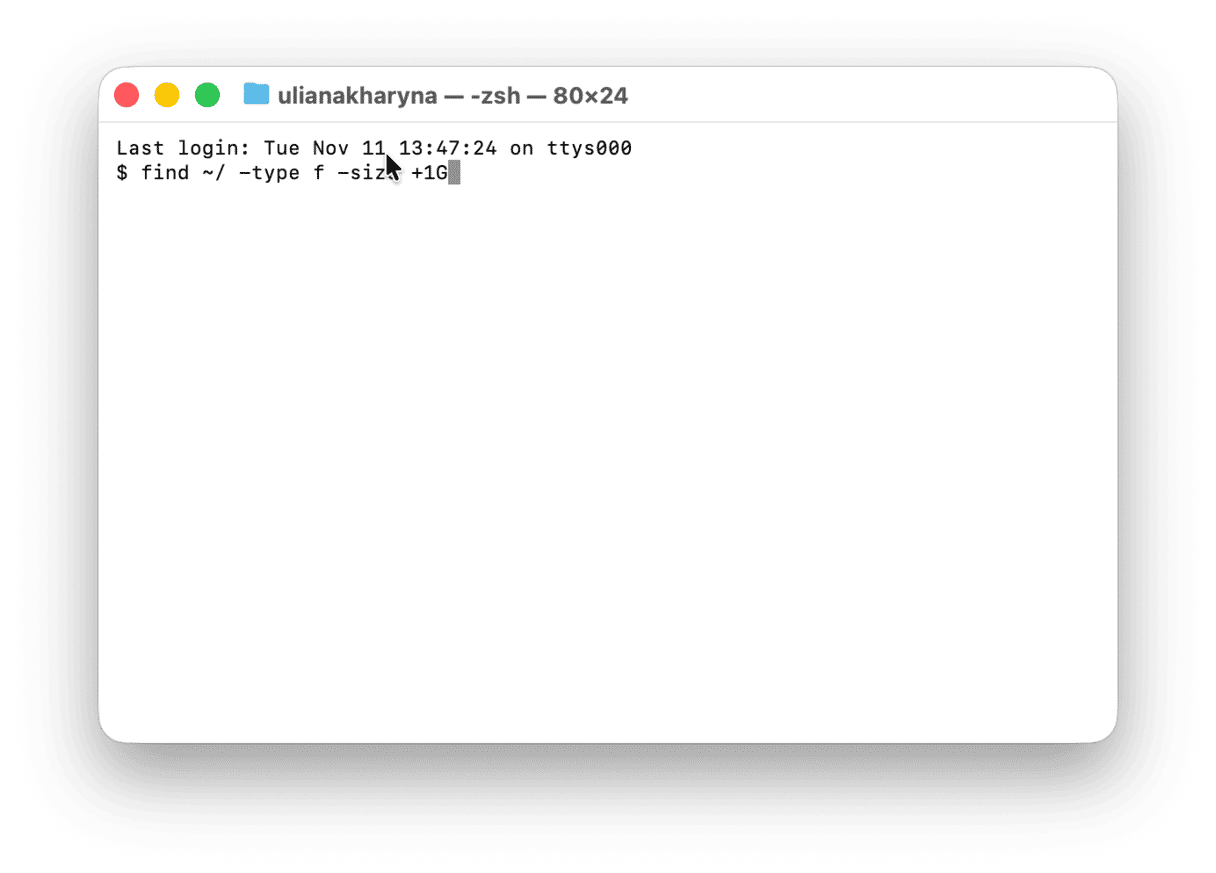
Using this command, you can also limit your search, setting size filters. Then your command will look like this: find ~/-size +30M -size +100M. This command will locate all files that are greater than 30MB but less than 100 MB.
There is an alternative set of commands you can run in Terminal:
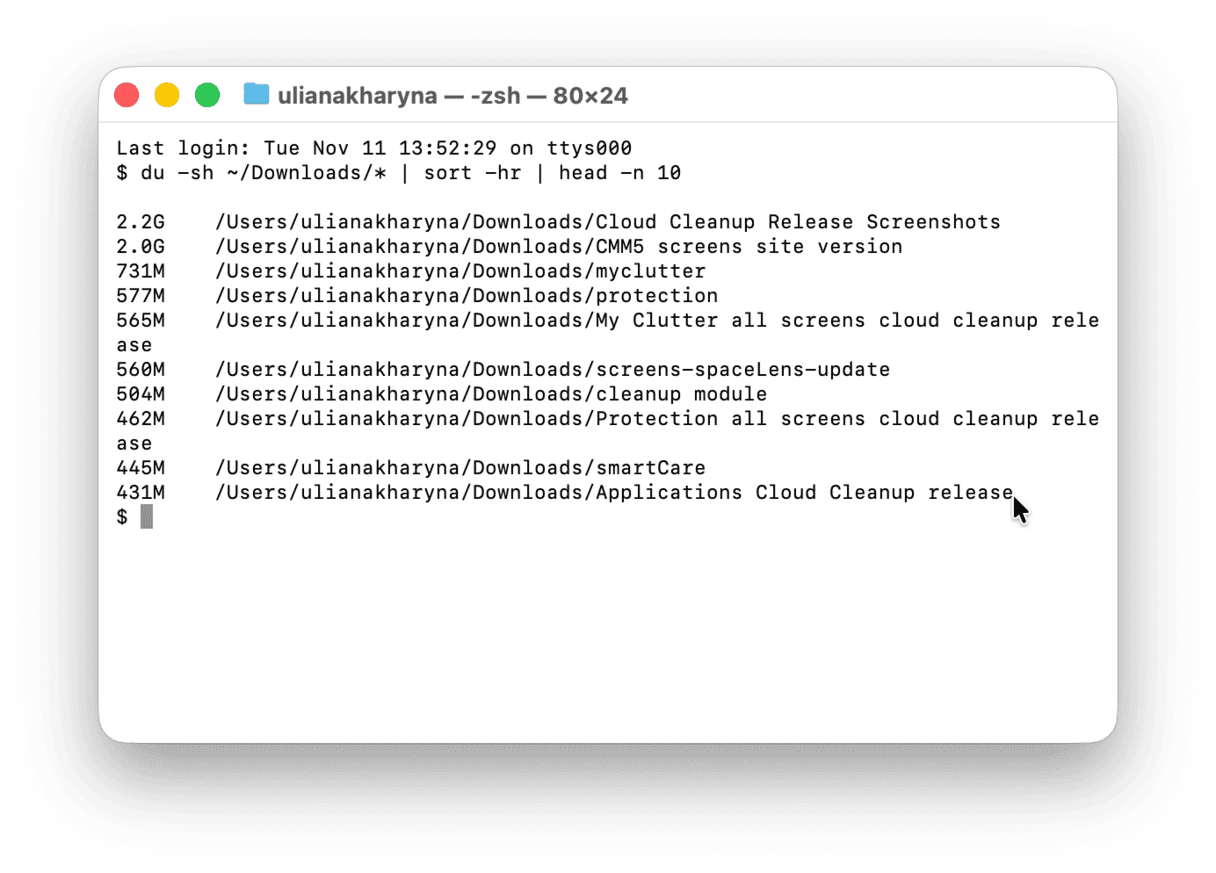
du -sh /* | sort -hr | head -n 10— this command will list the largest folders in your Home folderfind ~ -type f -exec du -h {} + 2>/dev/null | sort -hr | head -n 10— with this one, you can reveal 10 largest files in your Home folder (replace 10 with any other number to reveal the needed quantity of the largest files)du -sh ~/Downloads/* | sort -hr | head -n 10— use this command to scan the Downloads folder and list 10 largest items (you can replace ~/Downloads/* with the location of any other folder on your Mac)rm— run this command to remove any file/folder you no longer need; just typermin Terminals and then drag an item from the Finder window onto Terminal window
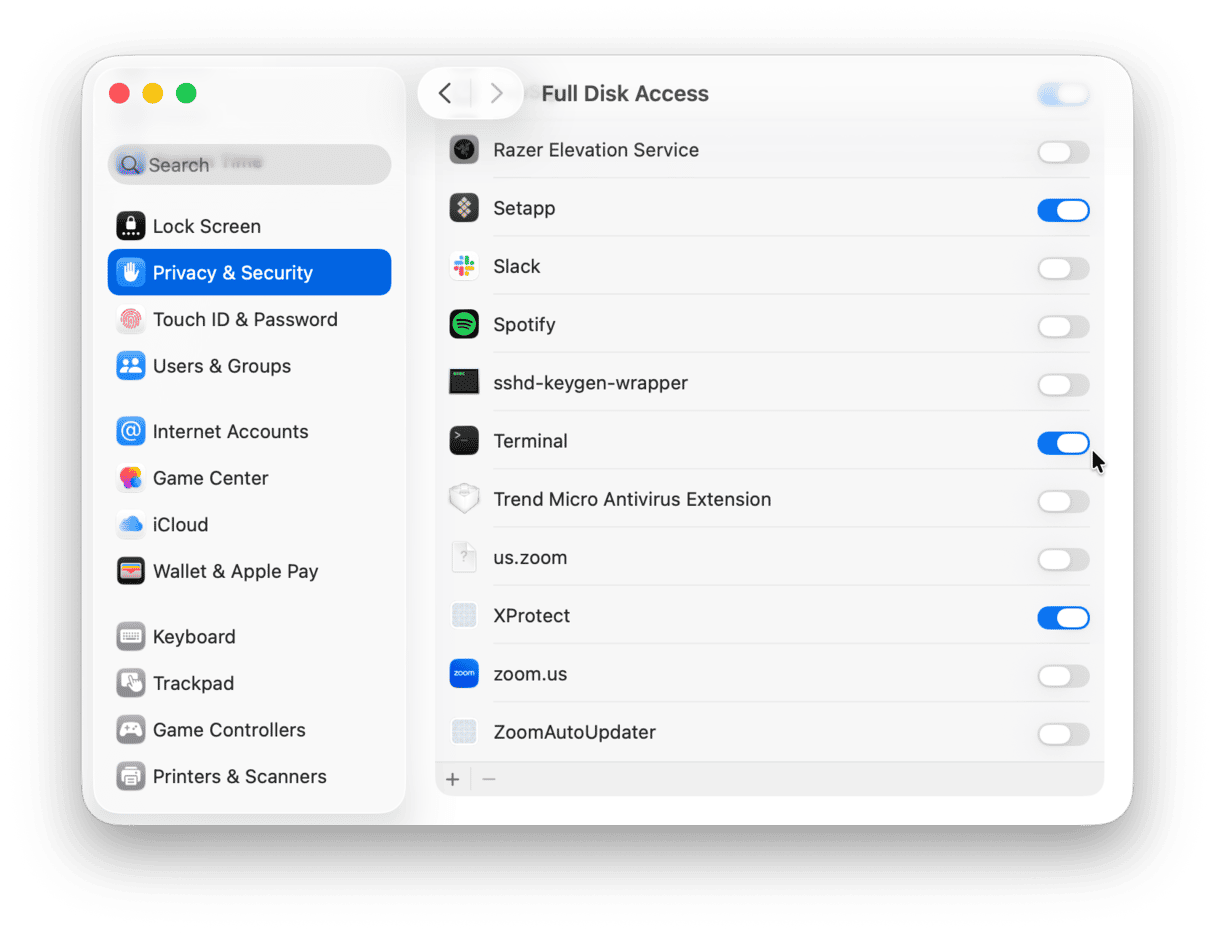
If you get the “Operation not permitted” message in Terminal, try prefixing your command with sudo — type sudo before the command you want to run. You will have to enter your password to run it.
Alternatively, grant Terminal full disk access in System Settings > Privacy & Security > Full Disk Access. If it is not listed there, click +, find and select it, and click Open.
So, these were some simple methods of how to view all files on Mac and delete them. You can either use Finder, Storage Manager, or Terminal to find the biggest files on your Mac and clean up your computer of them. If you don’t want to look for them manually, consider using a Mac cleaner app. You can download CleanMyMac mentioned in this article or try another trusted software like one of the apps reviewed in this article.
Frequently asked questions
How much space do I need to keep free?
It is recommended to have at least 15% of storage free. If the storage reaches 85-90% capacity, your Mac will most likely become slow and you will face all kinds of issues like apps crashing, inability to update or reinstall macOS, and system freezing.
Do I need to defrag my Mac hard drive?
No, you do not need to do it. macOS handles defragmentation automatically whenever it is needed.
What's the difference between free storage and available storage on Mac?
Available storage is the storage capacity your Mac is shipped with (e.g., 256 GB), while free storage is that which is not occupied by macOS and files.
Do I need to boot into safe mode to delete large files?
No, you should be able to remove large files in a normal boot. However, if your Mac won't boot normally, you might need to boot into safe mode or recovery mode to troubleshoot it. Safe mode will load only important processes, and it should allow you to delete files. As for recovery mode, you can run First Aid using Disk Utility to repair issues with the startup disk or use Terminal to clean up the system.
Can I set thresholds for large file alerts on Mac?
No, macOS does not come with built-in tools that allow you to do that. Nevertheless, you can create a smart folder and review files there from time to time to delete the largest ones you no longer need.
How to prevent large files from accumulating on Mac in the future?
The easiest way to stop large files from piling up is to delete them once you realize you do not need them. Since it may be a nuisance, we recommend developing a habit of cleaning up your MacBook, say, once a month. In this way, you will always have enough space and prevent the accumulation of clutter.


