Macs have a reputation of reliable computers, and for a good reason. Most of the time, they work well and never let their user down. However, in some cases, Mac may restart unexpectedly or tell you that you should restart for no obvious reason. If that happens to your Mac, it may have experienced a Kernel Panic error. In this article, we’ll show you how to deal with this issue. So, let’s go!
What is Kernel Panic?
Kernel Panic, though sounding scary, is simply an occurrence when your Mac keeps restarting for no obvious reason. Your Mac’s screen goes black, giving you various warning messages like “You need to restart your computer.” Note that the warning message’s presence distinguishes Kernel Panic from usual Mac restarts and app crashes. In other words, Kernel Panic is just a Mac version of the “blue screen of death” on Windows, but luckily, it can be fixed. So, let’s face the issue head-on.
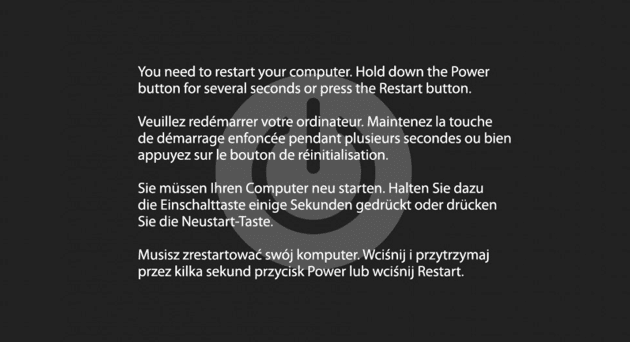
What happens is your Mac encounters a critical error that it can’t handle, so it automatically shuts down. If it rarely happens enough (like once in a few weeks), that shouldn’t be a trouble. A basic restart should help it. It’s worse when Kernel Panic happens regularly, especially if your Mac crashes right on startup. It might be a sign of damaged hardware, which isn’t funny, given your Mac is almost unusable by that time.
What’s causing Kernel Panic on Mac
There are a million reasons. One user reported he had simply installed the iTunes folder on a different drive than a system one. But in 90% of cases, software conflicts are to blame. Here’s a list of the main suspects:
- Not enough RAM and a lack of hard drive space
- Outdated drivers or plugins
- Broken disk permissions
- Conflicting apps
- Hardware issues and incompatible peripherals
The first step should be to isolate hardware issues from software-related ones. It may be a combination of both, like when your RAM has turned off while two apps are conflicting for memory. Anyway, there’s a path laid out by great Mac experts which will now follow immediately.
How to fix Kernel Panic [software solutions]
1. Check crash reports
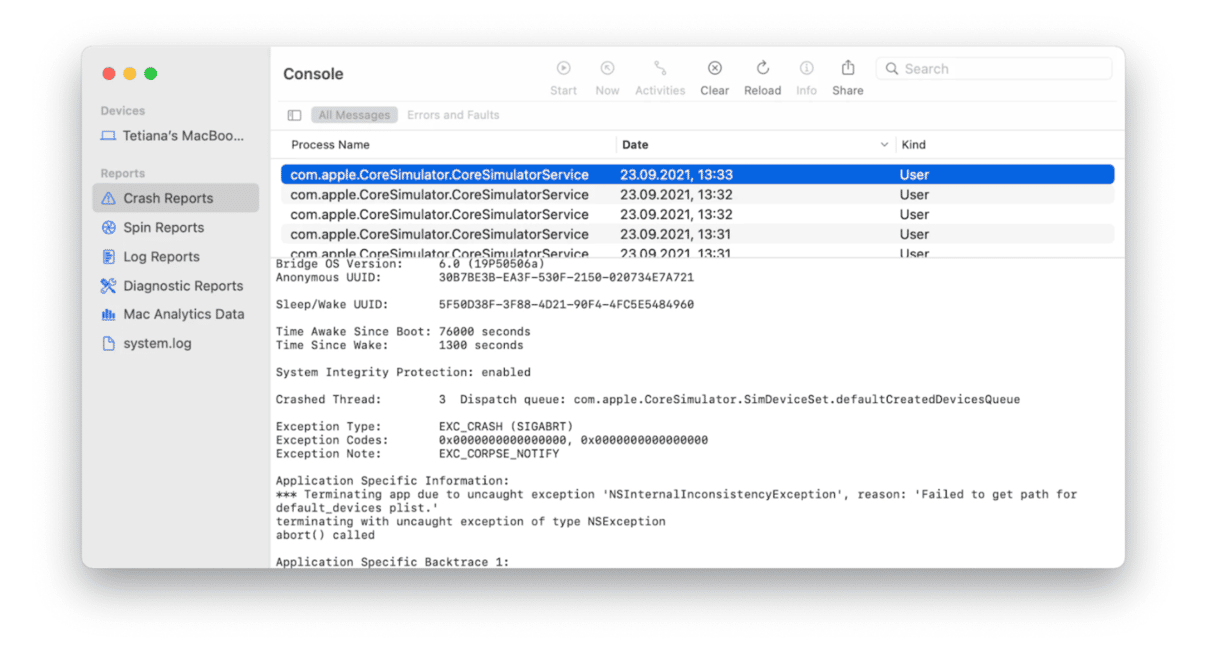
The best thing about macOS is that it keeps account of everything going on in the background, meaning that it will also have a record of a Kernel Panic. Each such incident will be stored in crash reports, and checking them is no difficult task.
Here’s how to check crash reports on Mac:
- From the Finder, go to Applications and open Console.
- Click Crash Reports from the sidebar.
- Look for “terminated due to” or “reason: failed because” to understand what happened.
2. Update all your software
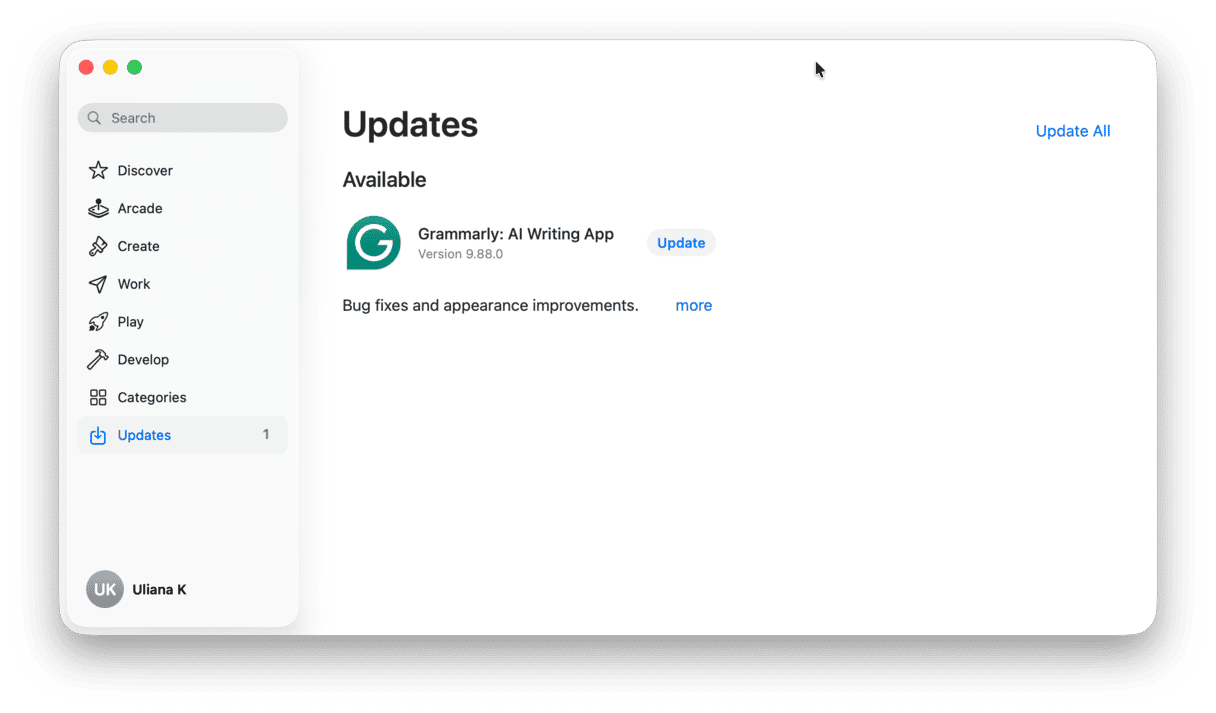
Start by opening the App Store app through Spotlight or the Apple menu. Go to the App Store and click Updates to see the latest updates available for your Mac. If some tools haven’t been updated for long, it may well be the root of the Kernel Panic problem.
3. Find which apps are corrupted
If your Mac keeps crashing on a particular app, you know which one is to blame. That’s what you should do in this case:
- Try updating the problem app and then reboot your computer.
- If there are no updates or you cannot run them, delete and reinstall the entire app.
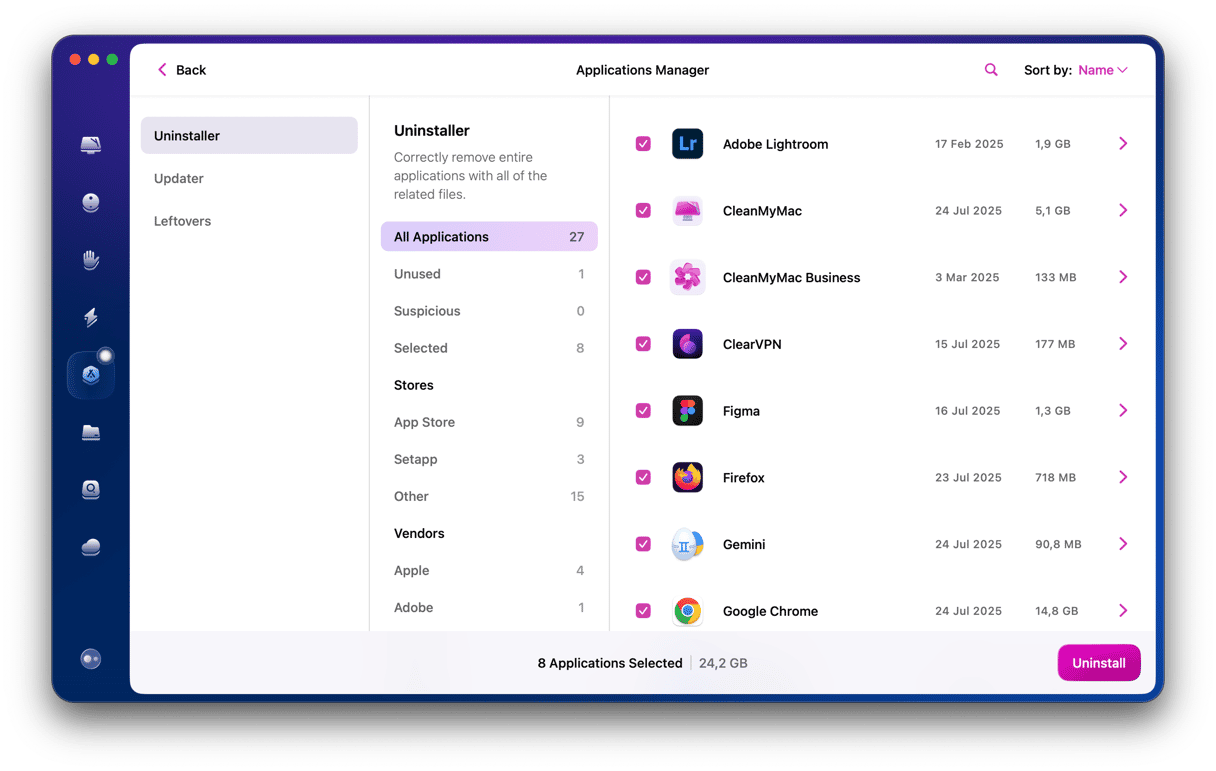
Alternatively, use CleanMyMac’s Uninstaller module, which lets you sort all your apps by vendor or store, see the unused apps, and remove multiple programs at once. To delete software with CleanMymac:
- Start your free CleanMyMac trial.
- Install and open the app.
- Go to the sidebar, click on the Applications module, and hit Scan.
- Wait for a few minutes for the scan to complete, and go to Manage My Applications.
- You’ll see the Uninstaller tool, where you can select the boxes next to the apps you want to remove.
- Click Uninstall to delete them.
If Kernel Panic occurs on random apps, you should look into deep-seated system drivers, specifically the ones that came with peripherals, like video cards, adapters, etc. Make sure you updated everything that deals with graphics, file systems, or networking. And, if it doesn’t help, here are more tricks.
4. Ensure you have enough free space on the drive
Apple recommends reserving at least 20% of free space on your startup drive. Your Mac needs enough room to breathe freely. But when there’s a lack of physical or virtual memory, your Mac’s performance drags down, and Kernel Panic is quite common.
- Choose Apple menu > About This Mac > More Info.
- Go to Storage Settings.
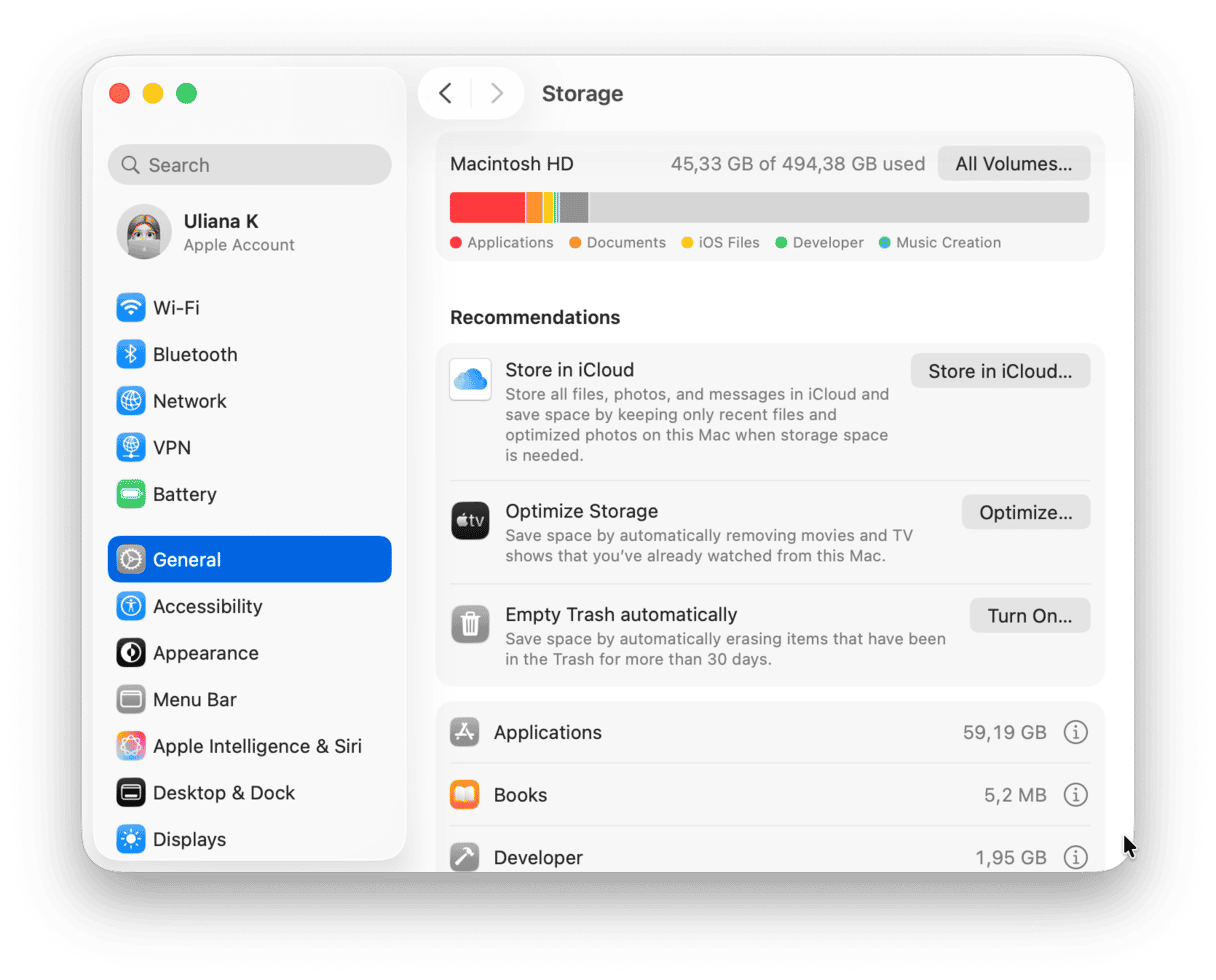
If your main volume is approaching full capacity, then you ought to make more room for it. The obvious solution would be to delete unused apps or whatever old junk is stored there. You can check Recommendations under the colored bar and try to free up some space using the built-in Apple tools.
5. Open Disk Utility
Kernel Panic may happen due to corrupted files or issues with external devices. Fortunately, Apple partially took care of this with their built-in Disk Utility. Opening Disk Utility’s First Aid tool would detect any disk errors, and if it can solve them, you’re lucky again.
First, boot into recovery mode.
For Intel-based Mac:
- Go to Apple menu > Restart.
- Immediately press and hold Command+R.
- Don’t release the keys until you hear Mac’s startup sound or until the Apple logo appears.
For Mac with Apple silicon:
- When turning on your Mac, press and hold the Power button.
- Keep it pressed until you see startup options.
- Click the Gears icon (Options) and hit Continue.
Now, go to Disk Utility and click First Aid > Run.
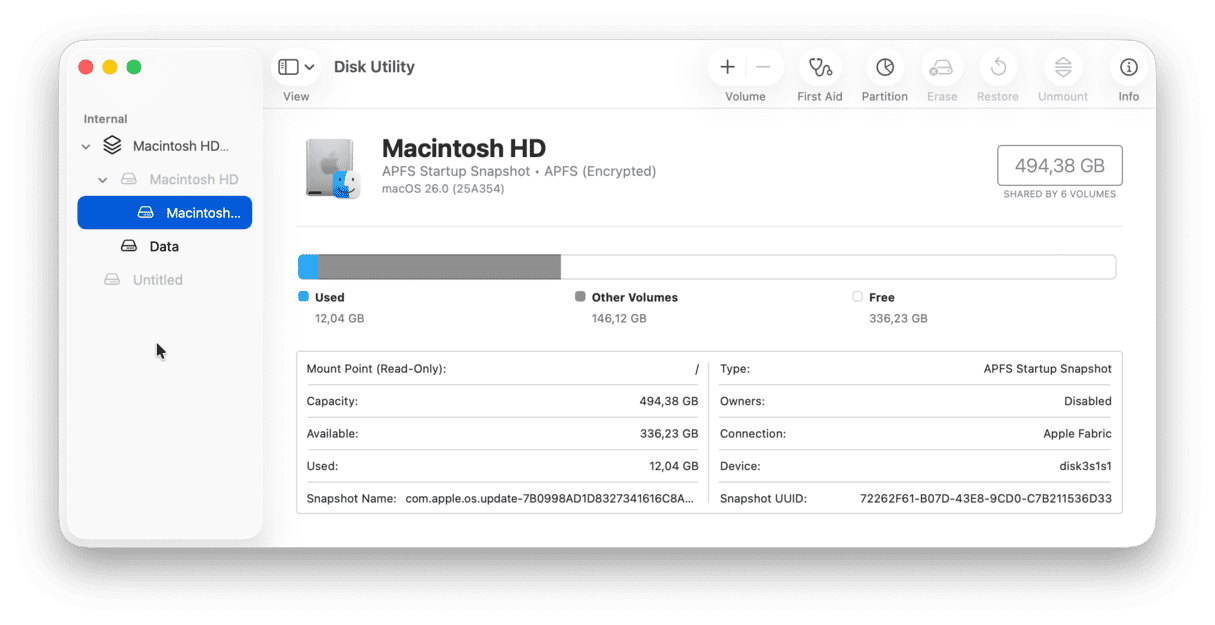
Follow the on-screen commands and expect to see something like “Operation successful” in the report. In the worst-case scenario, you might get “The underlying task reported failure,” which suggests a disk repair failed. At this point, you should start thinking about saving your data and reformatting the drive.
6. Disable startup items
There is a good chance login items are the reason your Mac randomly restarts. With dozens of apps launching on startup, they could be too many for your processor to handle. To troubleshoot Kernel Panic, now your tactics would be to disable these programs and check how your Mac behaves. To disable login items, follow this path:
- Go to System Settings > General > Login Items.
- Choose a startup item you want to disable and then click the “–” symbol.
- Restart your Mac to enable the changes.
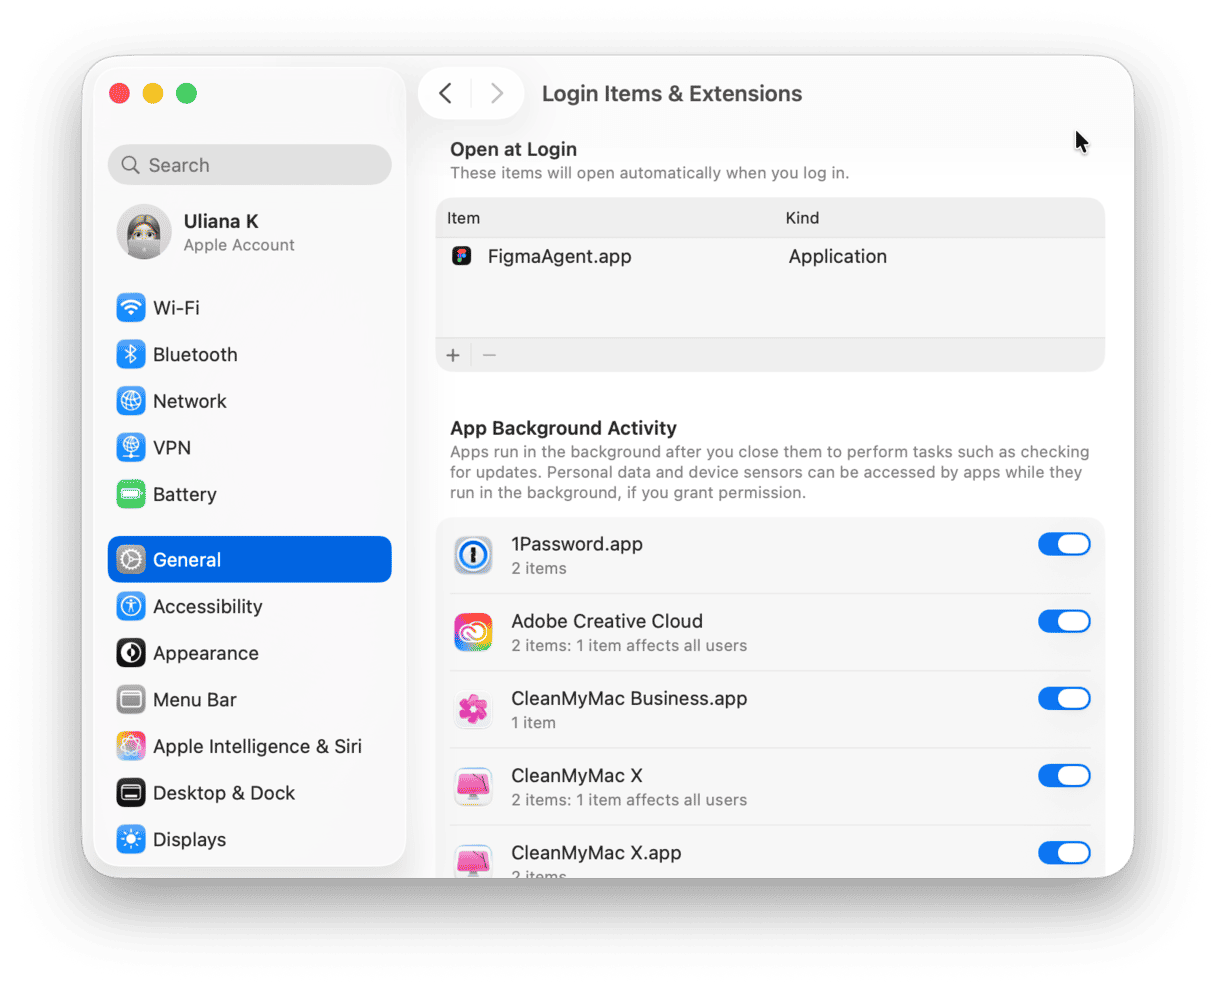
Now, it’s time to put on your detective’s hat as we’ll be investigating which login item has been causing Kernel Panic. This time, we’ll go in the opposite direction and will be turning on the login items — one at a time. If your Mac crashes after the particular login app is enabled, congrats, you’ve hit right on the nail. Note that you’ll have to reboot after each step, but finding the root of the problem is intriguing, right?
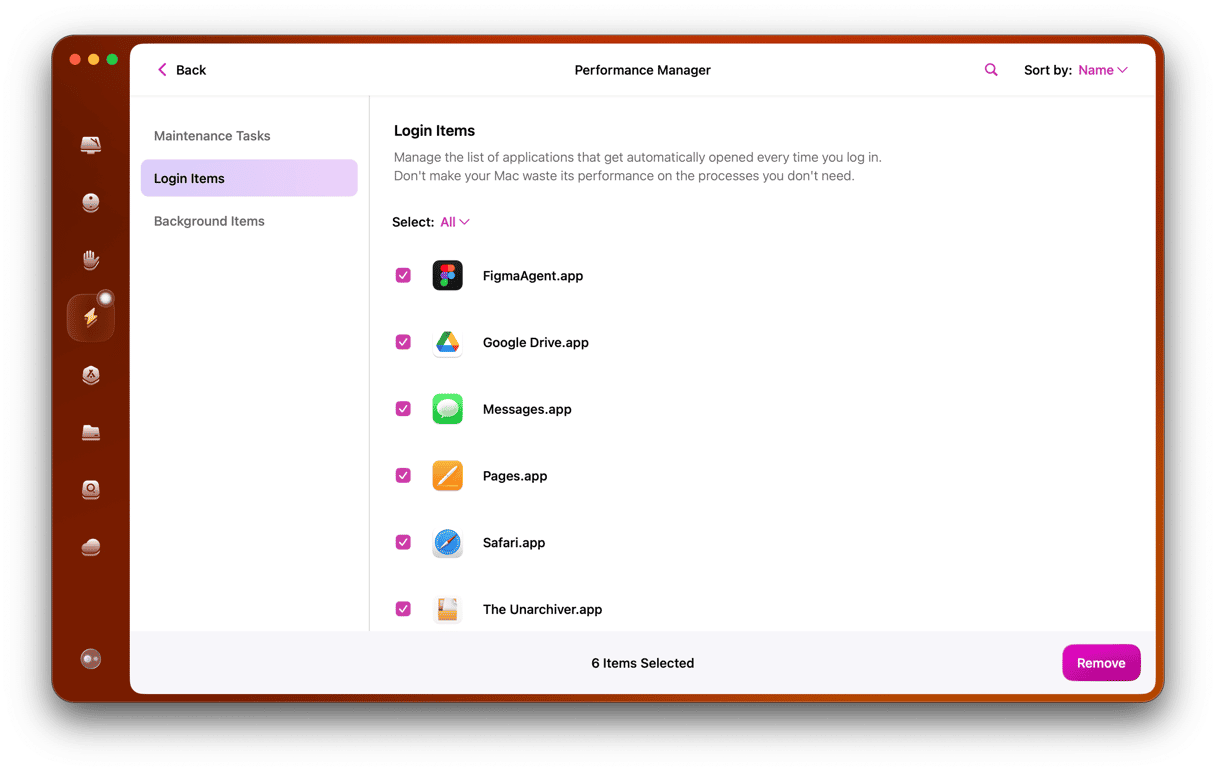
By the way, if you’re uncomfortable messing with system settings, there’s an easy alternative. CleanMyMac, the app we mentioned above, has many tools for deep-level Mac maintenance. It also has a feature to disable/enable Login Items that may affect your Mac performance.
- Get your free CleanMyMac trial.
- Open it.
- Go to the Performance module in the sidebar and click on Scan.
- Select View All Tasks and locate Login Items.
Disable startup apps one by one. Done!
How to fix Kernel Panic [hardware solutions]
All the connected hardware could be responsible for the crash fever on your Mac — it happens quite often, actually. So, let’s walk through the hardware solutions to Kernel Panics. And be prepared to restart your Mac a few more times when you follow the next tips.
1. Turn off peripheral devices
Just as we did with startup items, we have to figure out which exact device is conflicting with your system. Now, you need to plug off everything connected to your Mac: printers, external video cards, network adapters, etc. Restart your Mac and connect one device at a time — if nothing happens, restart again with the new device plugged in. This trial-and-repeat approach should isolate the reason for Kernel Panic. Found which peripheral is corrupted? Well done, now reinstall it and update the software that came with it.
2. Run Apple Diagnostics
Depending on your OS, this built-in tool may be called Apple Diagnostics or Apple Hardware Test. These advanced Apple utilities shouldn’t be reserved for geeks only — in fact, they really save lives (okay, Macs).
For Intel-based Macs:
- Choose Apple menu > Restart.
- Press and hold the D key while you restart the computer.
_1687513605.png)
For Macs with Apple silicon:
- Restart your Mac and continue to press and hold the power button as your Mac starts up.
- Release the button when startup options appear.
- Press Command (⌘)-D on your keyboard.
Apple Diagnostics would launch automatically and test your hardware condition. If any problems are detected, you’ll get a detailed report which is now your official invitation to pay a visit to Apple Support.
Hope these tricks helped you eliminate Kernel Panic. Mac should maintain its reputation as the best computer in the world, so let’s keep it healthy. Share this article if you liked it, and thanks for reading.


