System Settings — System Preferences in older macOS versions — is a crucial part of macOS. It’s where you control everything from your desktop background and screensaver to how applications access your webcam and how your Mac connects to the outside world. Most of us are accustomed to using it regularly and to it just working when we need it. But what if it doesn’t? What do you do if System Settings is not responding? Read on to find out. We’ll also show you how to force quit System Settings.
What are System Settings?
System Settings — formerly System Preferences — app is where you control how your Mac works and customize it to suit you. From there, you can manage screen resolution and audio devices, connect to devices using Bluetooth, and manage Notifications. That’s not even scratching the surface of what System Settings can do, of course, which is why we Mac users rely on it so heavily.
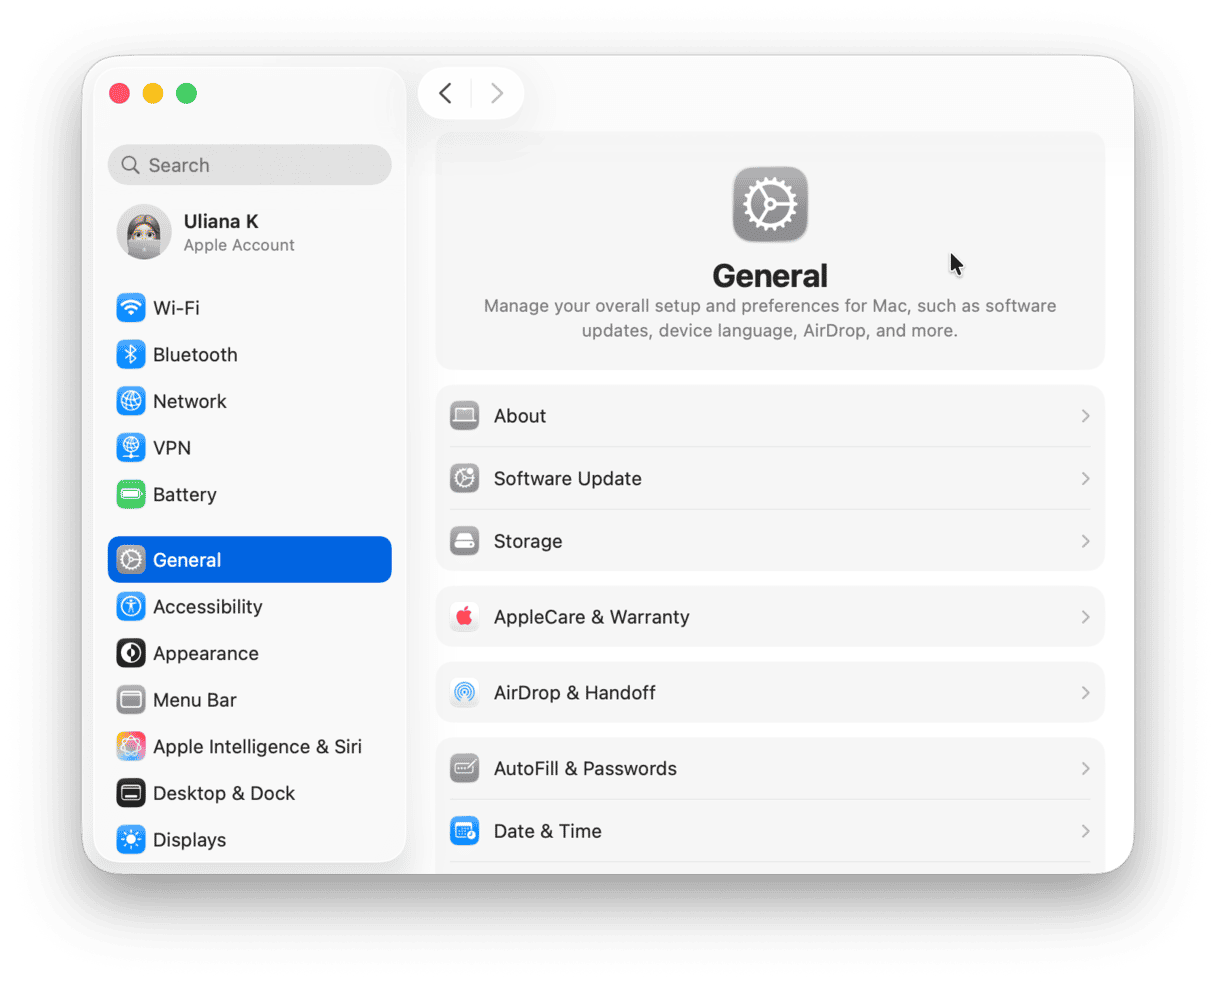
System Settings is organized as a list of options, each represented by an icon and providing multiple settings and macOS’s standard panes. Some applications and extensions install their own panes to allow you to manage their preferences.
When things are working as they should, you just click an option to access the settings, make your selection, and then quit System Settings. Things don’t always work as they should, though.
Why is System Preferences not responding?
There are several possible reasons why System Settings may not be responding. Here are a few of the most common ones:
- Hard disk error
- Corrupted plist files
- macOS-related issues
Below, we’ll show you what to do about this glitch.
What to do if you see ‘System Settings is busy and can’t be closed’ or a similar message
1. Force quit System Settings
The first thing is to force quit it and relaunch:
- Right-click or Control-click System Settings item in the Dock, press and hold the Option key, and choose Quit/Force Quit; or
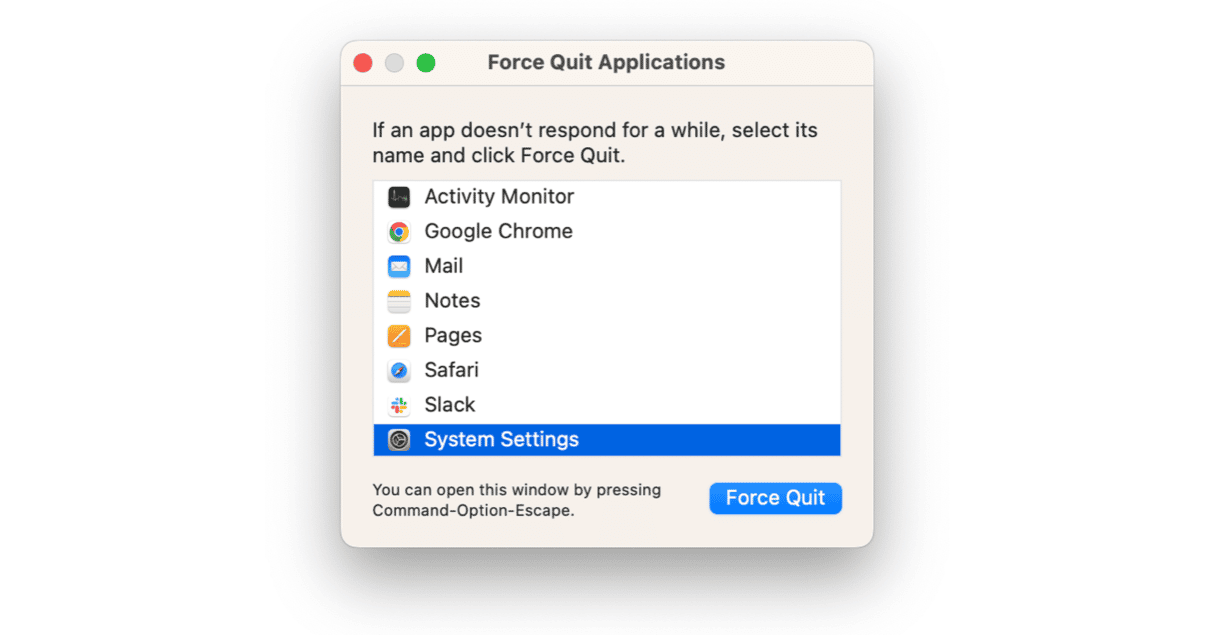
- Press Command + Option + Escape, choose System Settings in the window, and click Force Quit.
2. Restart your Mac in safe mode
If System Settings still doesn’t work correctly, restart your Mac. If that doesn’t solve the problem, restart your Mac in safe mode and try rerunning System Settings. Safe mode boots macOS with only the bare minimum of extensions necessary to run. It also runs some repairs and maintenance routines.
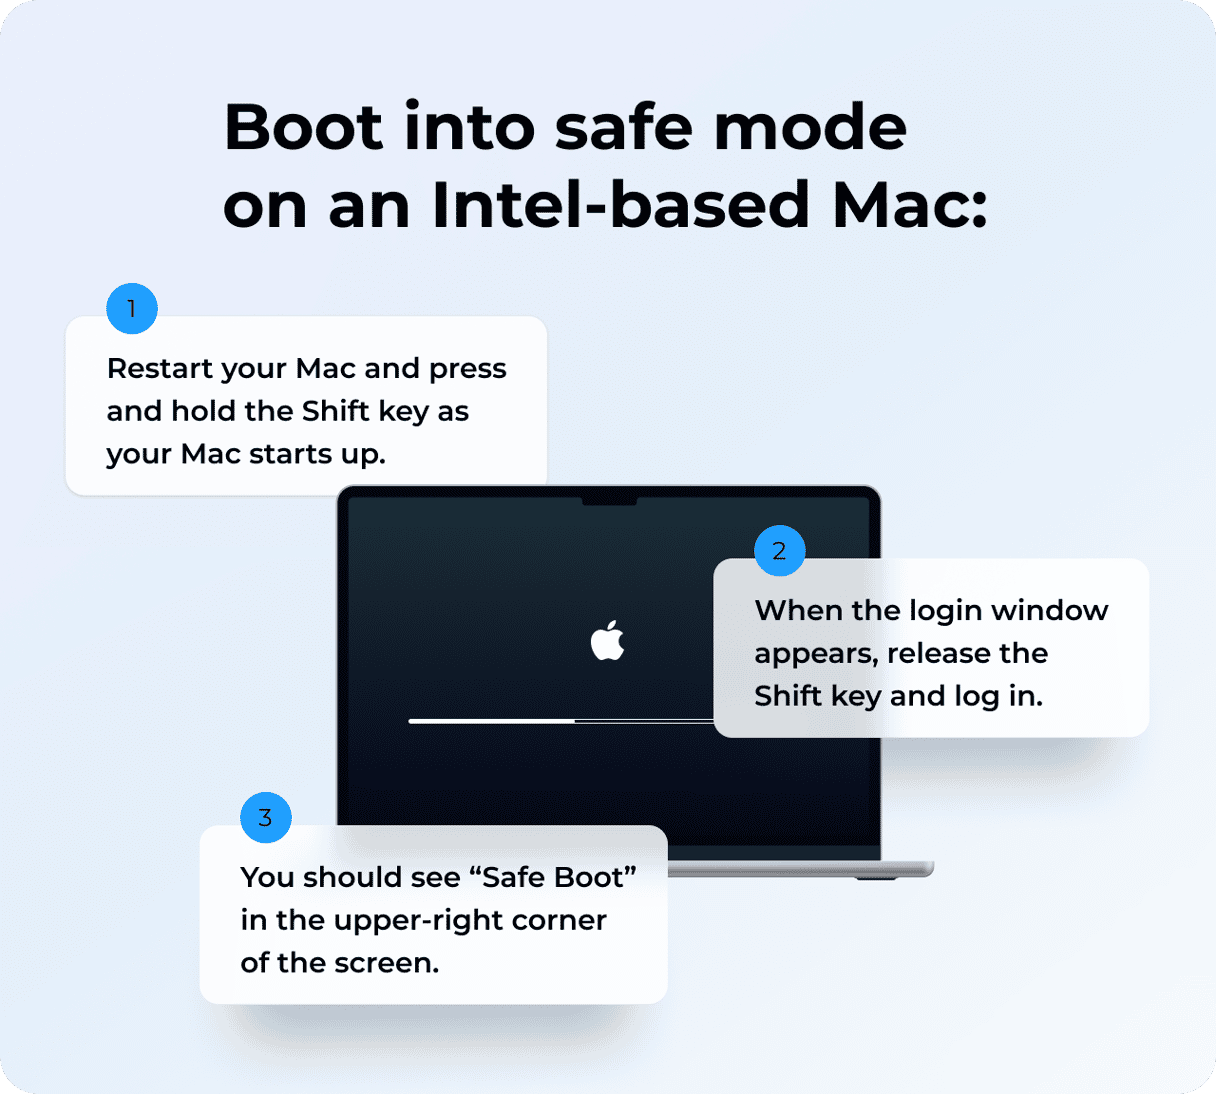
To start up your Intel-based Mac in safe mode:
- Shut down your Mac and wait 10 seconds.
- Restart your Mac and press the Shift key.
- Release the Shift key after the login window shows up.
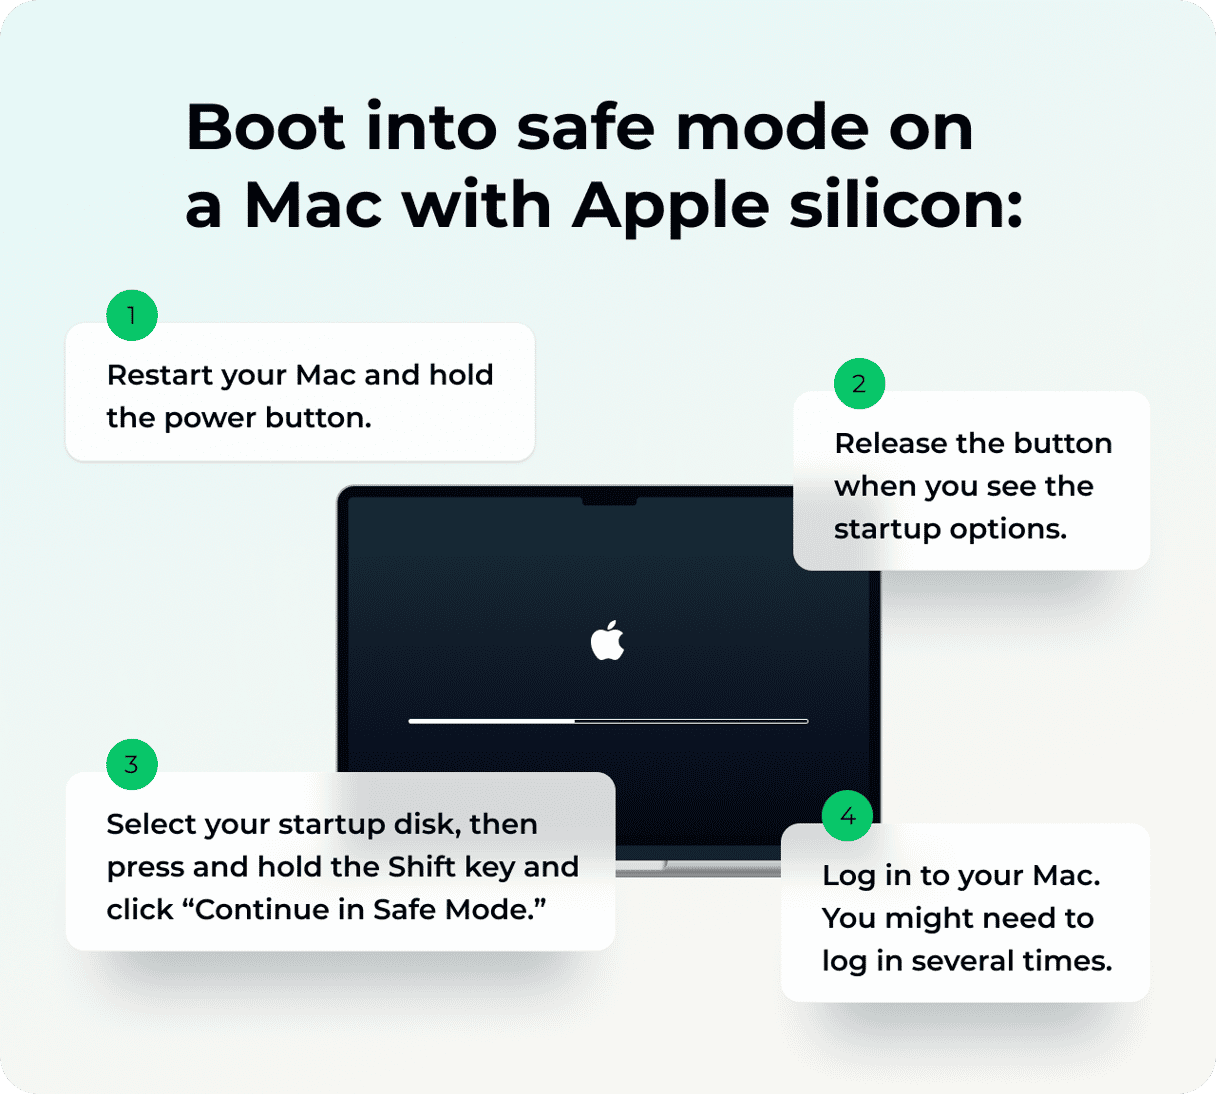
To start up your Mac with Apple silicon in safe mode:
- Shut down your Mac and wait 10 seconds.
- Press and hold the power button until the startup options window shows up.
- Select a startup disk.
- Press the Shift key and click Continue in Safe Mode.
- Release the Shift key.
Check whether System Settings works in safe mode. If so, restart your Mac normally and open System Settings. It may now work correctly. If not, disconnect any connected peripherals, except your keyboard and mouse, and try again.
If it’s still having problems, uninstall any apps, extensions, or login items you don’t use. They may cause your issue.
3. Free up memory
Many problems on your Mac, including those with System Settings, can be fixed by running maintenance routines, such as repairing disk permissions or freeing up some memory. CleanMyMac makes it very easy to run those routines. It can also help you pinpoint potential problems and things that might be slowing your Mac down, such as login items and launch agents, and help you remove them.
Here’s how to maintain your Mac:
- Go to the menu bar at the upper right corner of your screen and click on the CleanMyMac Menu icon. It appears in the menu bar when you start CleanMyMac for the first time.
- Locate the Memory icon and click Free Up.
- You can then click the Memory icon to view more details or even quit apps consuming the most RAM.

4. Delete plist files
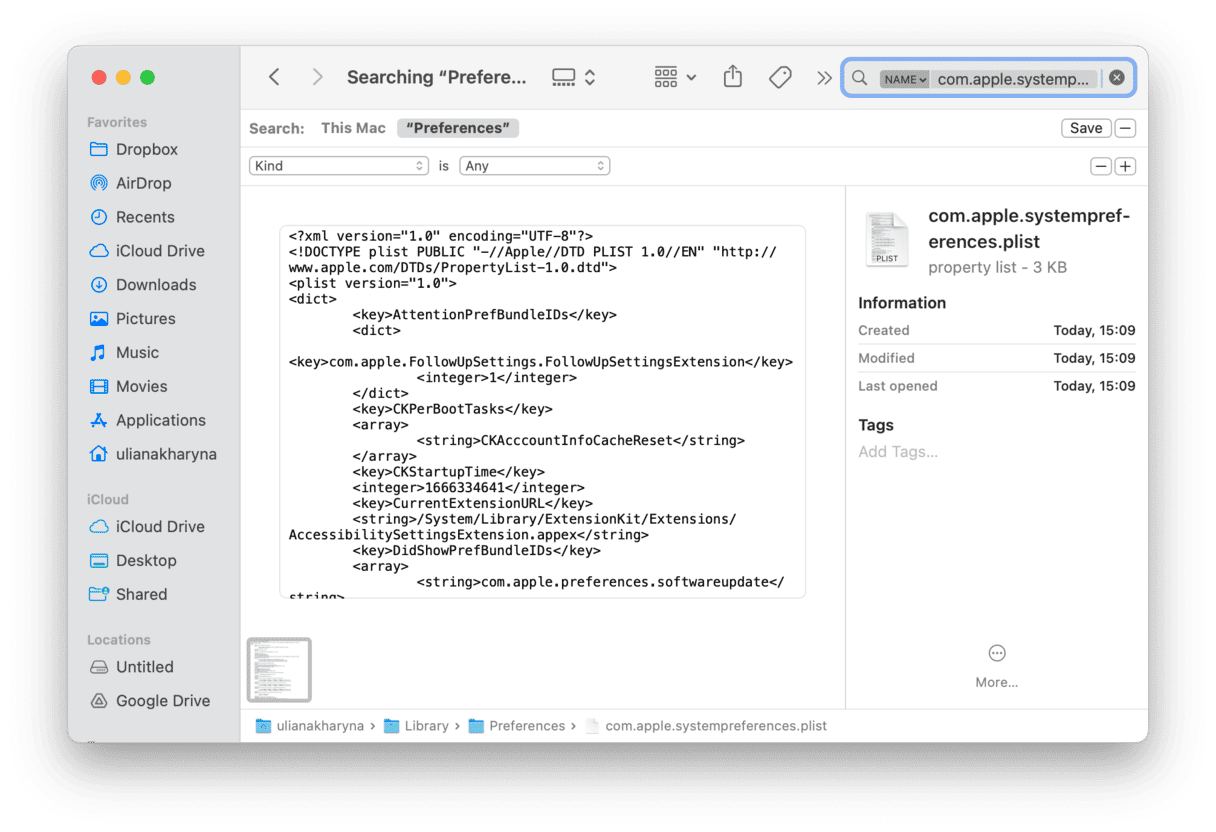
The next fix is to delete plist files because, if they are corrupted, it may be the reason why System Settings are not responding. Here’s how to do it:
- Open a new Finder window and press Command + Shift + G.
- Copy and paste the following path: ~/Library/Preferences and press Return.
- Find the following file: com.apple.systempreferences.plist
- Send it to the Trash.
- Now, empty the Trash, restart your Mac, and try to open System Settings again.
5. Use First Aid in recovery mode
Sometimes, these may be issues with your startup disk that cause the problem. You can fix them by running build-in First Aid, but you will first have to boot your Mac into recovery mode.
Follow the steps below depending on Mac model you have.
For an Intel-based Mac:
- Go to Apple menu > Restart.
- Immediately press and hold Command+R.
- Don’t release the keys until you hear Mac’s startup sound or until the Apple logo appears.
For a Mac with Apple silicon:
- When turning on your Mac, press and hold the Power button.
- Keep it pressed until you see startup options.
- Click the gears icon (Options) and hit Continue.
- You may be asked to select a user and enter their administrator password. Follow the on-screen instructions and press Next after any action you take.
Once booted into recovery mode, follow these steps:
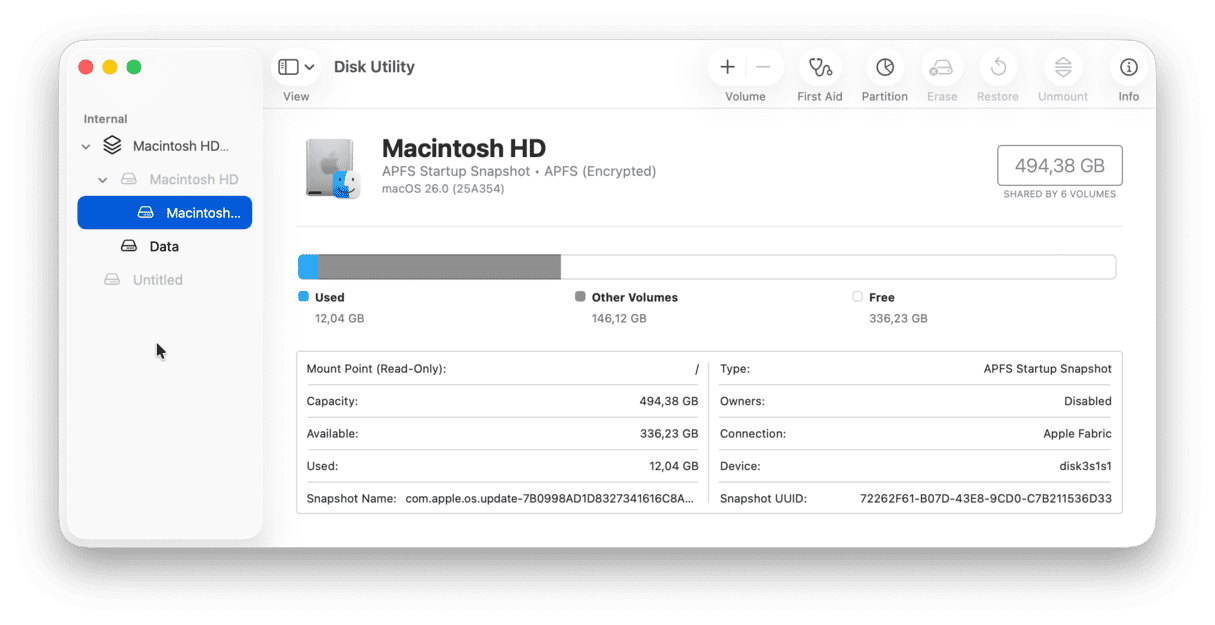
- Open Disk Utility.
- Select your startup disk.
- Click First Aid from the toolbar > Run.
Now, restart your Mac as you normally would and check if it helped.
6. Restore System Preferences from the backup
You can also try to restore System Settings/System Preferences from the backup. Note, though, that it would work only if you have a habit of backing up your Mac regularly.
The easiest way to do it is to use Time Machine backup:
- Plug in the external hard drive you use for Time Machine backups.
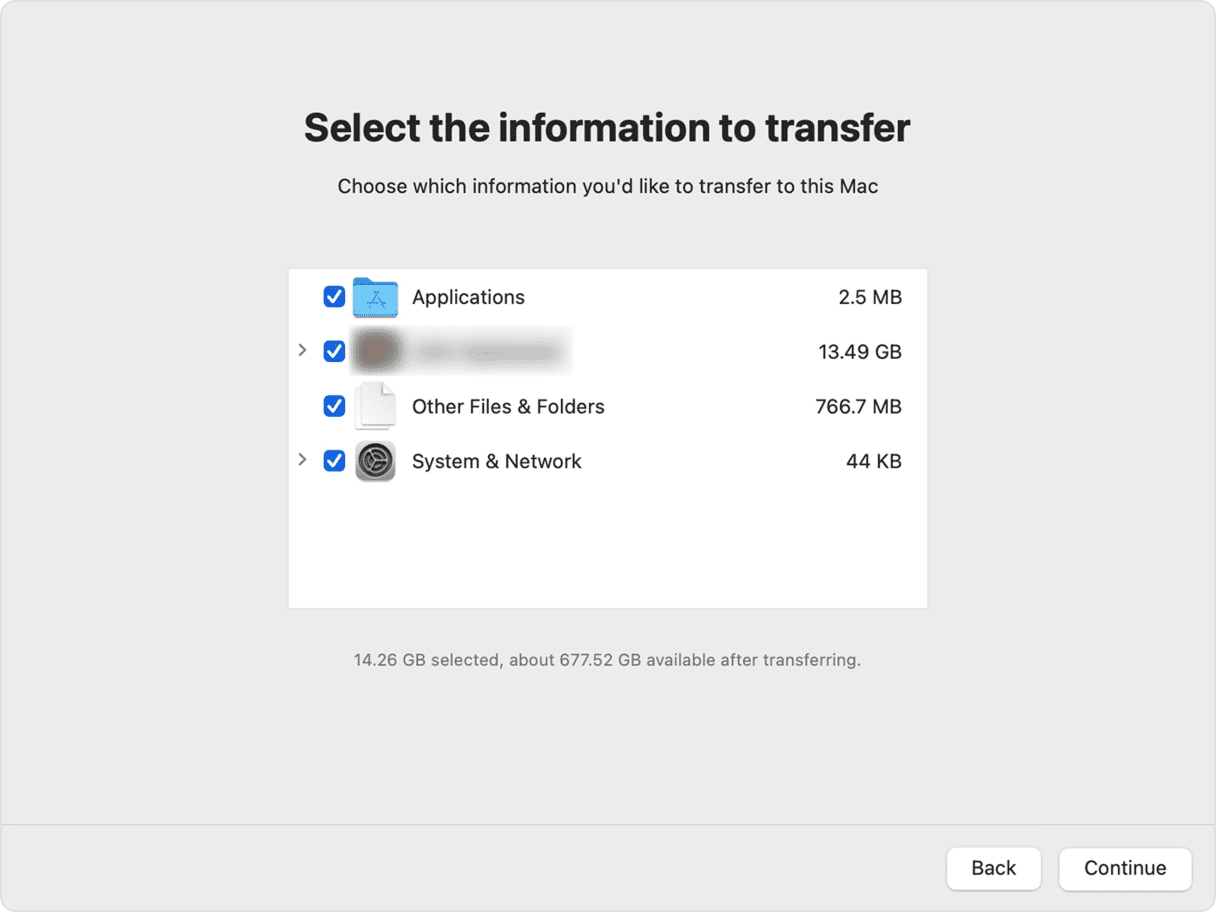
- Go to Applications folder > Utilities and open Migration Assistant.
- Choose From a Mac, Time Machine Backup or Startup Disk and click Continue.
- Select your Time Machine disk > System & Network folder.
- Click Continue.
7. Reinstall your macOS
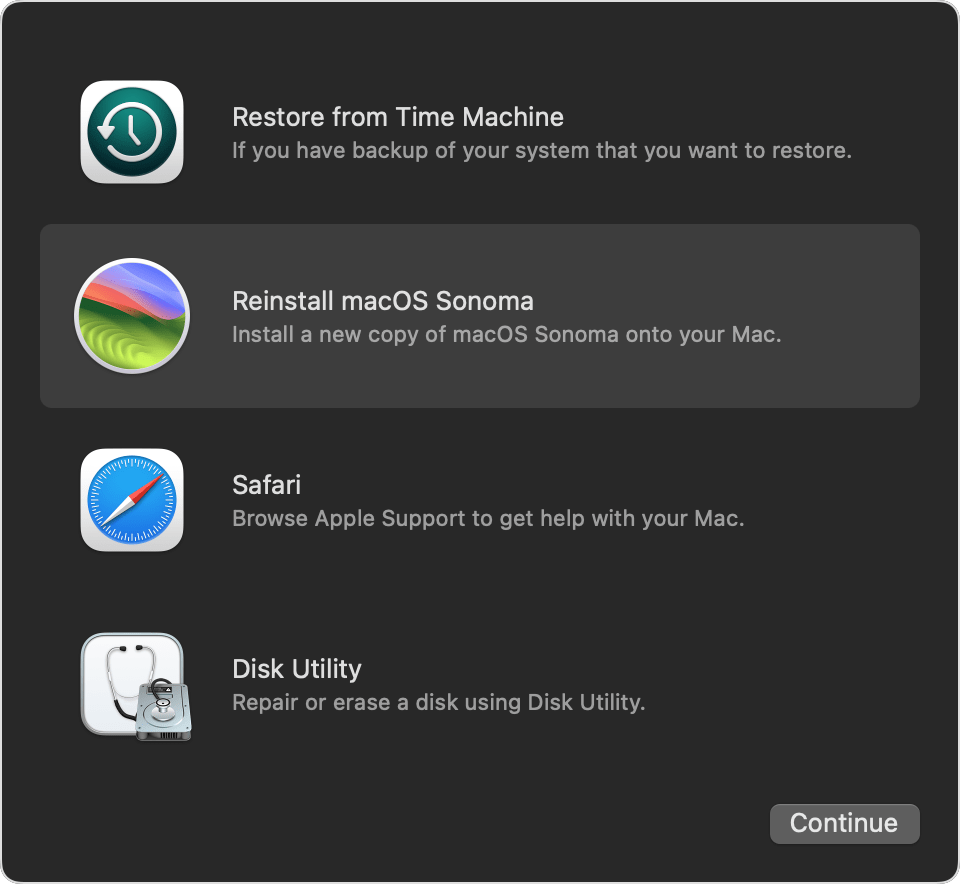
If the problems persist and none of the above steps fixes them, you should back up your Mac and reinstall macOS. To do that, boot into recovery mode first, following the steps above.
Once booted in recovery mode, choose reinstall macOS and follow the on-screen instructions to do it.
Once macOS has been reinstalled, you can copy data from the backup you made back to your Mac. Check out this article if you’re not sure how to do it.
System Settings is a valuable and important part of macOS. Most of the time, it works well without a problem. Occasionally, however, it fails to respond. Several different things can cause that, but whatever is causing it, following the guide above should fix it.


