It doesn’t matter how fast your Mac is when you first set it up — sooner or later, you’ll notice that it is slowing down. It may happen in every application, or it may affect some more than others. There are many reasons why your Mac might slow down, but by following a step-by-step process, you can eliminate them all one by one to make your Mac run faster.

Mac slowing down: what to do?
One of the main things that cause Macs to start running slow is an accumulation of files. These are temporary files, old cache, and application leftovers that hog RAM or fill up your boot disk until there is not enough space for your Mac to run efficiently. So, consider getting rid of those files to make sure they don’t clutter your storage. But first, let’s restart your Mac.
1. Restart your Mac
This is the simplest solution, and it may be all you need to do. Restarting your Mac quits background processes, clears out memory, and gets rid of temporary files.
2. Check CPU usage
Your Mac’s central processing unit (CPU) is responsible for executing the instructions that allow tasks to run. Every app and process needs to use it. Some apps also rely heavily on the graphics processing unit (GPU). You can check whether either of them is overwhelmed and, therefore, causing your Mac to slow down in Activity Monitor.
- Go to Applications > Utilities and open Activity Monitor.
- Select the CPU tab.
- Click on the CPU column header to order processes according to the CPU cycles they’re using.
- If you see any that are using a significant percentage of CPU cycles persistently, select the process and click Quit Process.
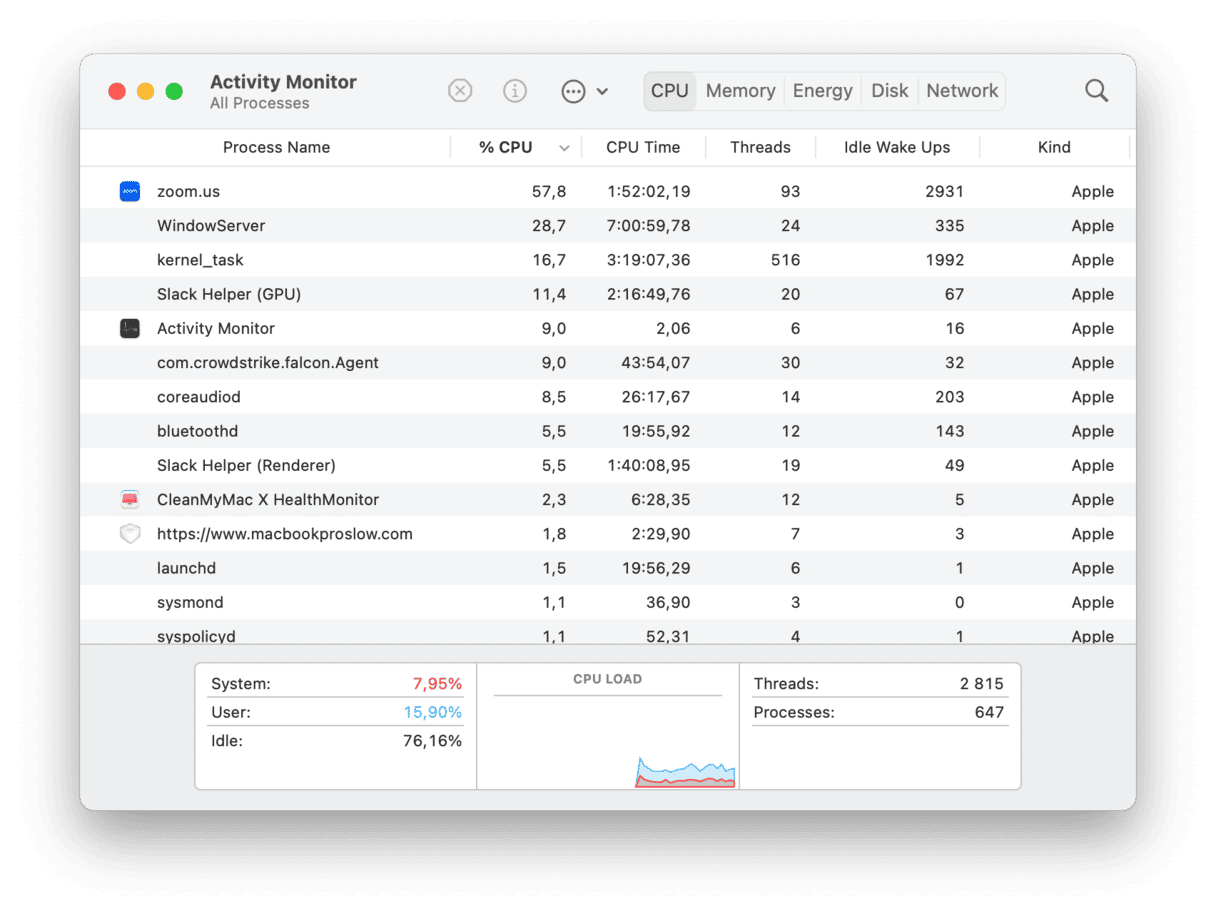
A quick way to inspect CPU and memory👇
The popular Mac maintenance app CleanMyMac includes a free tool to check CPU usage. If you have a spare minute to check the pressure on your CPU, it’ll give you some cool insights into what apps use the most processing power, how it’s distributed, etc.
- Start your free CleanMyMac trial.
- Click on the small iMac icon in the upper menu bar to reveal the menu.
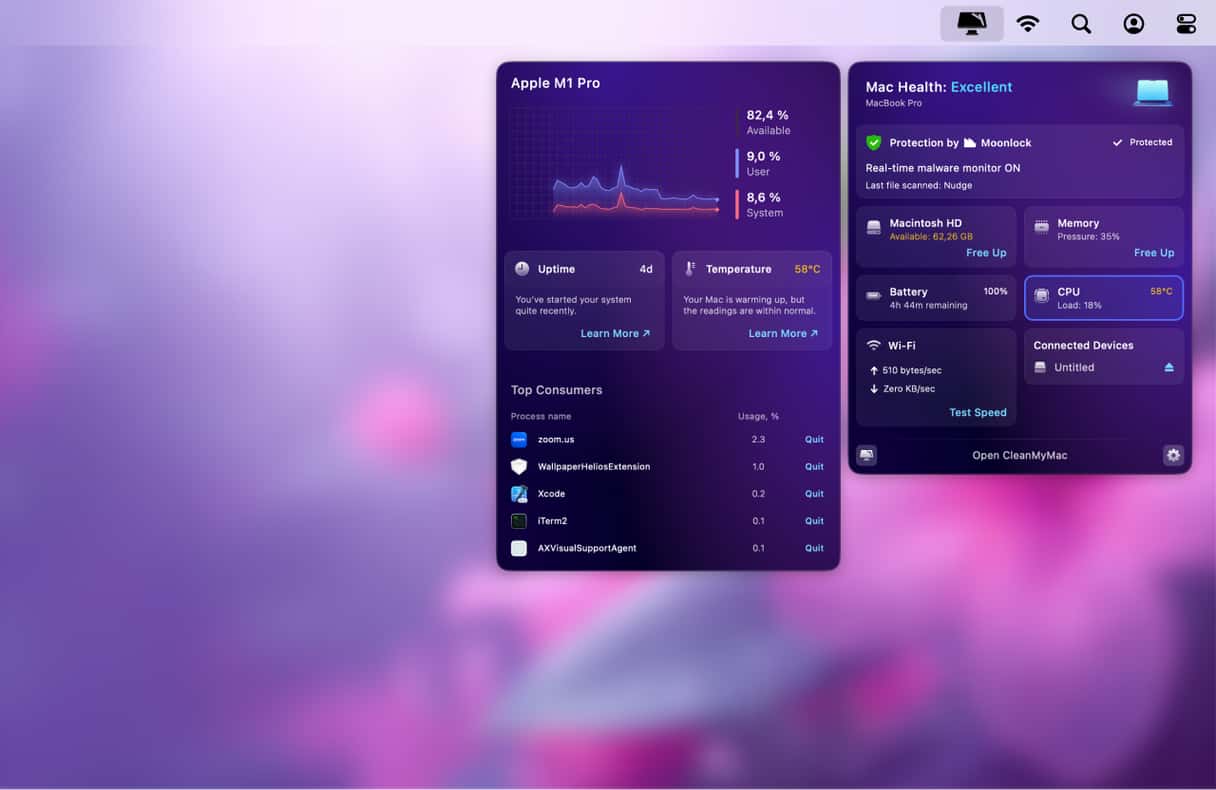
- Now, inspect the tabs under CPU and Memory.
- Pay extra attention to the CPU temperature: is it within the red zone?
3. Check if your macOS is up to date
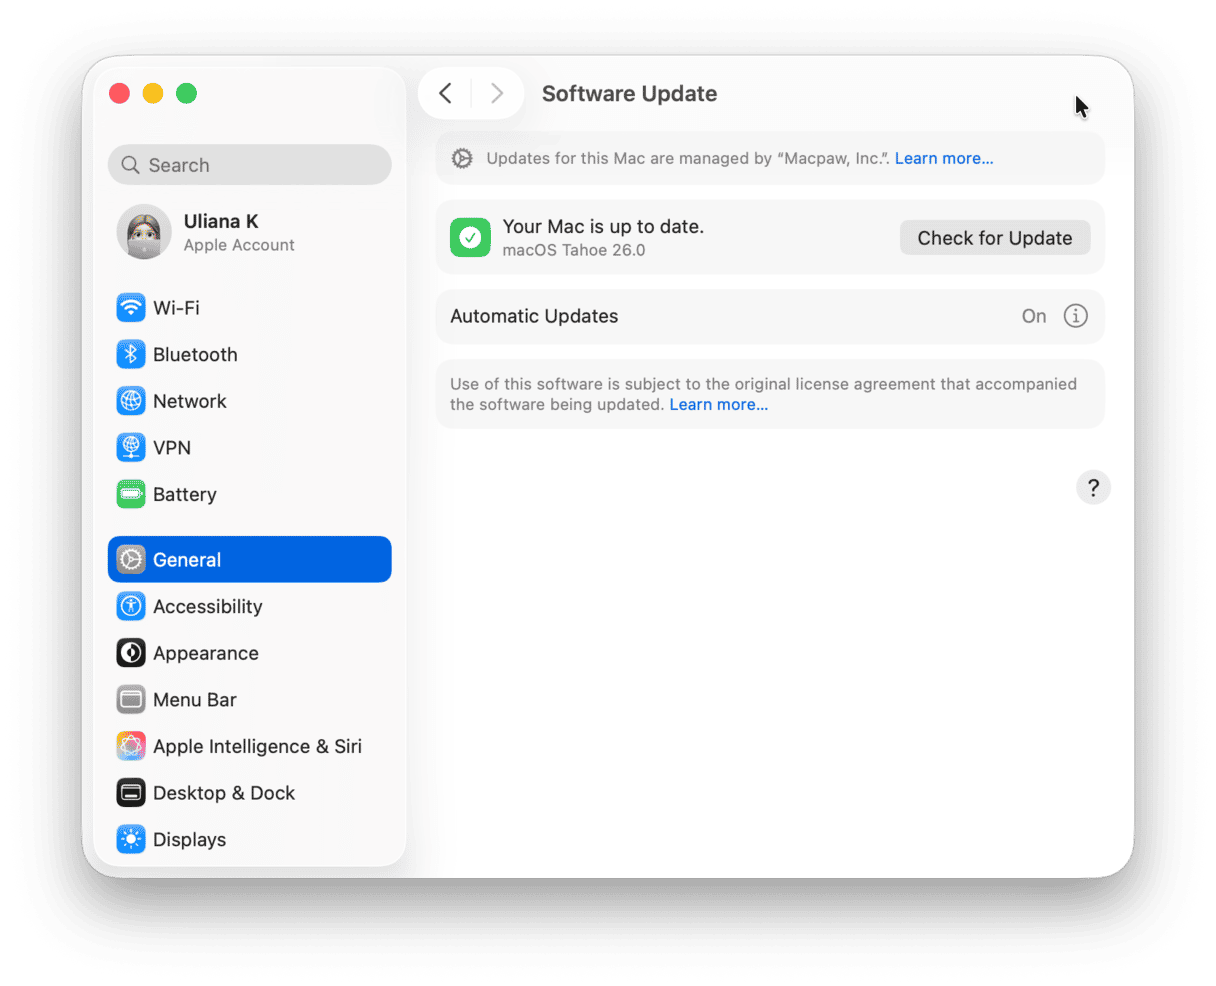
Apple regularly issues updates to macOS, both the current version and previous versions. These updates fix bugs and can sometimes improve your Mac performance.
- Click on the Apple menu and choose System Settings.
- Click General > Software Update.
- Click Update Now if you see any available updates
- Wait for your Mac to update and restart.
4. Check if apps are up to date
If you notice that your Mac slows down when you’re using a specific app, the problem may be that app. Check if it’s up to date. This is usually done by clicking on the menu that has the same name as the app (next to the Apple menu) and choosing Check for Updates.
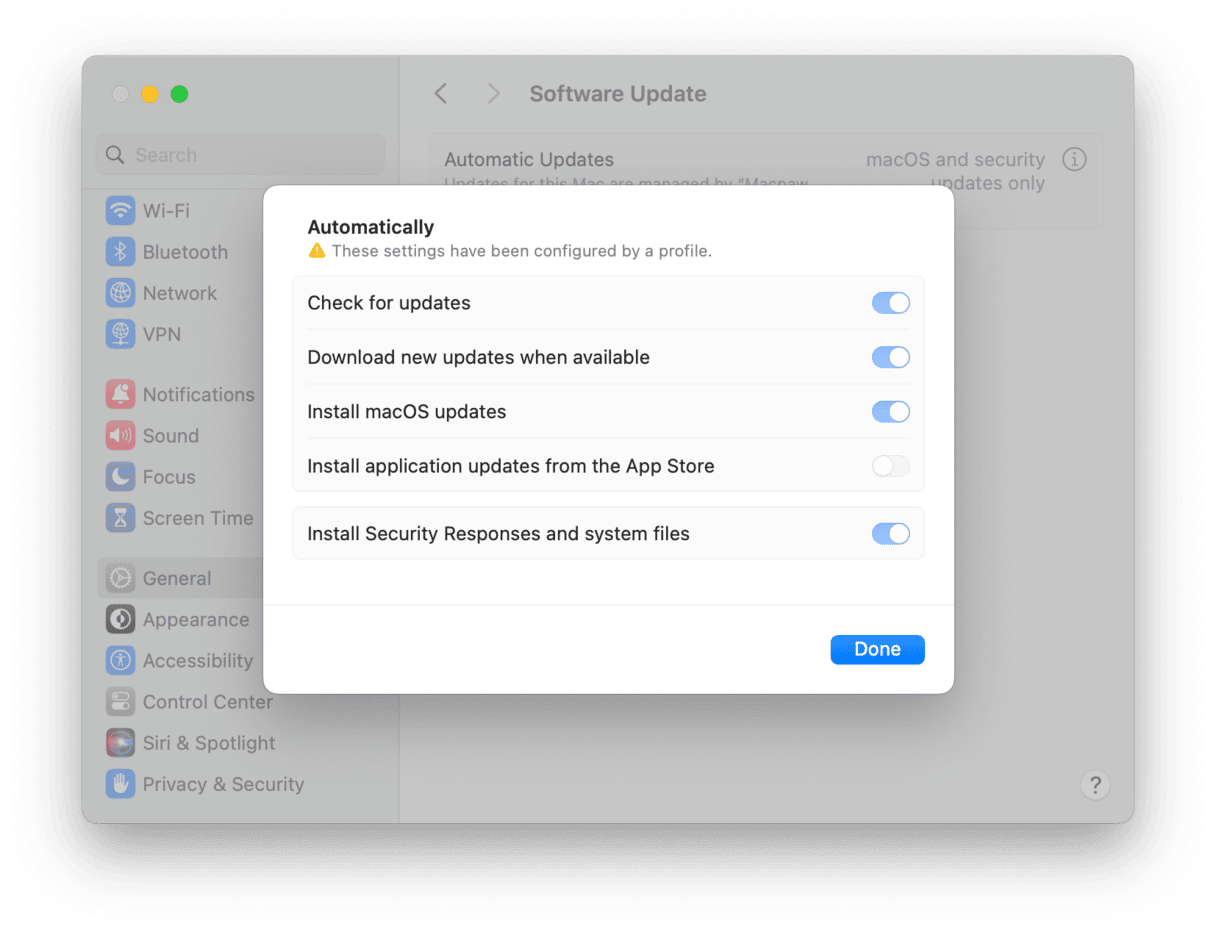
If you downloaded apps from the App Store, double-check whether they’re set to update automatically.
- Click on the Apple menu and go to System Settings.
- Navigate to General > Software Update.
- Click i.
- Turn on “Install application updates from the App Store.”
5. Check your internet connection
Sometimes, what seems like a slow Mac can actually be a slow internet connection. We rely so much on connecting to remote servers that a slow internet connection can make it feel like our Mac is running slowly.
- Go to speedtest.net or another speed test site in your usual web browser.
- Follow the instructions to test your speed.
- If it is significantly slower than it should be, try switching off Wi-Fi on your Mac and switching it back on again.
- If that doesn’t work, try restarting your router.
If nothing helps and your internet connection is still slow, try contacting your provider.
6. Remove some large junk files
If restarting your Mac doesn’t make it run faster, the next step is to check if there are any unnecessary files hogging disk space. The quickest way to scan your Mac for those is to use CleanMyMac.
- Get a free trial of CleanMyMac.
- Once it’s downloaded, install it and open it from your Applications folder.
- Click Scan.
- When CleanMyMac has finished scanning, go to the Cleanup tile and click Review. You can check the details and remove selected items.

In addition to temporary files and outdated caches, malware can also overload your Mac’s processor and make your machine slow. CleanMyMac runs a quick malware scan to detect threats like trojans, adware, and viruses.
7. Check memory usage
Every app stores data in memory in order to operate. If you run low on physical memory, apps store files in virtual memory — files, known as swap files, temporarily stored on your boot drive. Virtual memory is slower than physical memory, and so the more your Mac has to rely on virtual memory, the slower it will run. Sometimes, applications hog memory and don’t release it when they no longer need it, meaning it’s not available for other apps — that’s known as a memory leak.
You can check memory usage in Activity Monitor. Follow the steps for checking CPU usage above, but select the Memory column instead.
To free up memory, quit apps you’re not currently using. And close browser tabs — having lots of tabs open in a web browser uses RAM.
There are many possible reasons for your Mac slowing down. However, if you follow the process outlined above, you should quickly discover what the problem is and how to fix it. And if you use CleanMyMac to help, you’ll do it even more quickly and easily.


