If you suddenly cannot open or manage files on your Mac, repairing disk permissions is one of the tips you may meet in numerous troubleshooting guides. Apple had this functionality on older OS X versions; however, they’ve protected system file permissions by limiting what the user can access and modify.
While a quick repair is no longer possible, you can still resolve permission issues with built-in macOS tools. Let’s see how you can actually repair disk permissions on a Mac and fix permission issues.
What are disk permissions?
Disk permissions on macOS are used to keep your files secure because they determine who can open, change, or delete both files and folders. They’re designed so that certain apps (or other users if you share your Mac) can’t just dip into a system file they have no business with and modify or remove it. This way, they prevent system instability and keep one user’s files private from those of other users.
Every file and folder on your Mac comes with an associated set of permissions. From the Apple Community:
“Many things you install in Mac OS X are installed from package files (whose filename extension is “.pkg”). Each time something is installed from a package file, a “Bill of Materials” file (whose filename extension is “.bom”) is stored in the package’s receipt file, which is kept in /Library/Receipts/ in Mac OS X v10.5 and earlier. These files don’t take up much disk space and you shouldn’t put them in the Trash. Each of those “.bom” files contains a list of the files installed by that package, and the proper permissions for each file.”
Why permissions need repairing?
While older versions of macOS indeed had issues with system-wide file permissions, today's Mac operating systems handle this very differently. Thanks to a core security feature called System Integrity Protection (SIP), critical system files and their permissions are automatically protected and maintained.
Permission problems can still occasionally occur, but they are now almost always related to your user account, in other words your home folder. This can happen after migrating data from another Mac, restoring from a backup, or if a specific application malfunctions.
If you are experiencing issues with files, it might be a home folder permission problem. Some examples of out-of-the-norm behavior:
- An app is not working correctly
- Being unable to move, delete, or save files in your own folders
- Getting an error message that you don't have permission to access a file or folder
How to repair disk permissions on Mac automatically
For users of macOS versions newer than El Capitan, the removal of Repair Disk Permissions means you have no troubleshooting solution to turn to if your Mac is ailing. CleanMyMac, has the disk permission functionality within its feature set, so it'll be a useful little tool for you, if you experience permissions problems.
Get started with a free CleanMyMac trial. Once that’s done, follow these steps:
- Open CleanMyMac.
- Click on Performance from the left sidebar menu and click Scan.
- Once the scan is complete, select View All Tasks and choose Maintenance Tasks.
- Click on Repair Disk Permissions by checking a box, and click Run.

CleanMyMac will scan your system to verify disk permissions and automatically repair permissions that are found to be faulty.
And that’s all there is to it. Your Mac should now be running as intended. If your Mac appears to be running fine, it’s still worth running repairs every so often to ensure it stays that way. Not all broken permissions affect performance, but that doesn’t mean they shouldn’t be fixed.

How to repair permissions manually
If you've used Macs for a long time, you might remember "Repairing Disk Permissions" as a go-to tool for troubleshooting problems. However, that is now a thing of the past for most users. Newer macOS versions use a security feature called System Integrity Protection (SIP), designed to automatically repair file permissions during software updates and system changes. SIP works by restricting the root account so that it can’t do things like modify protected locations and processes, such as /System and /usr. This should prevent malware from gaining root permissions and infecting your system files.
However, f you’re running a pre-El Capitan version of macOS, you can still use the "Repair Disk Permissions" feature in Disk Utility:
- Press Command + Space to open Spotlight, type in “Disk Utility,” and hit Return.
- Select Macintosh HD from the left sidebar menu.
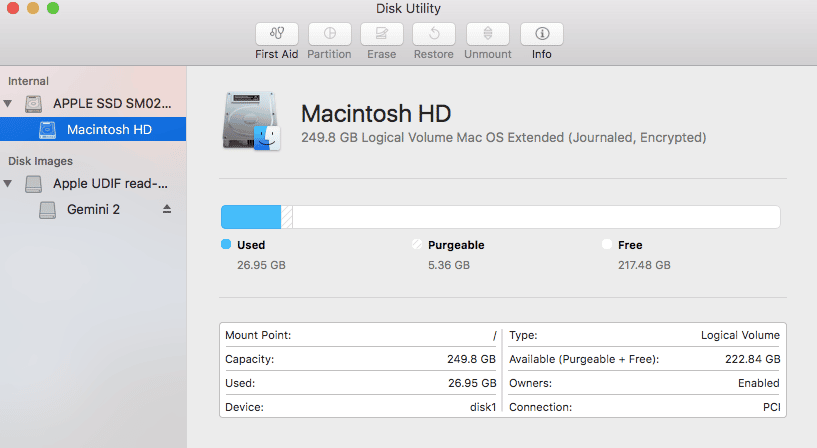
- Click on the First Aid tab.
- Click on Verify Disk Permissions. By taking this step, Disk Utility will work through your hard drive to detect broken or misbehaving permissions and list them for repair. This might take a few minutes, but you can select the Show details box to keep an eye on its progress.
- Click on Repair Disk Permissions and wait while Disk Utility runs through the identified permissions to fix them.

If disk permission issues have played such havoc that your Mac won’t boot correctly, it’s possible to access Disk Utility in recovery mode. Do this by holding Command + R during bootup.
If you’re installing a newer (or older) version of macOS on top of your existing operating system, Mac will perform a disk permission repair as a part of the installation so that you start from a clean slate.

How to control permissions for specific apps
If you need to, you can manage permissions for files and apps. All you have to do is check the permissions using the "Get Info" panel:
- Right-click on an app or file you’re trying to access.
- In the menu that opens, click Get Info (alternatively, you can use the Command + I combination after clicking on the app or file once).
- Look for the Sharing & Permissions section. Here you can modify the permissions for Read or Write.

In some cases, though, you may receive the “You don’t have permission to open the application” error message. It is occasionally reported on newer macOS versions. It doesn’t allow you to run certain apps and, sadly, doesn’t explain which permissions are missing, so the first trick won’t work.
Luckily, it is easy to fix this error. Try the following one by one.
Update your software
Update macOS by going to System Settings > General > Software Update and following the on-screen instructions if an update is available.

It's also important to check if the app you're having trouble with is up-to-date. Open the App Store and select Updates from the left menu. Alternatively, click the app's menu in the menu bar to check for updates.
Check if your account has the neccessary privileges
Sometimes, you may encounter permissions problems while trying to modify files or apps without admin privileges.To check what type of user account you have open System Settings and click Users & Groups. Click the i next to the currently logged-in user and make sure that the Allow this user to administer this computer feature is turned on. You may need to Add Account if your current user does not have admin permissions.

- Hopefully, now you know how to fix permissions issues and access and modify your files and apps. Thanks for reading!


