Every year, when a new version of macOS is launched, Mac users rush to upgrade and take advantage of all the latest features and improvements. Some don’t even wait for the full version to launch and install the public beta instead. For most people, the upgrade goes smoothly, and they use the latest macOS version without any problems. Some users, though, soon regret upgrading and start wondering how to uninstall macOS Sequoia. The good news is that you can revert your Mac to the previous version of macOS. In this article, we’ll show you how to downgrade from macOS Sequoia.
Why downgrade from macOS Sequoia?
There are a few reasons why you may want to downgrade from macOS Sequoia. It could be that your Mac is slow or less stable after the upgrade. Or it could be that some applications you rely on don’t work properly in Sequoia. Or maybe you just don’t like the new look or features and want to return to Sonoma.
Before you downgrade from macOS Sequoia
If your reason for downgrading from macOS Sequoia is that your Mac is slower or less stable than it was when you were running Sonoma, there is something you can try first — run some maintenance tasks and optimize performance. Maintenance tasks include reindexing Spotlight and clearing DNS cache. In addition, thinning out Time Machine snapshots, repairing disk permissions, and speeding up Mail can all help your Mac run more smoothly. Optimizing your Mac means reviewing login items and background extensions to make sure you are only running the ones you need and disabling the rest. Doing all that manually would be time-consuming and laborious. But you don’t have to do it manually. CleanMyMac’s Performance tool can do it for you with just a few clicks. You can download CleanMyMac here for free.

How to downgrade from Sequoia to Sonoma
So, how to go back to previous macOS? There are three main ways to do it, and we’ll describe them in detail below.
Use Time Machine
Hopefully, you made a backup of your Mac with Time Machine before you upgraded to Sequoia. If so, downgrading is easy. Just follow these steps:
- Connect the disk with the Time Machine backup on it to your Mac.
- Boot your Mac in recovery mode. To do that on an Intel-based Mac, hold down Command and R when you press the power button. On a Mac with Apple silicon, hold down the power button until you see the Startup Options screen. Click Options, then Continue.
- When you see macOS Utilities, choose Restore from Time Machine and click Continue.
- Choose your Time Machine backup disk as the Restore Source.
- Choose the backup you want to restore from — it should be the last one before you upgraded and should say it was made with Sonoma.
- Choose Restore.

Downgrade in recovery mode
If you have an Intel-based Mac, it’s pretty easy to reinstall the version of macOS that shipped with your Mac. You can then upgrade from there to Sonoma if you need to. There is a key combination for booting in recovery mode that, when you use it, instead of reinstalling the version of macOS that was most recently installed on your Mac, will install the version that was installed when it shipped. Here’s how to do it:
- Shut down your Mac.
- Press and hold Shift + Option + Command + R and then press the power button.
- Release the keys when you see the Apple logo.
- When you see macOS Utilities, choose Reinstall macOS.
- Wait for macOS to reinstall.

Use a bootable installer
If you don’t have a Time Machine backup to restore from and you have a Mac with Apple silicon, you can’t use the recovery mode method above. Nevertheless, downgrading from Sequoia is still possible but more difficult. You will need to create a bootable installer on a USB stick, boot your Mac from that, then erase your startup disk, and install macOS from the USB stick. If that sounds complicated, don’t worry, we’ve got you covered and will take you through it step by step. It does need a Terminal command, but you can just copy and paste it from our instructions.
- Find a USB stick with a capacity of at least 16GB. If it has been used previously, connect it to your Mac, open Disk Utility, select the USB stick, and choose Erase. Format it as APFS and call it macOS Sonoma installer.
- Click here to download macOS Sonoma from the App Store.
- When it has downloaded, it will open automatically. Press Command-Q to quit. The installer will now be in your Applications folder.
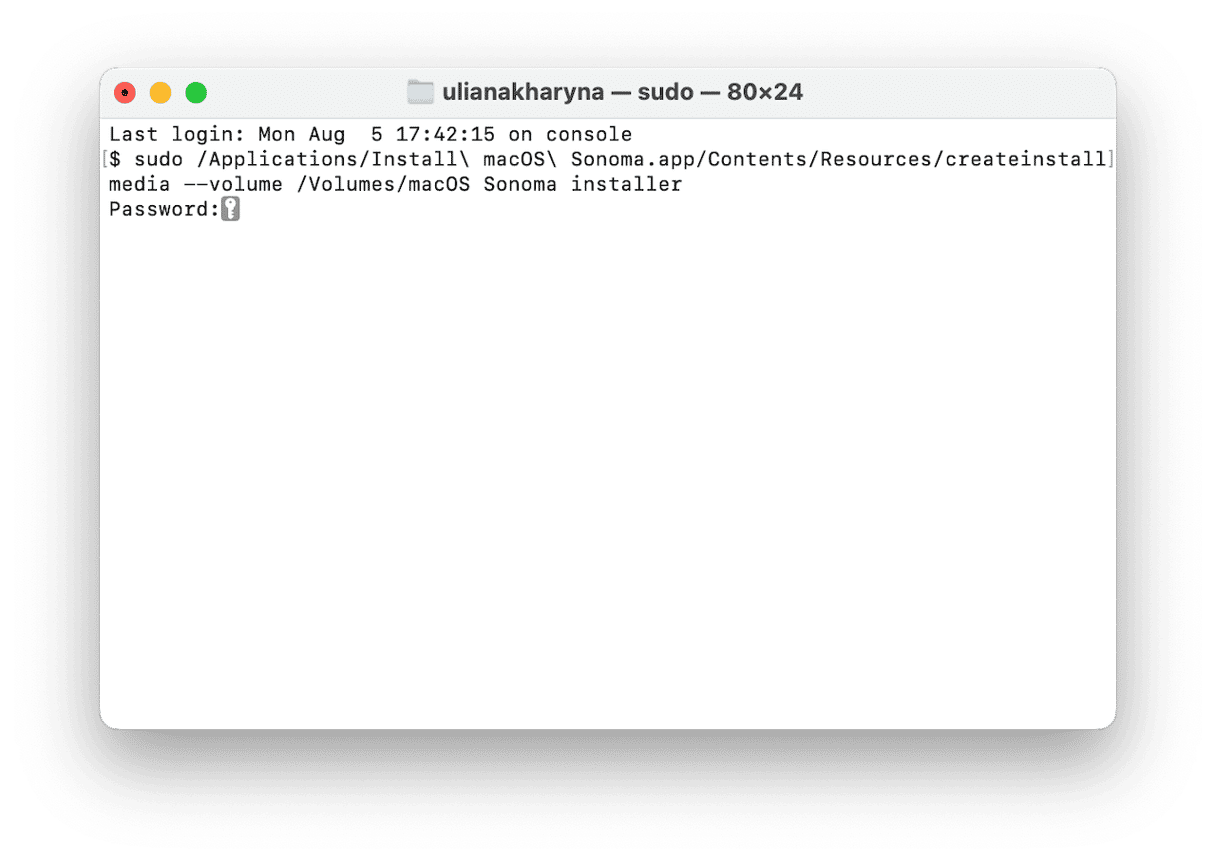
- To create the bootable installer disk, open Terminal. Type this command and press Return: sudo /Applications/Install\ macOS\ Sonoma.app/Contents/Resources/createinstallmedia --volume /Volumes/macOS Sonoma installer and enter your password followed by Return.
- When you see a message in Terminal that says the installer has been created successfully, quit Terminal.
- Click the Apple menu, choose System Settings > General > Startup Disk, and select the USB installer.
- Shut down your Mac. Press and hold the power button until you see the Startup Options screen.
- Click Options, then Continue.
- When you see macOS Utilities, choose Disk Utility.
- Select your startup disk and choose Erase.
- Choose APFS as the format and Macintosh HD as the name for the disk.
- When it has been erased, quit Disk Utility.
- From macOS Utilities, choose Reinstall macOS.
- Follow the instructions on the screen and then wait for macOS Sonoma to be installed.


Most people who upgrade to the latest version of macOS have no problems but occasionally some users find that it doesn’t work out so well and they want to go back to whichever version they were using previously. That could be because their Mac runs slowly or because some apps don’t work as well, or at all, in the new version. If that’s you, follow the steps above to downgrade from macOS Sequoia.


