Maybe you just updated to macOS Monterey and found that your Wi-Fi is dropping off sometimes. Don’t worry. You’ve ended up on the right article. Keep reading for a few simple fixes for your Monterey Wi-Fi issues.
1. Restart your Mac
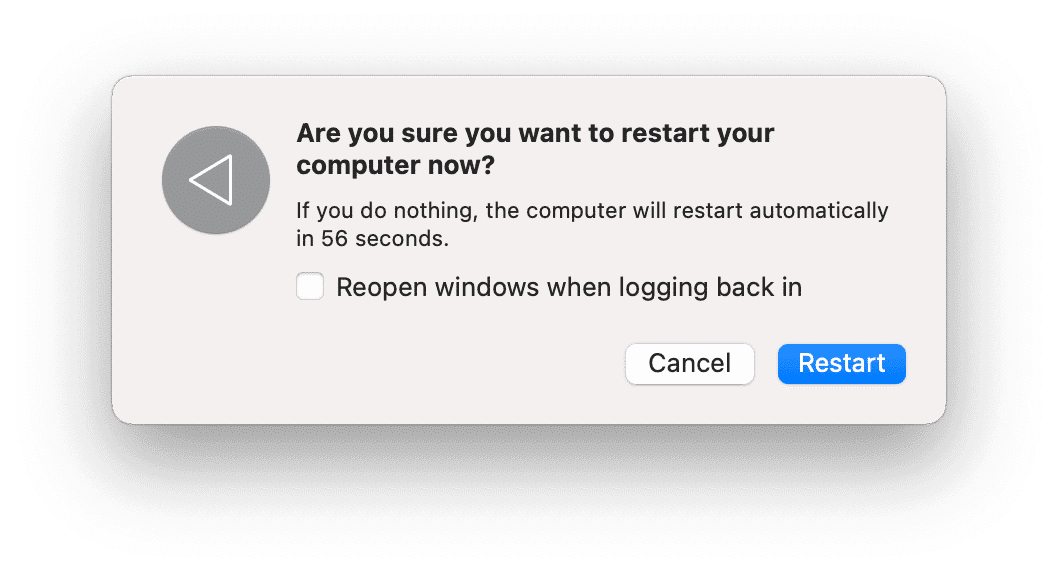
This might sound cliche, but it’s for a good reason. Rebooting your computer can indeed fix a lot of random issues – including with your Wi-Fi. Your computer’s problem could be as simple as some software that didn’t load correctly after the install finished. But, this step is one of those that is so simple, it’s easy to overlook and forget. That’s why it’s first on this list. I’m a big fan of trying the simplest fixes first.
Tip: Restart your Wi-Fi router by disconnecting from the power source.
2. Run Wireless Diagnostics
Another fix that should only take a few minutes to try is using the built-in Wireless Diagnostics tool. It comes with macOS and is really straightforward to use. Here’s all you need to do:
- Hold down Option + click on the Wi-Fi icon in the menu bar.
- Click Open Wireless Diagnostics.
- Then, click Continue.
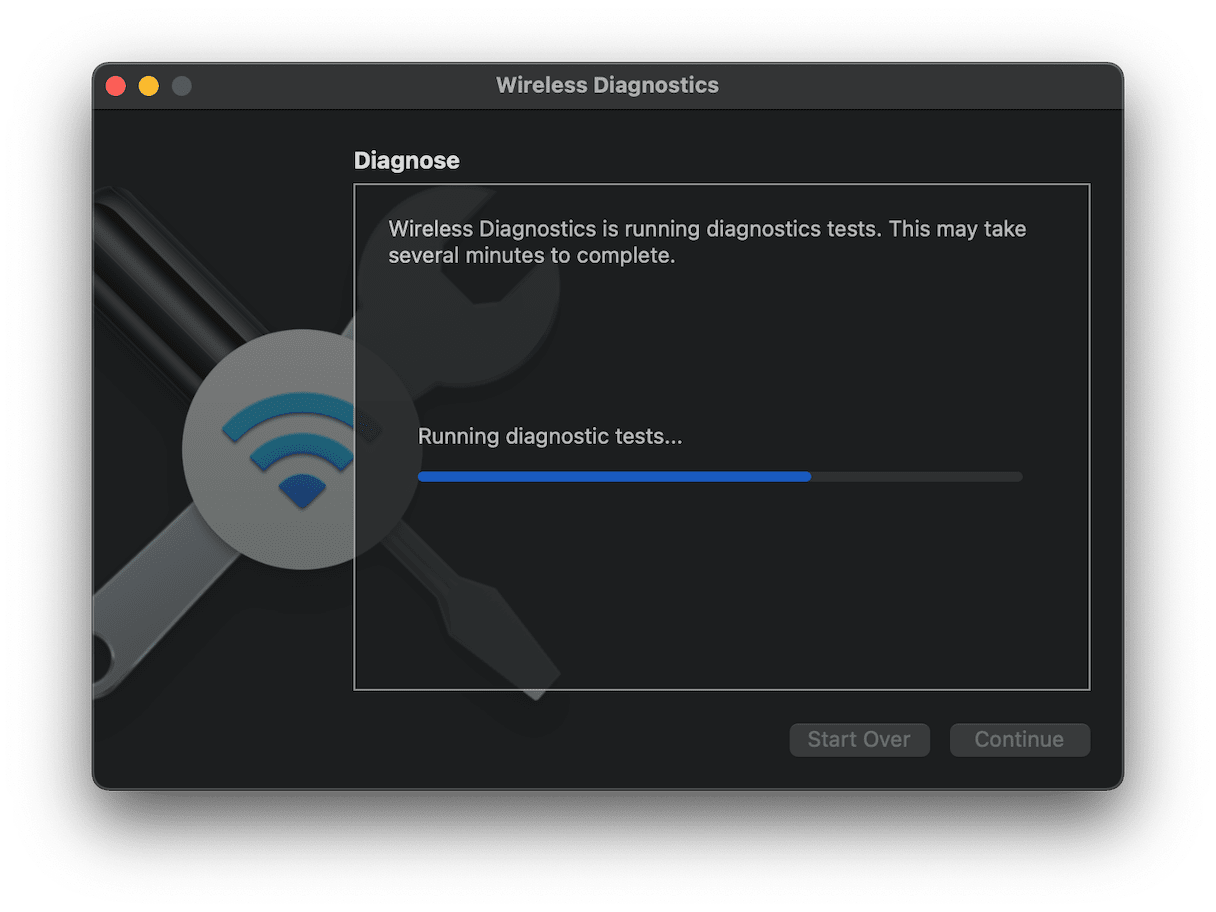
When the diagnostic is finished running, you can follow the prompts to try and resolve whatever issues it finds.
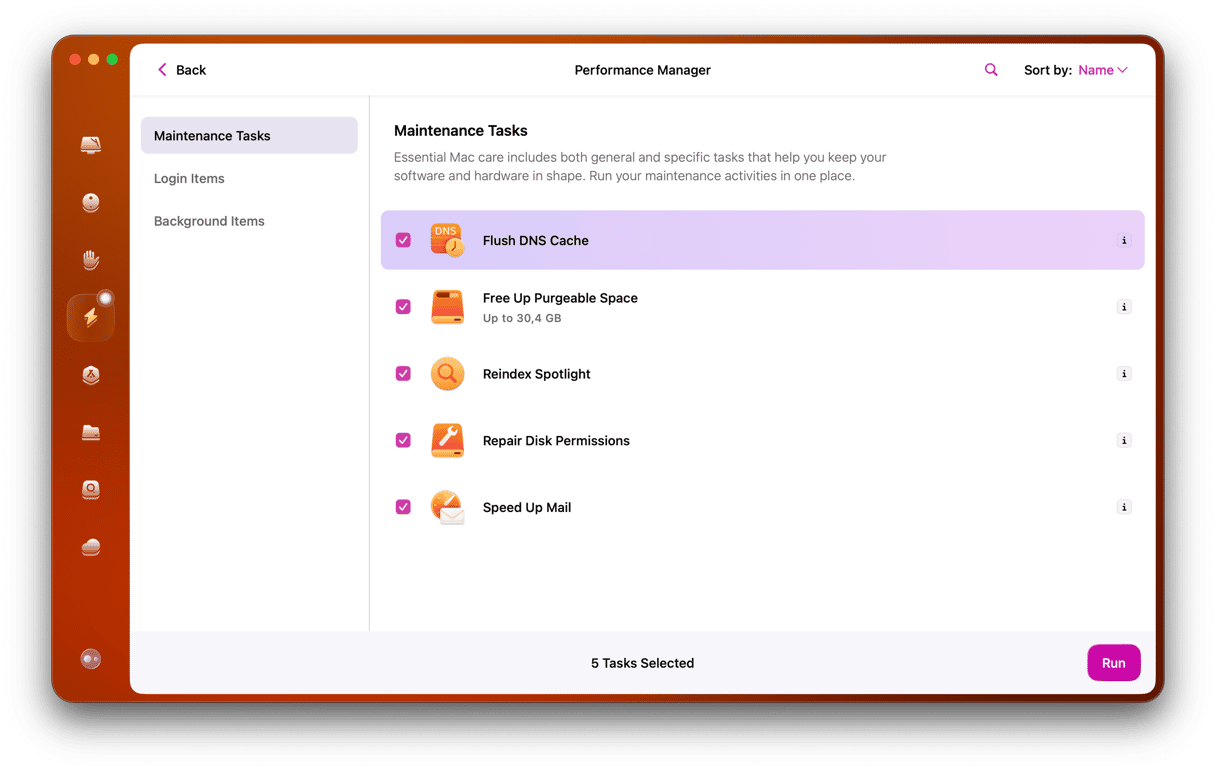
3. Flush DNS cache using CleanMyMac
If you’re connected to your Wi-Fi network, but you can’t get any websites to load, then you’ll want to try and flush your DNS cache. DNS cache stores the information about domain names, much similar to a phone book. This database has outdated entries sometimes which can be fixed by resetting or flushing the DNS.
One of the easiest ways to do that is with CleanMyMac. After you downloaded and installed its free version, just follow these steps:
- Open CleanMyMac.
- In the sidebar, click Maintenance.
- Select Flush DNS Cache and click Run.
4. Reset your PRAM
Maybe you’re having an issue where your Wi-Fi won’t turn on on Monterey at all. If that’s the case, then there might be something going on with PRAM. It stands for Parameter Random Access Memory, and it’s mainly used to store the settings of things that need to be used as soon as you start your Mac. Typically, settings that are stored in PRAM are for your internal speaker, monitor, or even your Wi-Fi card.
Thankfully, resetting your PRAM is really simple. Here’s what you need to do to reset your PRAM:
- Turn your Mac off.
- Hold down Command + Option + P + R, and then turn your computer on.
- Keep holding those keys down until you hear the chime or startup sound twice.
- Then, you can let those keys go.
5. Disable hiding your IP address
macOS Monterey, among other things, features the new, more secure Safari. There is even a feature to hide your IP address from trackers. But turning it on appears to slow down Wi-Fi, as reported on many Mac forums.
So even if you regularly use Chrome, you may try to open Safari and disable its “hide your IP address” feature. This setting seems to affect all other browsers as well.
Open Safari > Preferences.
Navigate to Privacy.
Uncheck “Hide IP address from trackers”
6. Check for software updates
Software updates are released to help make your apps and operating system more reliable and safer. While coders and developers do their best to try and anticipate every issue their software has, it’s just not possible. Usually, the newer an operating system is, the more often an update is released for it. So, even though you might have just updated your Mac to Monterey, it might need a software update to fix this Wi-Fi.
Here’s how you can check for and install software updates:
- Open System Preferences.
- Click Software Update > Restart Now.
Depending on how big the update is, it will take anywhere from 15-30 minutes. You’ll know it’s finished because your computer will reboot and take you to the original login screen.
7. Delete Wi-Fi preference files
Wi-Fi settings are stored in the Library and are governed by a number of .plist files. Their other name is preference files.
You can delete some of these preference files and let your macOS recreate them after rebooting. But first, it’s better to back them up.
- Create a backup folder and name it “Wi-Fi Preferences”
- Now, click on Finder and choose Go > Go to Folder… in the upper menu bar.
- Paste in this location:
/Library/Preferences/SystemConfiguration/
Here’s a list of files you need to find in that location:
Com.apple.airport.preference.plist
Preferences.plist
com.apple.network.eapolclient.configuration.plist
NetworkInterface.plist
com.apple.Wi-Fi.message-tracker.plist
Select those files and drag them to the backup folder from step 1.
Now, restart your Mac. If something is not working right, move the preference files back to their original location.
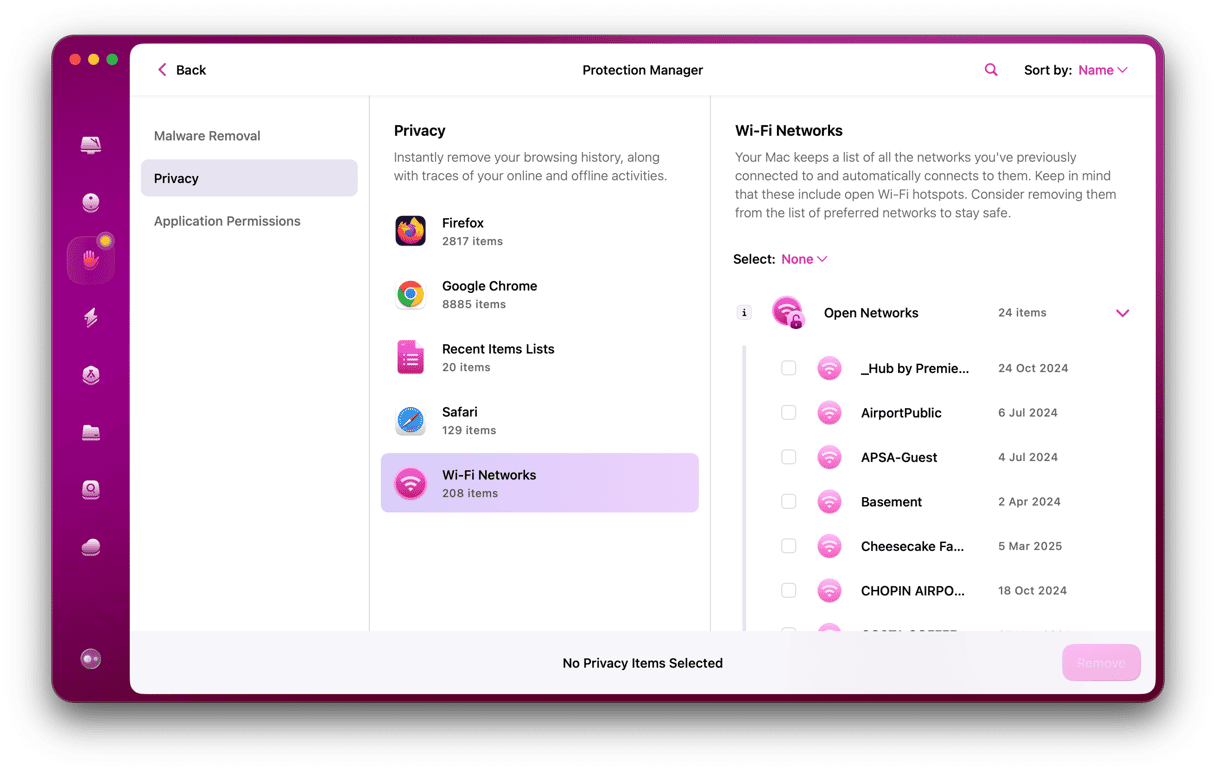
8. Forget unneeded Wi-Fi networks
Another popular culprit for giving your Mac Wi-Fi issues could be the long list of other Wi-FI names you have stored on there. These can cause your computer problems because if the network names are generic enough, there might be another network nearby that your Mac will try and connect to.
The good news is that this is another issue CleanMyMac can help you fix. And do it pretty quickly. This is all you have to do once you have the app on your Mac:
- Open CleanMyMac — download its free edition here
- In the sidebar, click Privacy > Scan.
- Select Wi-Fi Networks.
- Then, you can select the networks you want to forget and click Remove.
Reconnect to check if your Wi-Fi is working again.
There’s a very short list of things that are more annoying than the Wi-Fi on your Mac not working. And that’s especially true if you’re in the middle of trying to fix it and having to search for tutorials and articles to help you improve it. The silver lining to this article is that most of these solutions only take a few minutes, if not a few seconds, so it’s easy to try all of them until all of your macOS Monterey Wi-Fi woes are resolved. Hopefully, one of the troubleshooting tips in this article has helped you and fixed your Wi-Fi bugs on Monterey.


