We’ve checked some other Ventura downgrade instructions available on the internet. They lack clarity and, unfortunately, look like a complete mess, even missing the entire steps. So here’s our improved instruction to perform a downgrade from macOS Ventura.
By downgrade, we mean switching your macOS back to some previously installed version. For macOS 13 Ventura, in most cases, this will be macOS 12 Monterey. But it could be an even older OS, it depends.
Why should you downgrade from Ventura?
Many apps haven’t been optimized for Ventura in time, most notably the Magnet app and even Dropbox. This is the question of time, of course, but if you’re missing some crucial functionality today, downgrading is the way to go.
“The performance got worse”
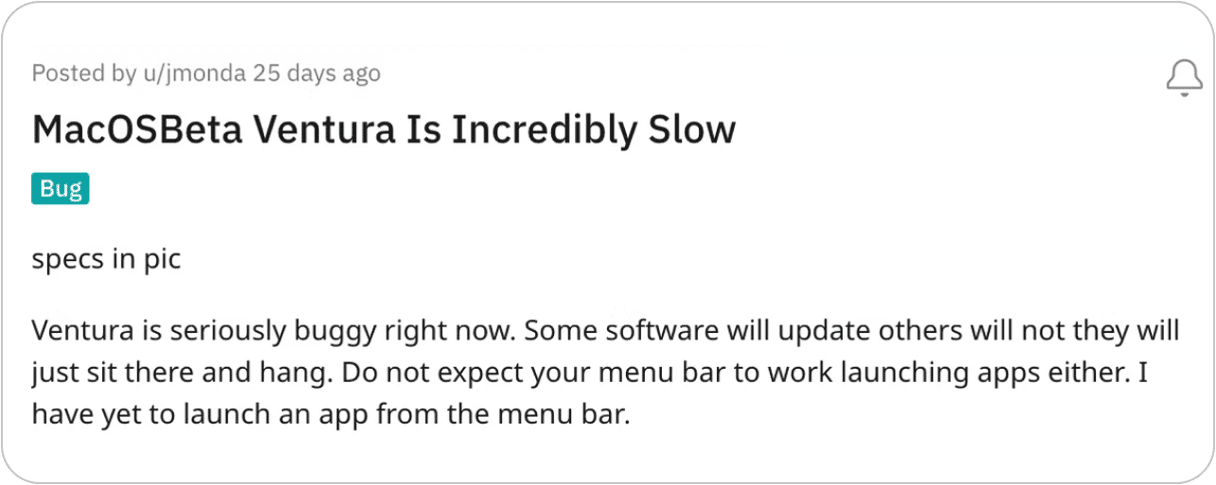
macOS 13 Ventura is not the first Apple OS to be shipped with glitches. Some users report that their MacBooks got incredibly slow after upgrading. But don’t rush to blame it all on macOS Ventura. It’s possible to fix the performance on your own with a bit of tweaking and cleaning up.
Check your Mac first. Then, reinstall
Ask yourself: Do you really need to downgrade? A downgrade from Ventura takes at least an hour to perform. Also, you may have to repeat the process twice if something goes wrong. So, before your departure, do the last final checkup of your Mac and try to eliminate issues with your current Ventura setup.
Check your Mac for hidden apps and processes
Sometimes, a single broken plug-in may slow down your entire Mac. So, you may check your Mac for such invisible items like app leftovers, shadow apps, system junk, etc.
Try CleanMyMac for free— it’s a popular problem-fixer program for Mac. You can test all the tools for free to investigate what could be wrong with your Ventura-running Mac.
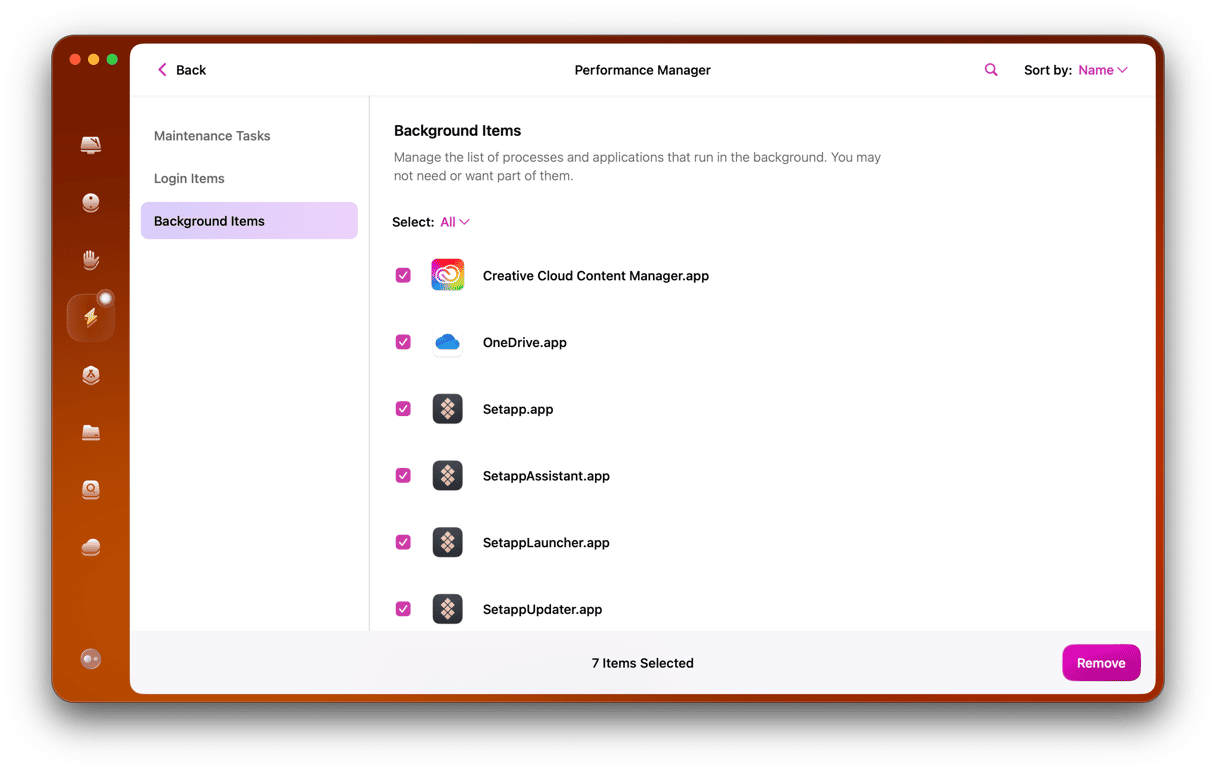
When you open CleanMyMac:
- Go to Performance and run a scan
- Review login and background items that could affect your Mac’s performance
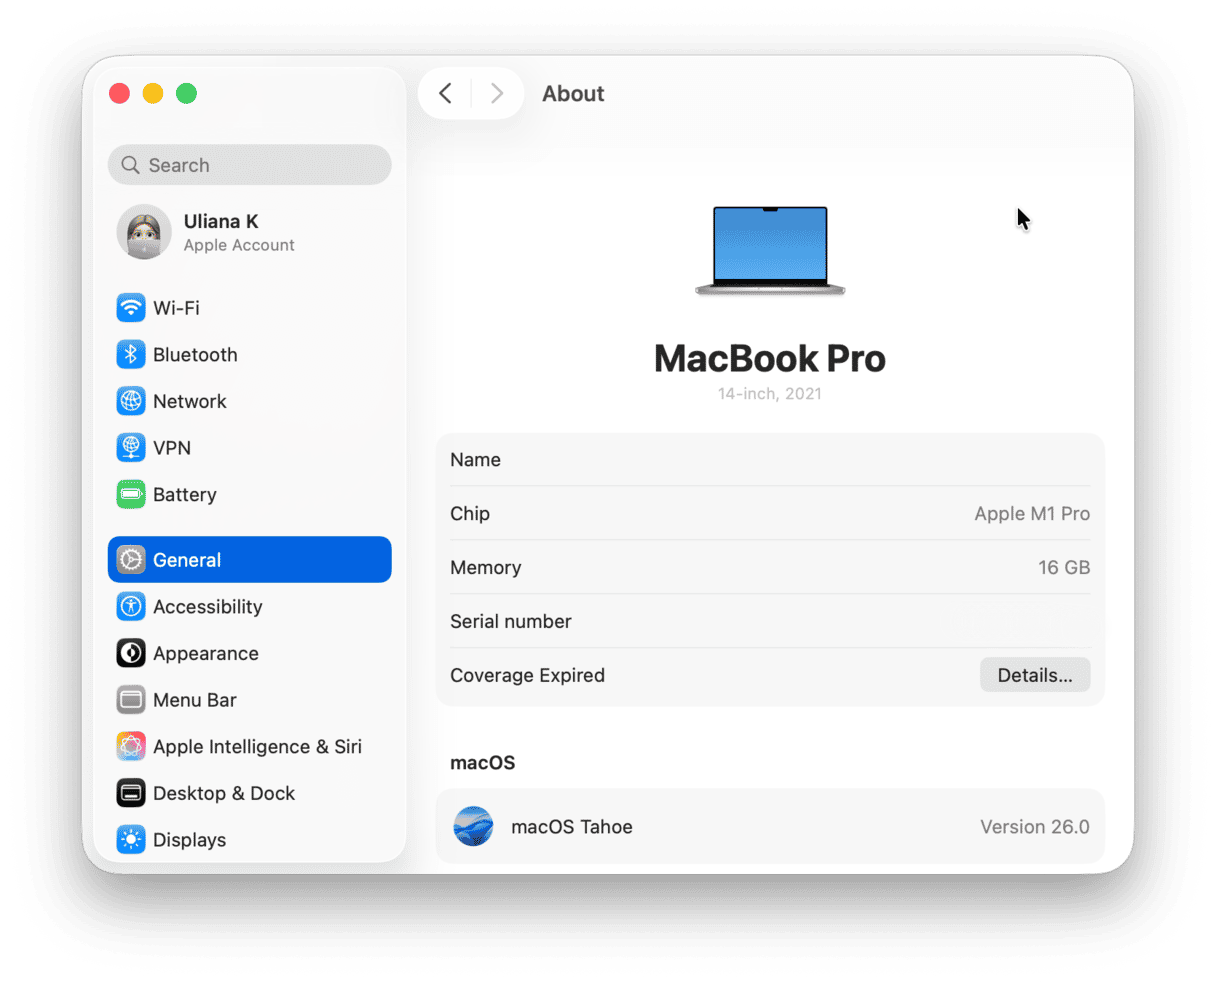
Find out what Mac you have
It’s crucial to check your Mac’s processor type. Is it Intel or Apple silicon? Remember this because the following steps will be different for these two processors.
Click the Apple Menu > System Settings > General > About.
Here, look for Intel or Apple M1 mentions.
Now, all is ready, so we can downgrade from Ventura.
Principal ways to downgrade macOS Ventura
Now, let’s get to the business and find out how to downgrade macOS Ventura and install a previous system on top of it.
There are 3 principal ways:
- Time Machine backup
- macOS Recovery
- A bootable USB installer
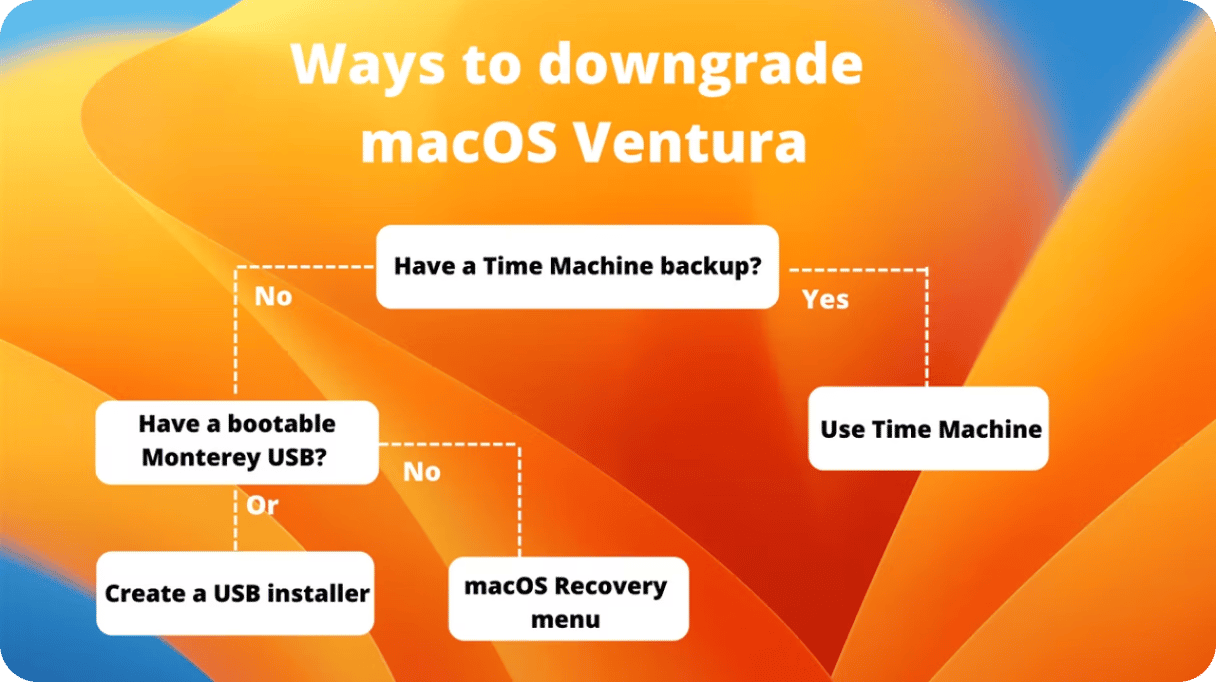
Time Machine: The easiest downgrade option
If you had previously backed up your Mac, this option is the most straightforward. Actually, any major macOS upgrade should start with a backup. So get your external drive ready; we’ll be traveling with Time Machine.
- Plug in the external drive with a backup file on it.
- Go to Apple menu > Restart.
Now, enter a special startup key combination.
For an Intel-based Mac:
Hold down Command + R when the Apple logo appears.
For a Mac with Apple silicon:
Hold down the Power button. Keep holding until the startup screen appears. Next, go to Options > Continue.
- Select Restore from Time Machine
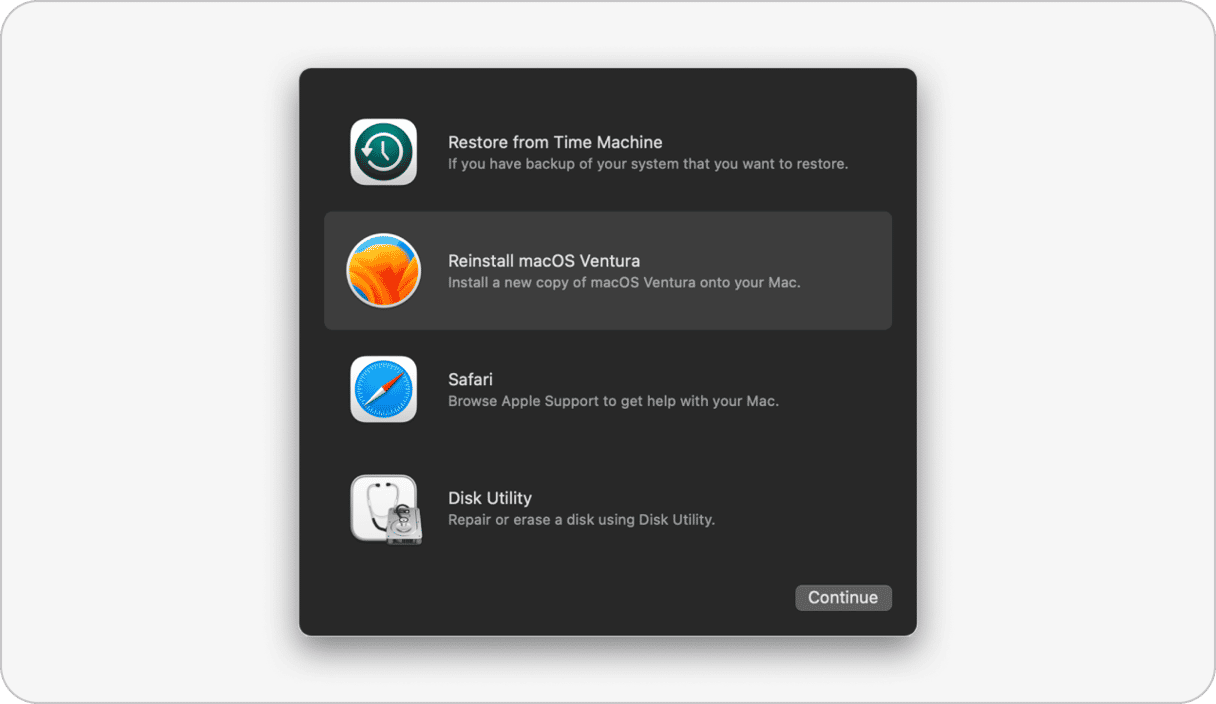
macOS Recovery: Another way to downgrade macOS Ventura
macOS Recovery will reinstall your system to the last working macOS setup. Or you can even go back to the factory-shipped OS that came with your Mac. After you’ve shut down your Mac, you’ll need to once again press different startup key combinations.
- Shut down your Mac from the Apple menu > Shut Down…
- Press the Power button on. Now, quickly enter one of these:
Command+R: Reinstalls current OS version (Ventura).
Shift+Option+Command+R: Reinstalls the factory-shipped macOS.
Option+Command+R: Upgrades to the latest-supported macOS.
- Enter your password and click Continue > Next > Reinstall macOS.
Now, sit back and let your Mac resurrect itself. The installation may take longer than the estimated time on screen, so don’t worry, and don’t close your Mac’s lid.
Bootable Installer: The most head-scratching option
If you’re not a system administrator, you likely don’t have a USB with macOS Monterey lying around. So this option involves that you boot your Mac with a previously prepared installer that is copied onto an external drive or a USB stick. Good news, you can create such an installer yourself — this article explains how to do it.
Have you created the bootable stick? Now, read next.
On an Intel-based Mac:
Restart your Mac while holding down the Option key.
When the boot options pop up, release Option and press Command +R instead.
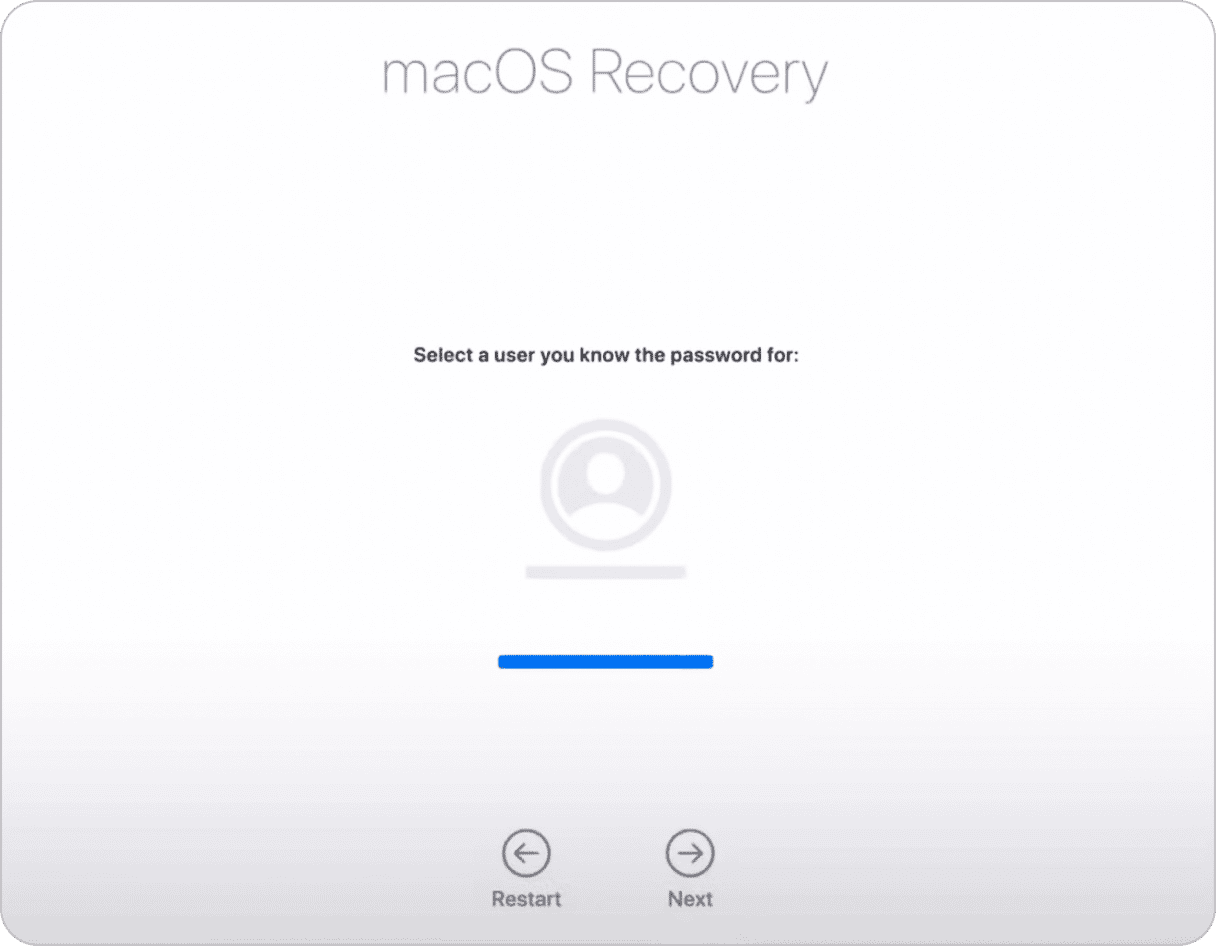
This is Mac Recovery mode. Here we need to go one level deeper to allow your Mac to boot from external media. You’ll be asked to enter your password several times.
Click on Utilities in the upper left.
Choose Startup Security Utility.
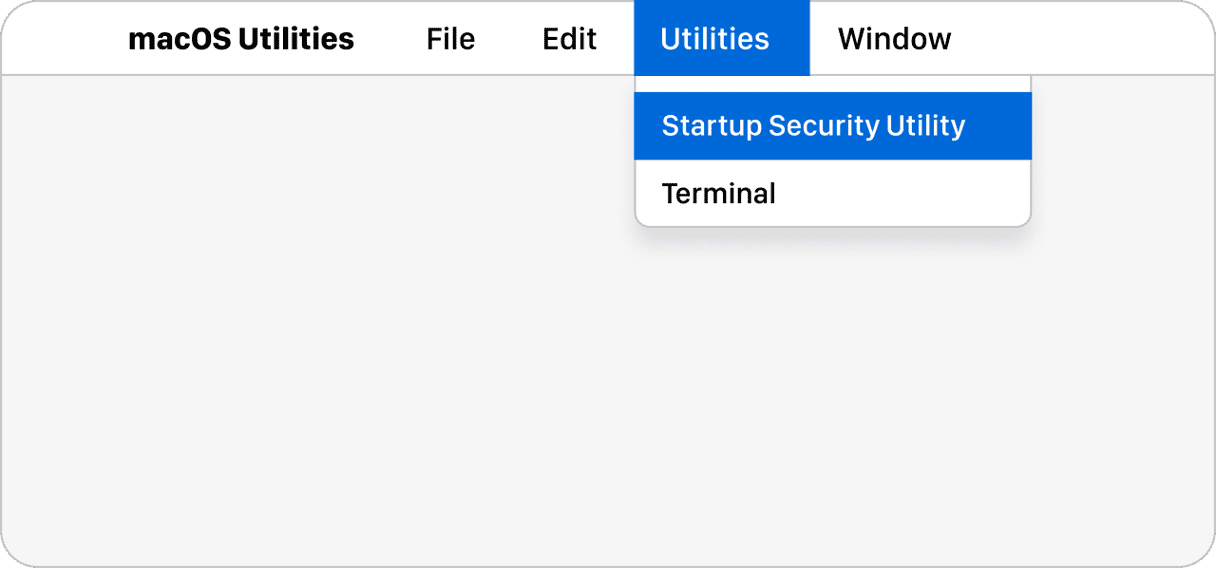
In the next menu, select to allow your Mac boot from external or removable media.
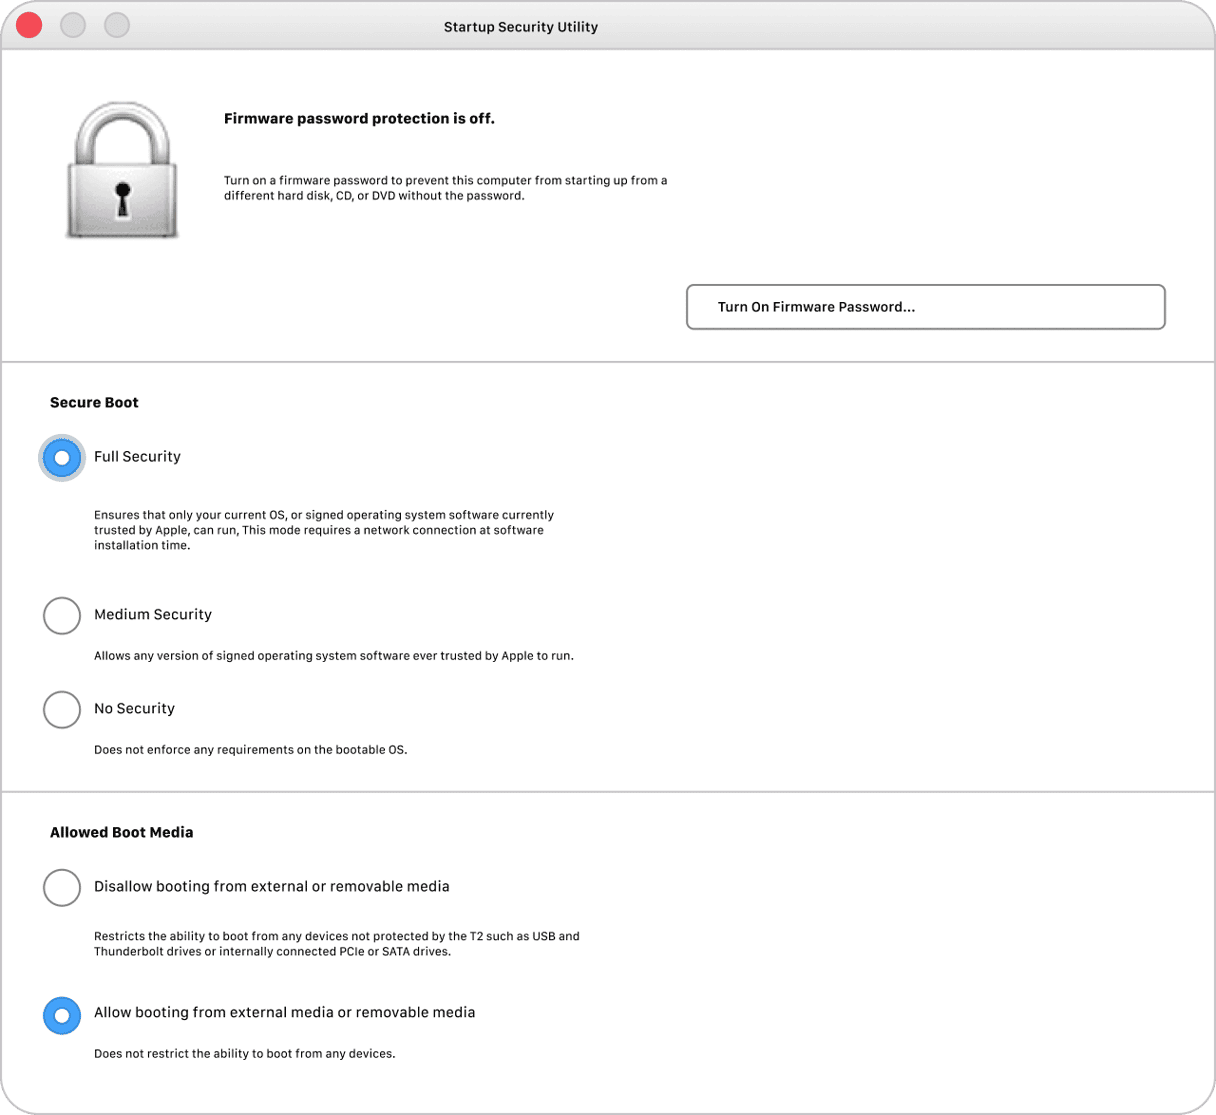
Well done.
Erasing your current hard disk
Why erase your macOS with files on it? It turns out that some disks cannot be downgraded that way and, therefore, require full formatting beforehand. We’re about to erase your current disk, and at this point, you should have a reliable backup of your important files.
Insert your USB drive.
Now, restart your Mac once more, holding down the Option key.
When the boot selection screen appears:
- Select to boot from the USB installer option and let it verify the disk.
- Next click Disk Utility > Continue.
- Find your internal Macintosh HD disk (the one with Ventura on it) and select Erase.
Choose the APFS format.
Choose GUID Partition Map if the Scheme option is provided.
Click Erase Volume Group.
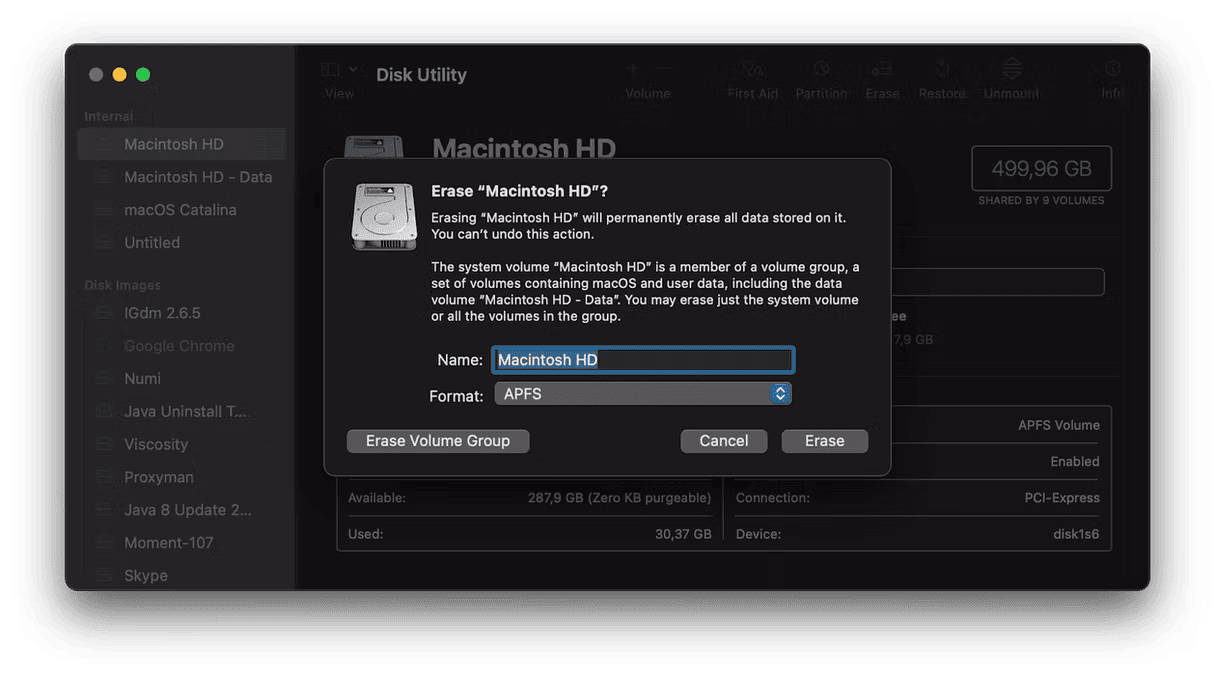
After you’ve quit Disk Utility, restart again by holding down the Option key.
One more time, you’ll see different startup options. With your USB installer plugged in, choose USB as a boot source.
Select the drive for macOS Monterey installation.
Click Install macOS Monterey and Continue.
Phew. We did it💪
On a Mac with Apple silicon:
Here are the same steps (formatting + installing) if you happen to have an Apple M1 Mac.
- Shut down your Mac.
- Press and hold the Power button.
- Select the USB drive among startup options > Continue.
- Click Install macOS Monterey > Quit install macOS.
- Disk Utility > Continue.
Next, we will erase your Macintosh hard drive. Then, on top of the formatted drive, we’ll install Monterey from the USB. Proceed with caution!
In Disk Utility, choose your Macintosh HD > Erase.
Now, click Disk Utility > Quit Disk Utility.
Now, restart your Mac with your USB drive plugged in. Hold down the Power button until the startup menu appears.
Select to boot from the USB installer.
Choose the drive to install macOS Monterey.
Click Install macOS Monterey > Continue.
Aftermath: Final performance check
Finally, check the performance of your Mac. In theory, your system should now be stable and more predictable. But anyway, it’s worth checking out how your Mac is doing in terms of memory and performance.
You can use a tool we’ve mentioned above, CleanMyMac by MacPaw.
- Get your free CleanMyMac trial
- Click on the small iMac icon in the upper menu bar
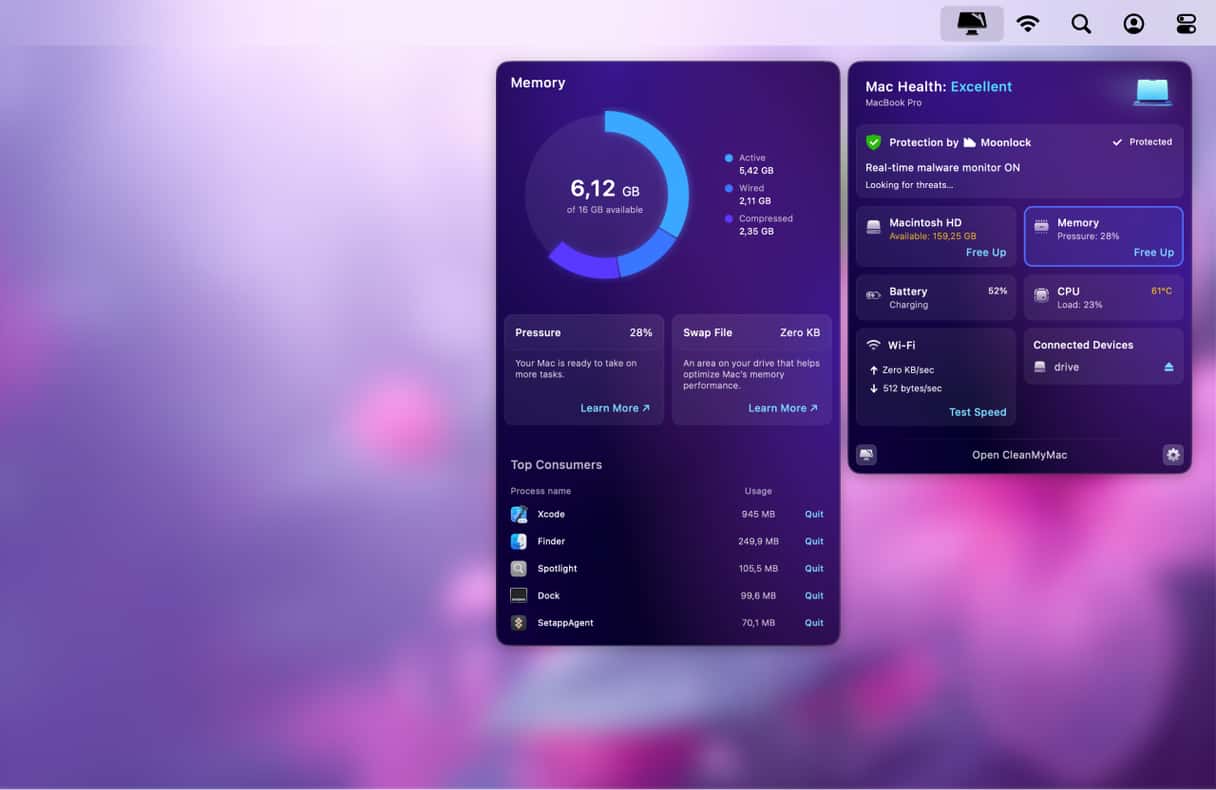
Here you can see the actual memory pressure for your Mac. Also, check out other tools to analyze your hard drive — you’ll find many useful insights about your Mac in the side panel.
We hope your way back to macOS Monterey was smooth and clear. Downgrading from Ventura to Monterey is not a trivial task, but people have done it and returned safely.


