If your Mac cursor goes crazy, drifting aimlessly across the monitor, this erratic “cursor dance” may be annoying. Cursor acting up may even be a sign of malware. But worry not, with a bit of targeted troubleshooting and regular maintenance, you can easily reclaim your wayward cursor for good and calm down the MacBook mouse going crazy. Start with cleaning your trackpad and/or mouse if it is connected with a lint-free cloth (slightly dampen it if needed). If it has not helped, keep on reading for some tech tips.

How to stop cursor from moving on its own
If you’ve asking, “Why does my cursor move on its own?” and have noticed that it started to exhibit troubling symptoms, such as ghost clicks or a slow horizontal drift, it’s time to investigate and find the root of the issue.
Reasons why your cursor malfunctions may range from pointing devices interfering with one another or corrupted files damaging hardware to physical issues like a damaged trackpad or a swollen battery. To uncover and eliminate the issue that’s causing the MacBook cursor erratic behavior, you need to complete a thorough checkup.
1. Reset all pointing devices
Having multiple pointing devices connected at once can sometimes cause interference. Your computer may try to jump from one to another while you’re working, which could result in bizarre cursor movement.
Bluetooth or USB, test your pointing devices individually. But before that, make sure all devices are fully charged and have fresh batteries. If, when switching from one device to another, you notice the Mac cursor moving on its own — you’ve just found the problem. Try to resolve interference by unplugging and reinstalling your mouse or resetting your Bluetooth pointing device:
- Open Bluetooth in System Settings.
- Remove all devices by clicking the i icon and choosing Forget This Device.
- Turn Bluetooth devices off and on, make them discoverable, and reconnect.
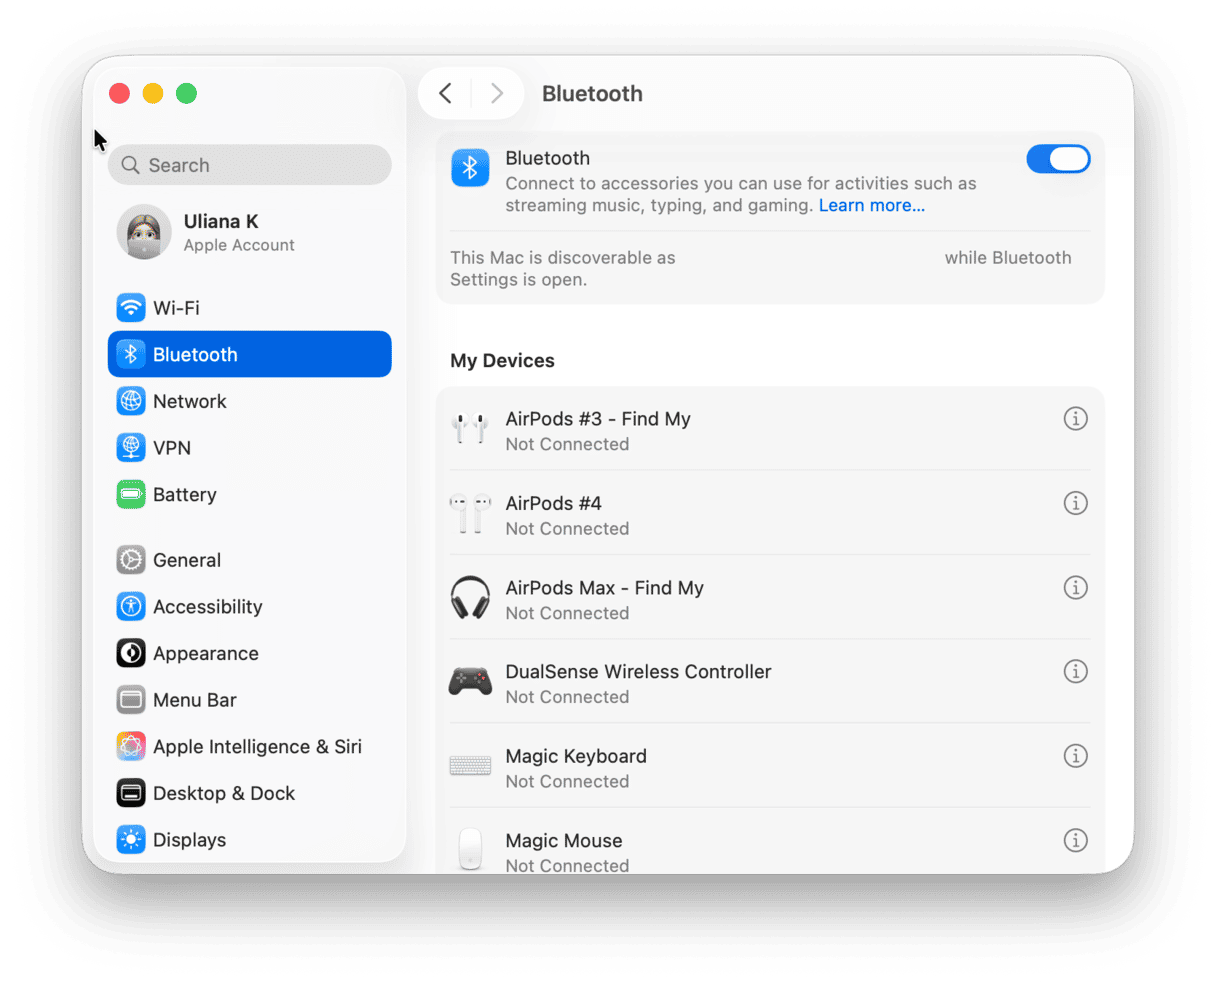
In addition, uninstall and reinstall USB-pointing devices:
- With the device unplugged, search for your device using the Finder.
- Open your device’s application folder and run the uninstaller. If your device has no folder, just drag the icon to Trash.
- Restart your Mac, plug the device in, and follow the steps to reinstall.
2. Check your Mac for malware
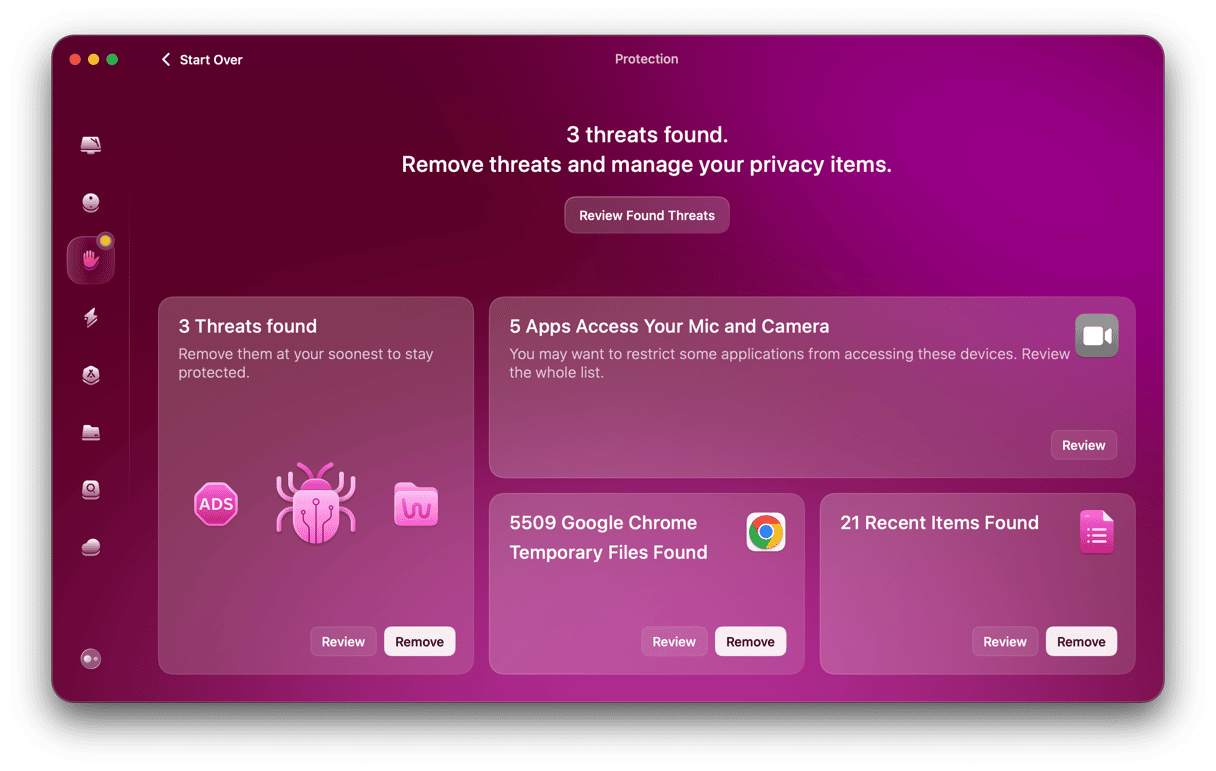
Another fix to try is to check your Mac for malware, as MacBook cursor jumping around may be a tell-tale sign that your computer is infected. There are many antimalware tools out there, but we recommend an Apple-notarized app CleanMyMac because it is absolutely safe to use. More than that, its malware database is constantly updated to detect the most recent viruses, adware, spyware, stalkerware, and other forms of threats.
To run the scan, follow these steps:
- Start your free CleanMyMac trial.
- Select the Protection tab.
- Click Scan.
- Once the scan is complete, you will either get a clean bill of health or see the Remove button to get rid of malware.
3. Turn off Tap to Click
Sometimes, these are System Settings that cause the MacBook cursor jumping around issue. To find out if that is the case, turn off Tap to click:
- From the main Apple menu, navigate to System Settings.
- Select Trackpad.
- Make sure that Tap to Click is turned off by toggling the switcher.
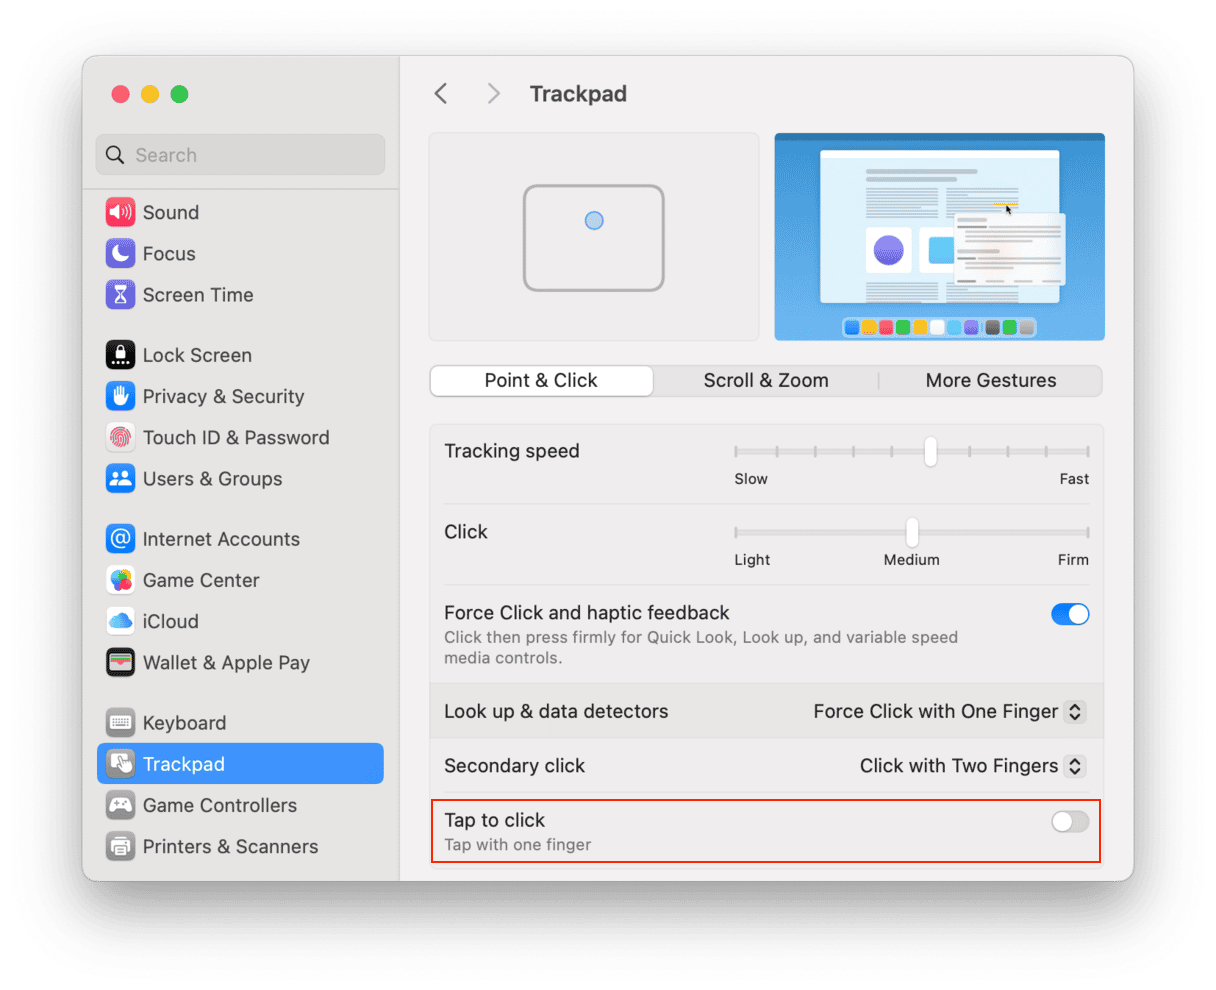
If it helped, most probably, you touched the trackpad while typing, and it is what was behind the MacBook cursor erratic behavior. If the issue persists, let’s proceed with other fixes.
4. Restart your Mac in safe mode
If your devices don’t seem to be the source of your sudden cursor’s independence, restart your computer in safe mode. Your Mac in this mode doesn’t open programs, apps, or cached files to repair internal issues it detects. Also, starting your computer in safe mode can resolve all kinds of other Mac problems.
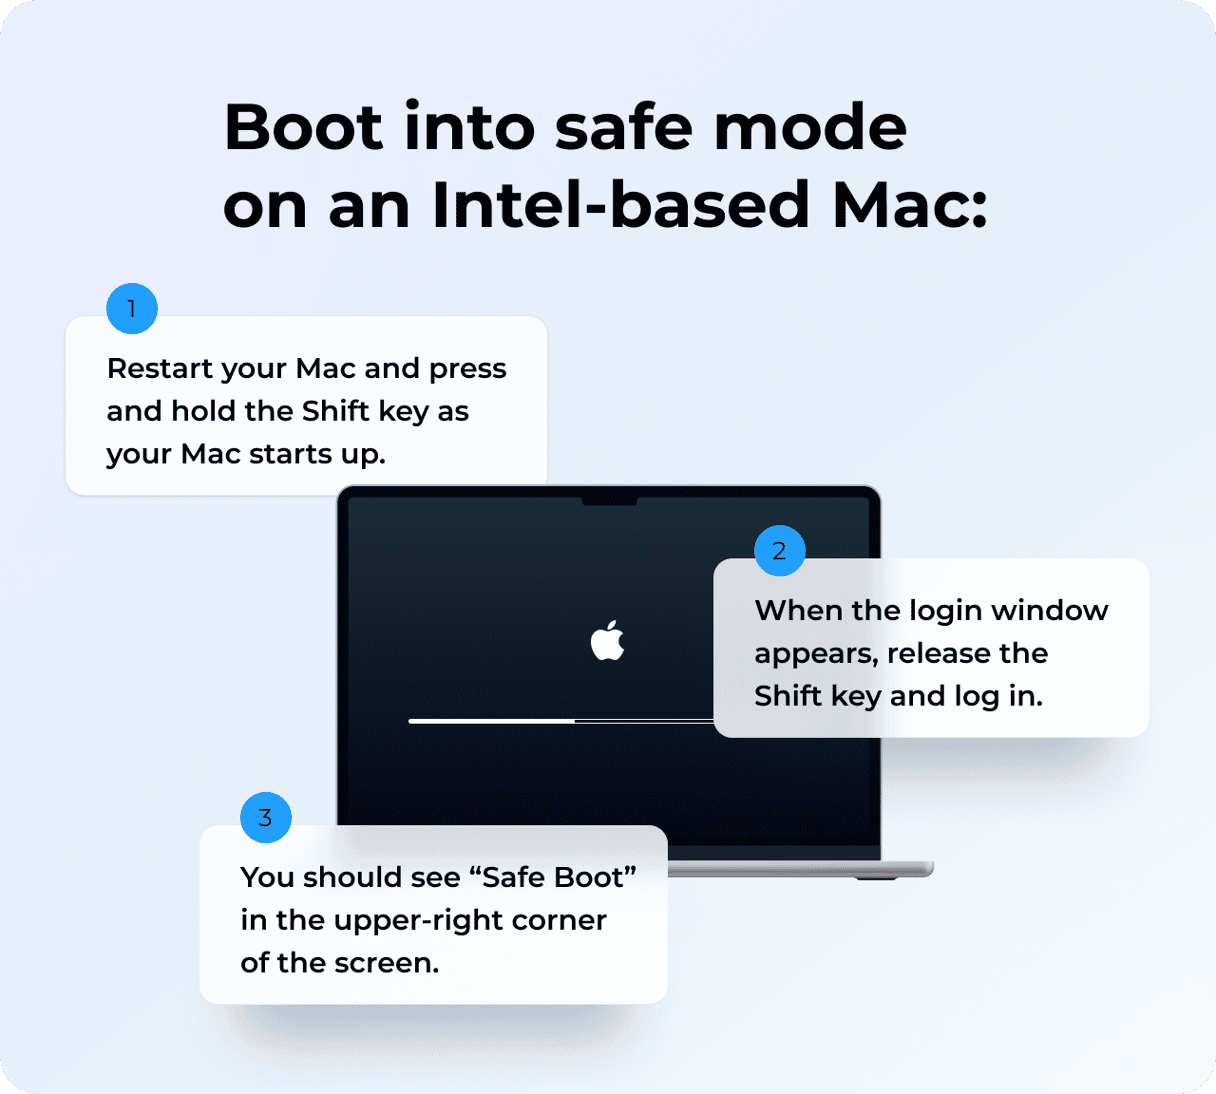
To start your Intel-based Mac in safe mode:
- Restart your computer normally from the Apple menu but hold the Shift key.
- Release Shift when you see the login window.
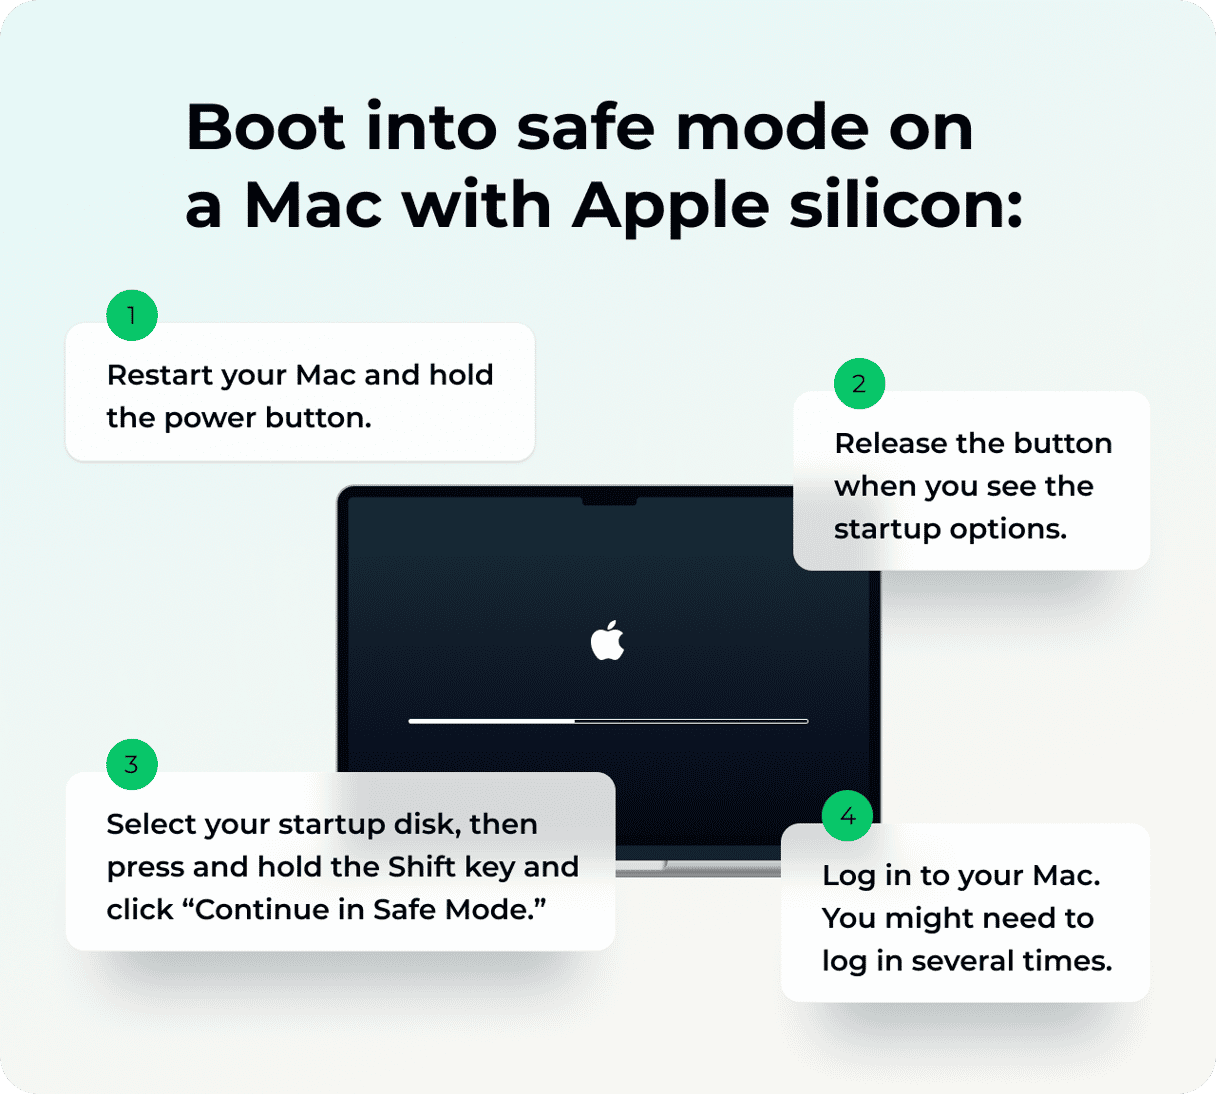
For a Mac with Apple silicon:
- Shut down your Mac and wait 10 seconds.
- Press and hold the power button until the startup options window shows up.
- Select a startup disk.
- Press the Shift key and click Continue in Safe Mode.
- Release the Shift key.
In addition to safe mode, try going fully offline. Turn off your Wi-Fi, unplug your Ethernet, and shut off Bluetooth. If you suspect you have a “cursor moving on its own Mac virus” even after scanning your Mac with antimalware software, and the issue still persists while disconnected in safe mode, you can be sure that it’s not malware, adware, or other intrusive programs that are disrupting your cursor.
5. Repair disk permissions
One more option at your disposal to help your computer resolve internal issues is to repair your disk permissions. Essentially, this forces your Mac to return to its default permissions and ensure everything is running in the way the macOS expects it to, which prevents applications from malfunctioning.
If you find yourself exhausted from manual troubleshooting, try CleanMyMac. This app is a simple but effective way to target and resolve your cursor and other issues at once.
Performance scan in CleanMyMac helps repair disk permissions and run maintenance tasks while flushing your DNS cache at the same time. The app is also equipped with a handy Uninstaller, which allows you to select and uninstall any problematic applications.
To perform maintenance, follow these steps:
- Get your free CleanMyMac trial.
- Select the Performance tab and run a quick scan.
- Click Run Tasks.
- Alternatively, click View All Tasks > Maintenance Tasks, select what to perform, and click Run.

6. Reconfigure SMC, NVRAM, and PRAM
The SMC (System Management Controller) controls your computer’s thermal, power, and battery recharging operations. Resetting the SMC will allow it to refresh any corrupted file paths that may be preventing pointing devices from working correctly.
To quickly reset your SMC on an Intel-based Mac:
- Select Shut Down from the Apple menu.
- After your Mac shuts down, hold Shift-Control-Option-Power button for 10 seconds.
- Release all held keys.
- Power on normally.
_1681124509.png)
For a Mac with Apple silicon, simply restart it.
Additionally, as your NVRAM (nonvolatile random-access memory) and PRAM (Parameter RAM) perform quick access memory tasks related to the devices you use every day, resetting them will help cure corrupted file paths.
To reset your NVRAM and PRAM on an Intel-based Mac:
- Select Shut Down from the Apple menu.
- Once your Mac shuts down, press the power button, followed quickly by Command-Option-P-R.
- Hold Command-Option-P-R until your Mac restarts,
- Once you hear the startup chord, release the buttons and allow the Mac to start up.

A Mac with Apple silicon will automatically reset NVRAM/PRAM.
Ultimately, there are quite a few causes for cursor issues, and finding the right one manually can be a real challenge. While some fixes will be as simple as cleaning your trackpad, many will still require a lot more effort. That’s where an app, such as CleanMyMac, really shines, combining all possible fixes into a simple one-click solution to get your cursor back to normal.


