macOS Monterey is a great new update we all have been very excited about. This version introduced many cool features, including the Shortcuts app, Universal Control, redesigned Safari, improvements to FaceTime, and other major changes. But, the new updates rarely run flawlessly, and sadly, macOS Monterey is no exception. Luckily, there is a fix for almost every problem you may encounter — in this article, we’ll break down common macOS Monterey problems and fixes.
macOS Monterey: problems & solutions
We’ll shed some light on common problems and issues you may face with macOS Monterey. If you’d like to fix a particular problem, jump up to the section that interests you:
- macOS Monterey won’t install
- Time Machine is stuck on backup
- Mac is slow after the update
- Mouse/Trackpad input is laggy
- Wi-Fi not working
- Bluetooth not working
- Mac cursor stuck on Monterey
- Battery started to drain
- Hide my email not working
- Mac won't shut down
- Mac overheating after the upgrade
- Screen saver is broken
1. macOS Monterey won’t install
If you were in the middle of updating your Mac, but the macOS Monterey installation failed, here are a few things you could try:
Make sure you have enough space.
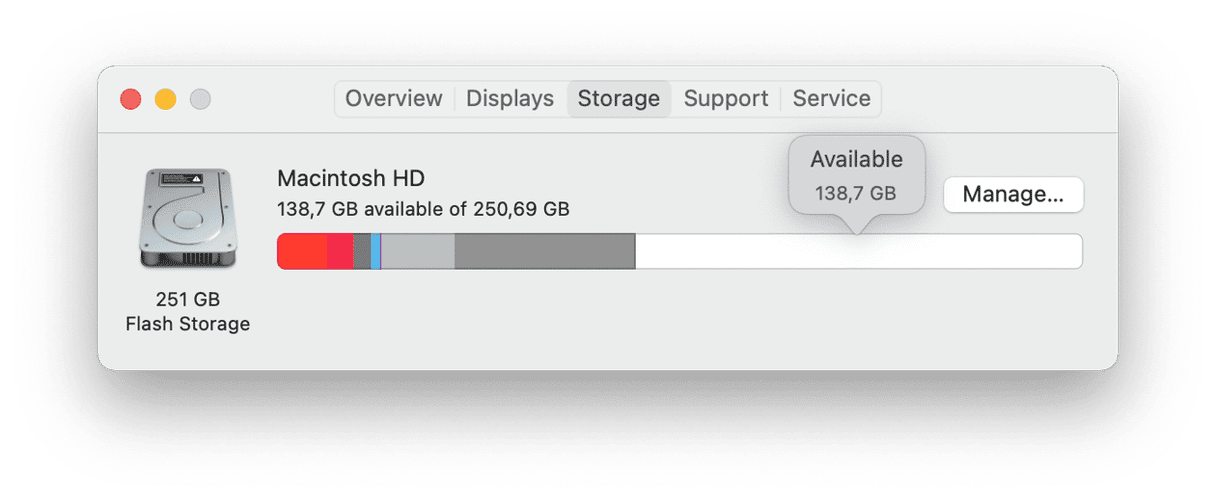
Apple recommends having around 20GBs of free hard drive space to install new OS update. To check how much free space you have, go to the Apple menu > About This Mac. Select the Storage tab and let it calculate how your storage space is allocated. If there are less than 20GBs available, click Manage, and follow the tips to optimize your hard drive.
Check your Wi-Fi connection
A problem with the internet connection may be the reason why the macOS Monterey update gets stuck. Change the network if you can, or switch to an ethernet cable to avoid Wi-Fi connectivity issues.
Check Apple System status
When Apple Servers are down, all Mac users can experience issues with the update. To check the current server status, visit the System Status page. Look for a green status indicator next to “macOS Software Update.” If there is a problem, it will say "Outage" alongside a red dot.
2. Time Machine is stuck on backup
If the last time you’ve backed up your Mac was some time ago, it may take longer for Time Machine to prepare a backup. Giving it more time should fix the issue. But, if it’s been stuck for a while, try stopping the backup in progress. Then, uncheck the “Back Up Automatically” box.
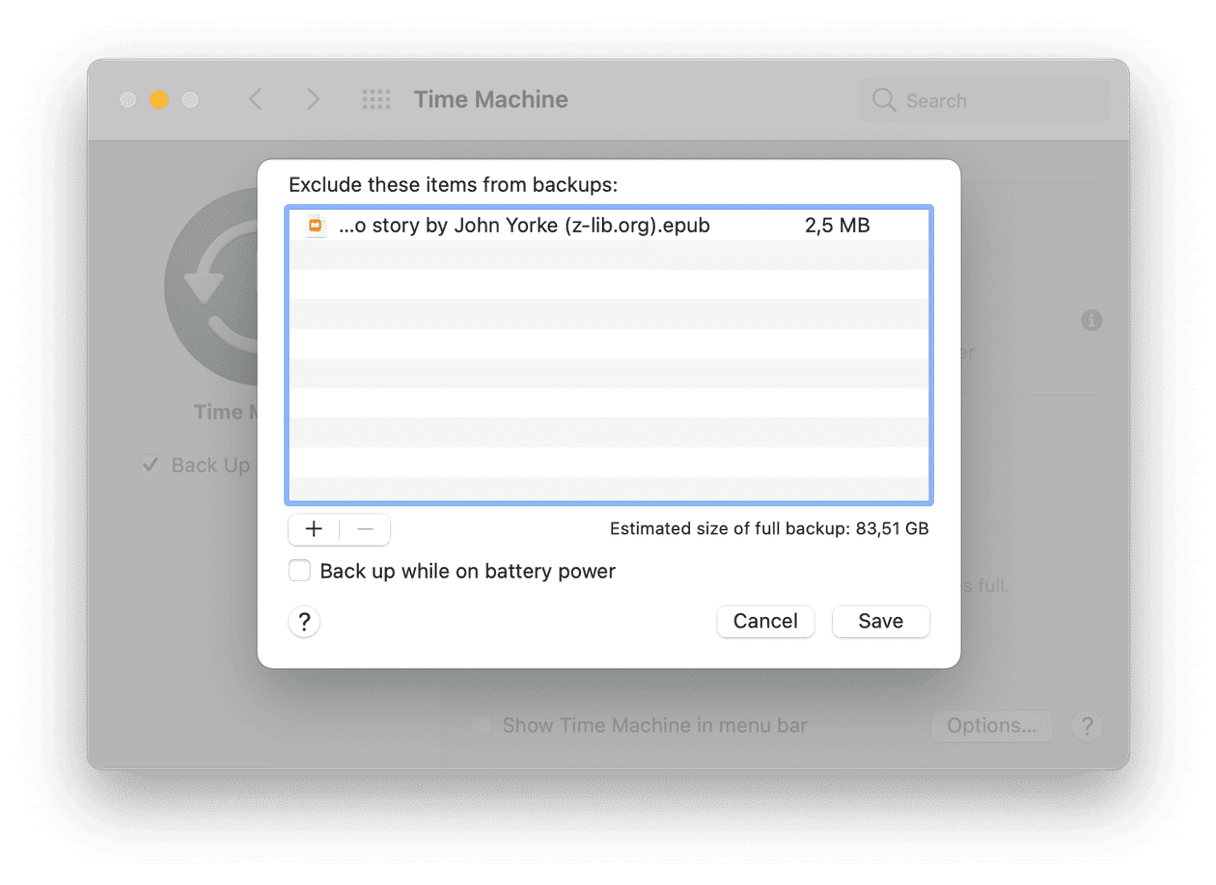
Now, exclude the large files you don’t need from the backup: click Options and press “+” to add files.
Before starting the backup over, make sure your antivirus software doesn’t interfere with Time Machine: exclude the external drive from the antivirus scans or quit the antivirus altogether while you’re backing up your data.
3. Mac is slow after the update
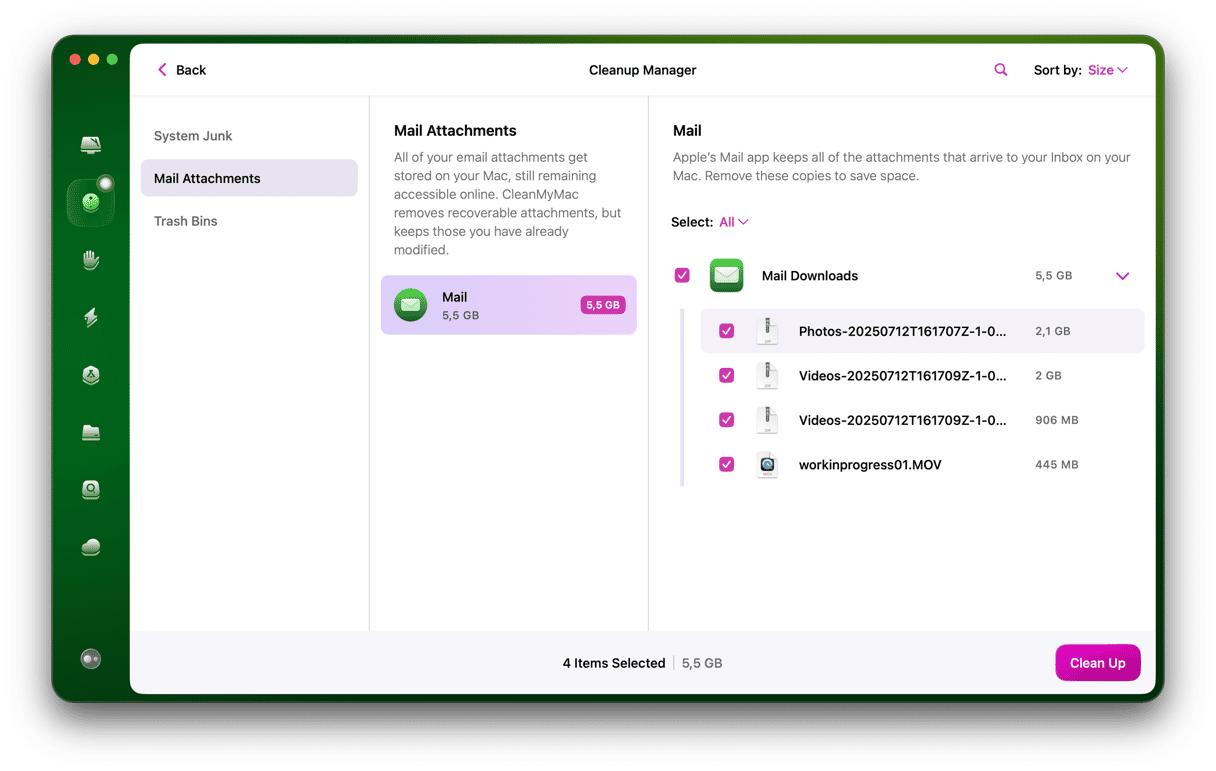
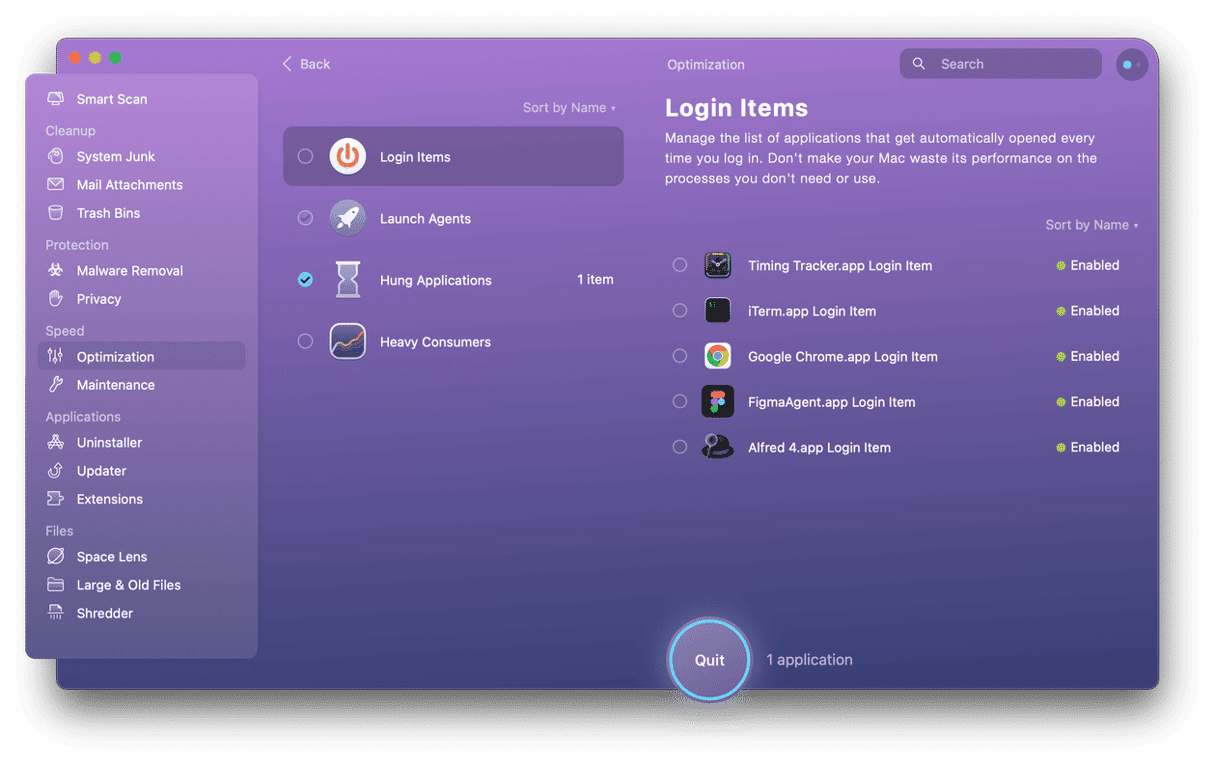
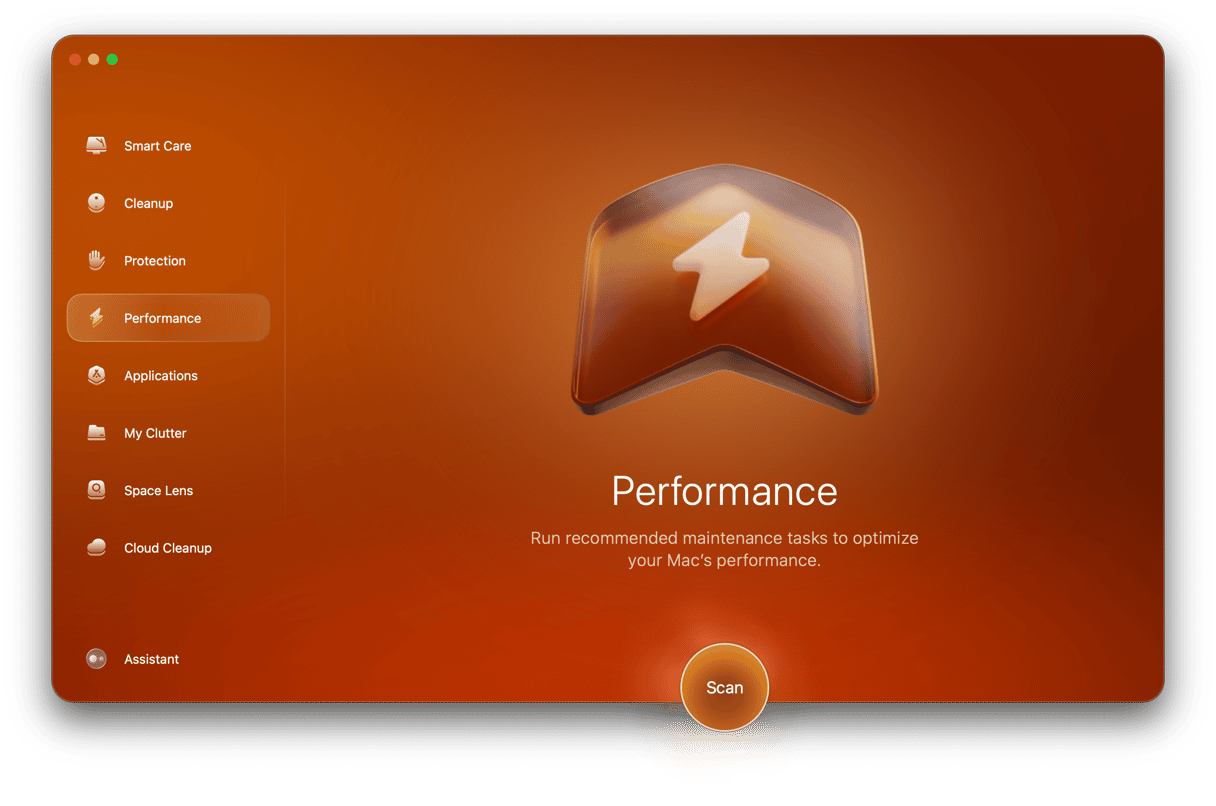
Some users reported having performance issues after updating their Macs to macOS Monterey. If that’s the case with your MacBook, there is an app that can fix that. CleanMyMac is a Mac cleaner and optimization tool that runs useful optimizations and speeds things up on your computer. It disables background processes, frees up RAM, and shows exactly what’s slowing down your Mac.
- Get your free CleanMyMac trial — it’s free to try it out.
- Install and launch the app.
- Go to Performance > Scan > View All Tasks.
- Select the Login Items you want to disable.
- Click Remove.
Now, move to the Maintenance Tasks tab, and run some optimizations here.
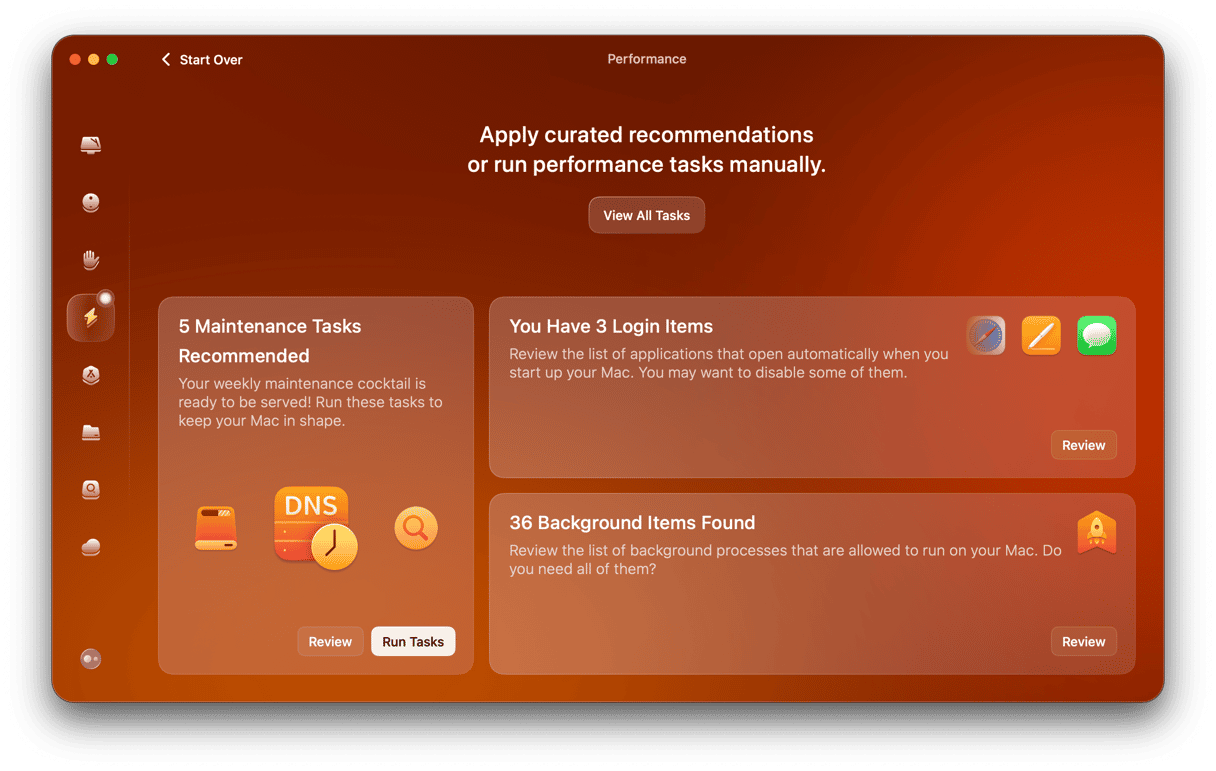
CleanMyMac saves the time you’d spent running all those commands in Terminal. So, if you’re looking for a safe and quick way to fix your slow Mac, try CleanMyMac — it’s notarized by Apple.
4. Mouse/Trackpad input is laggy
Some of the early adopters of the macOS Monterey reported an input delay that happened every five minutes and lasted for 5 to 20 seconds a time. Unfortunately, Apple still has no fix, but we expect the solution will arrive with the next update. In the meantime, you can try the following:
Disable conflicting apps
Some programs can conflict with each other causing your trackpad or mouse to lag. Quit all the active apps (you can do that using the Force Quit menu: just press Option-Command-Esc to launch it) and see if the issue persists. Reopen apps one by one to identify the culprit.
Downgrade to macOS Big Sur
If it’s impossible for you to use your Mac normally, consider downgrading to the previous macOS. Here are our detailed instructions on how to roll back from macOS Monterey to Big Sur.
5. Wi-Fi not working
If you’ve noticed that Wi-Fi stopped working on your Mac after the upgrade, first try forgetting the network:
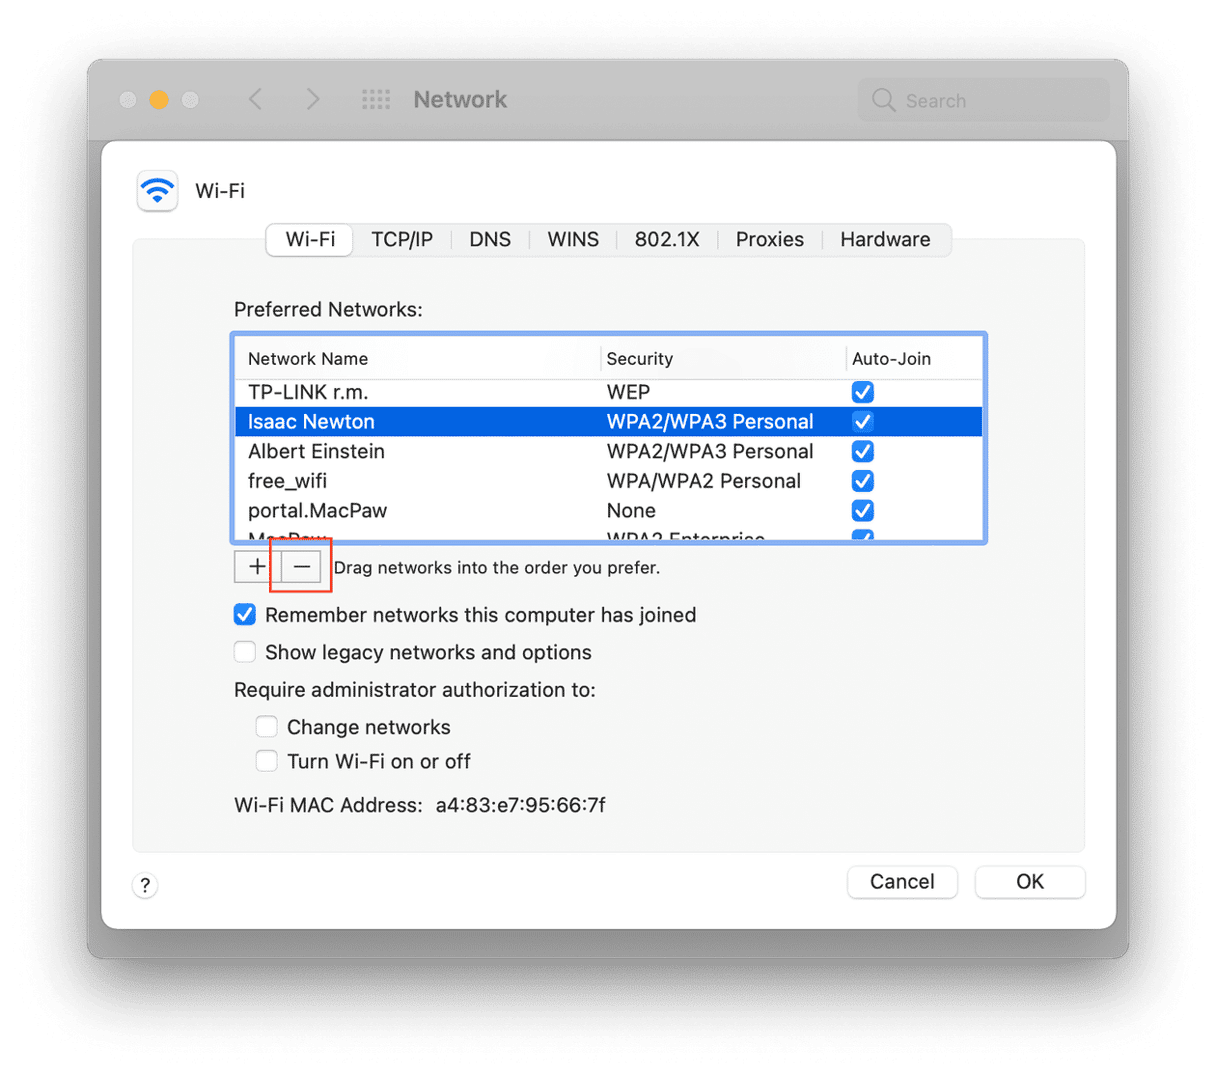
- Go to System Preferences > Network.
- Select Wi-Fi and click Advanced.
- Select the network you want to forget and press the “–” button.
- Click Remove to confirm.
Reconnect to the network and see if it worked. If it didn’t help, updating your Wi-Fi preferences may fix the issue. Here’s how to do that:
- Go to Finder.
- Click Go > Go to Folder.
- Enter this location and press Go: /Library/Preferences/SystemConfiguration/
- Locate the following files and delete them:
com.apple.airport.preferences.plist
com.apple.network.eapolclient.configuration.plist
com.apple.wifi.messsage-tracer.plist
NetworkInterfaces.plist
preferences.plist
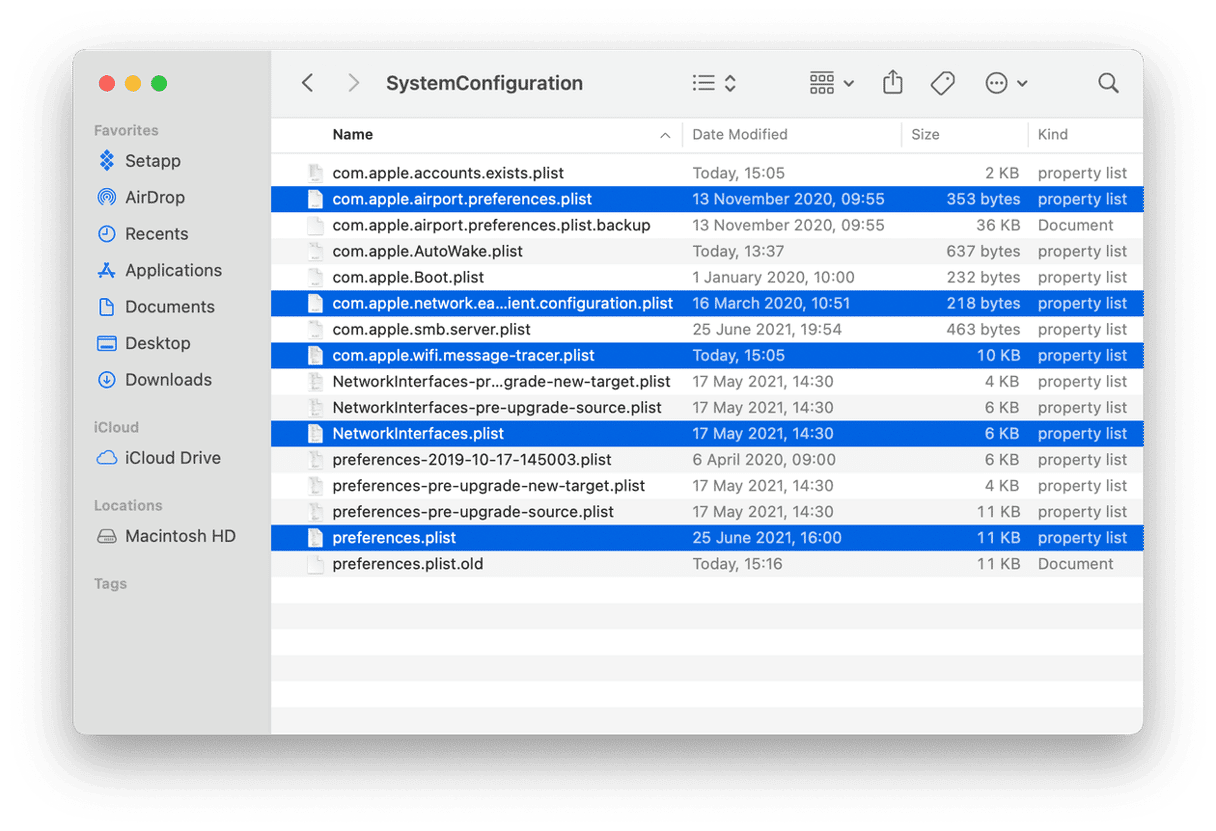
Restart your Mac and your Wi-Fi router. The new preference files will be rebuilt, and Wi-Fi should be up and running.
Another thing with Wi-Fi is that we often use lots of different Wi-Fi networks, forgetting some of them are free and unsecure. Your Mac can reconnect to that unsafe network if it’s nearby, exposing your data to more risks. So, it’s better to remove those networks for good. CleanMyMac helps you do just that: it shows the list of all open networks you’ve earlier connected to and deletes them.
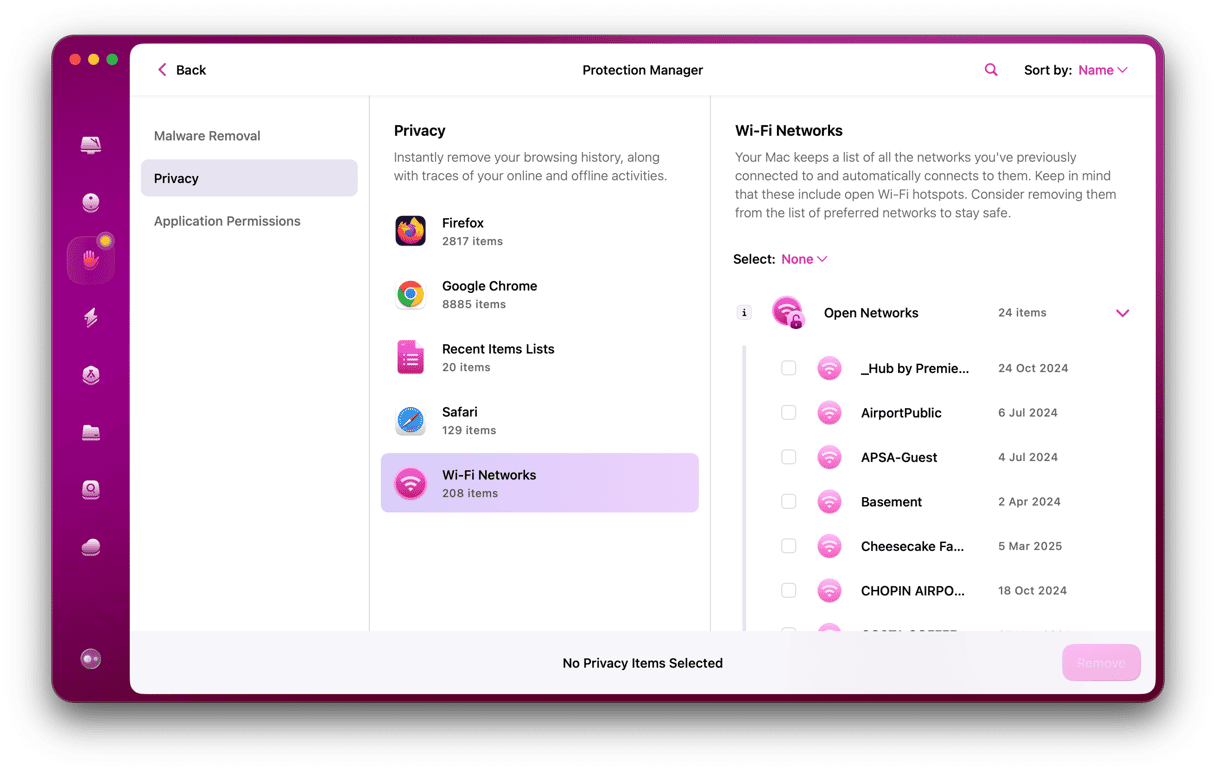
You can explore other Privacy features as well to be more in control of your data and remain secure.
6. Bluetooth not working
Bluetooth issues are common on the new OS: it happened on Big Sur, and it happens on Monterey now. If Bluetooth keeps disconnecting or doesn’t connect at all, here are some things you can do:
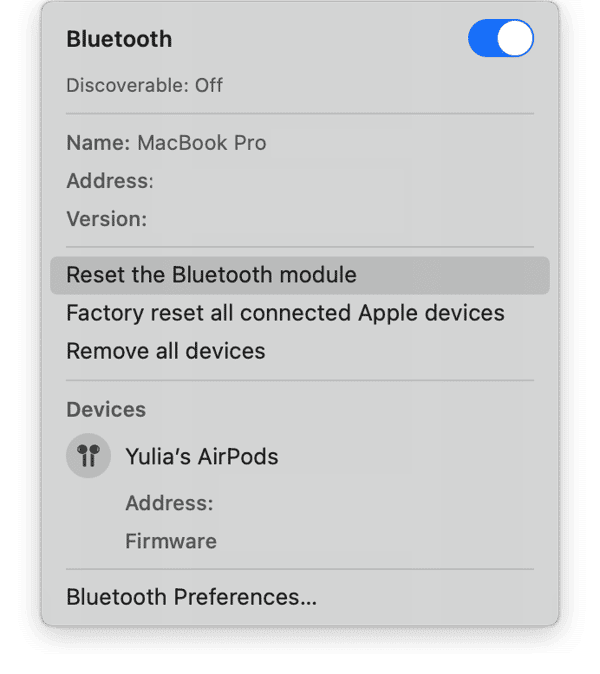
Reset the Bluetooth module
To reset Bluetooth, press Shift-Option and click the Bluetooth icon. Here, select Reset the Bluetooth module. In the window that appears, click OK.
Reset PRAM/NVRAM settings
NVRAM is a type of memory on your Mac that contains certain settings. PRAM, which stands for Parameter RAM, stores similar information. Resetting NVRAM/PRAM can help fix issues with sound, display, Bluetooth, and other preferences. Here’s how to do that:
- Shut down your Mac.
- Turn it on and press Option-Command-P-R on Mac’s startup.
- Hold the keys for 20 seconds, then release.
When your Mac starts up, go to System Preferences to modify any settings that were altered.
7. Cursor stuck on Monterey
We’ve seen posts about issues with the Mac trackpad after upgrading to Monterey. It seems to be turned off for certain user accounts while the mouse is still working fine.
What can you do? One user reported that the following trick solved the issue.
Update your Accessibility settings
Open System Preferences > Accessibility> Pointer control.
Now, deselect the setting that says “Ignore built-in trackpad when mouse or wireless trackpad is present”.
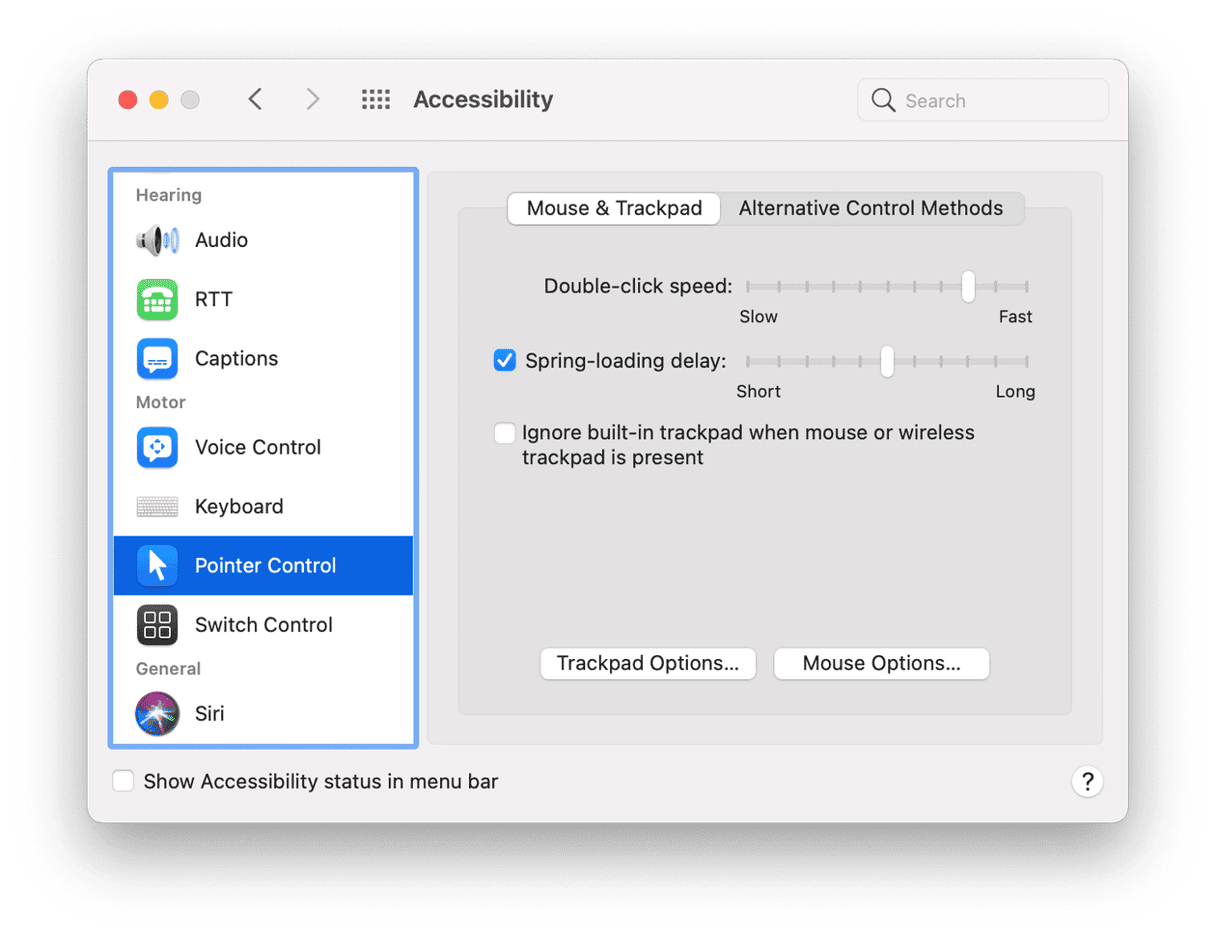
For some reason, this setting became the default one on Monterey, causing the cursor to be stuck.
8. Battery drain on macOS Monterey
The increased pressure on the battery is typical for the new macOS. The problem is hardly in the battery itself; it is most likely caused by a misbehaving app. Lots of apps still haven’t been adjusted for Monterey yet.
Before you take other steps, point and click the battery symbol in the upper right corner. Open Battery Preferences. You’ll see the apps that consume the most battery charge.
Now you can try either of these solutions.
Restart your Mac
The golden rule of troubleshooting that fixes 80% of all issues.
Check the battery’s usage history
Go to System Preferences > Battery > Usage history.
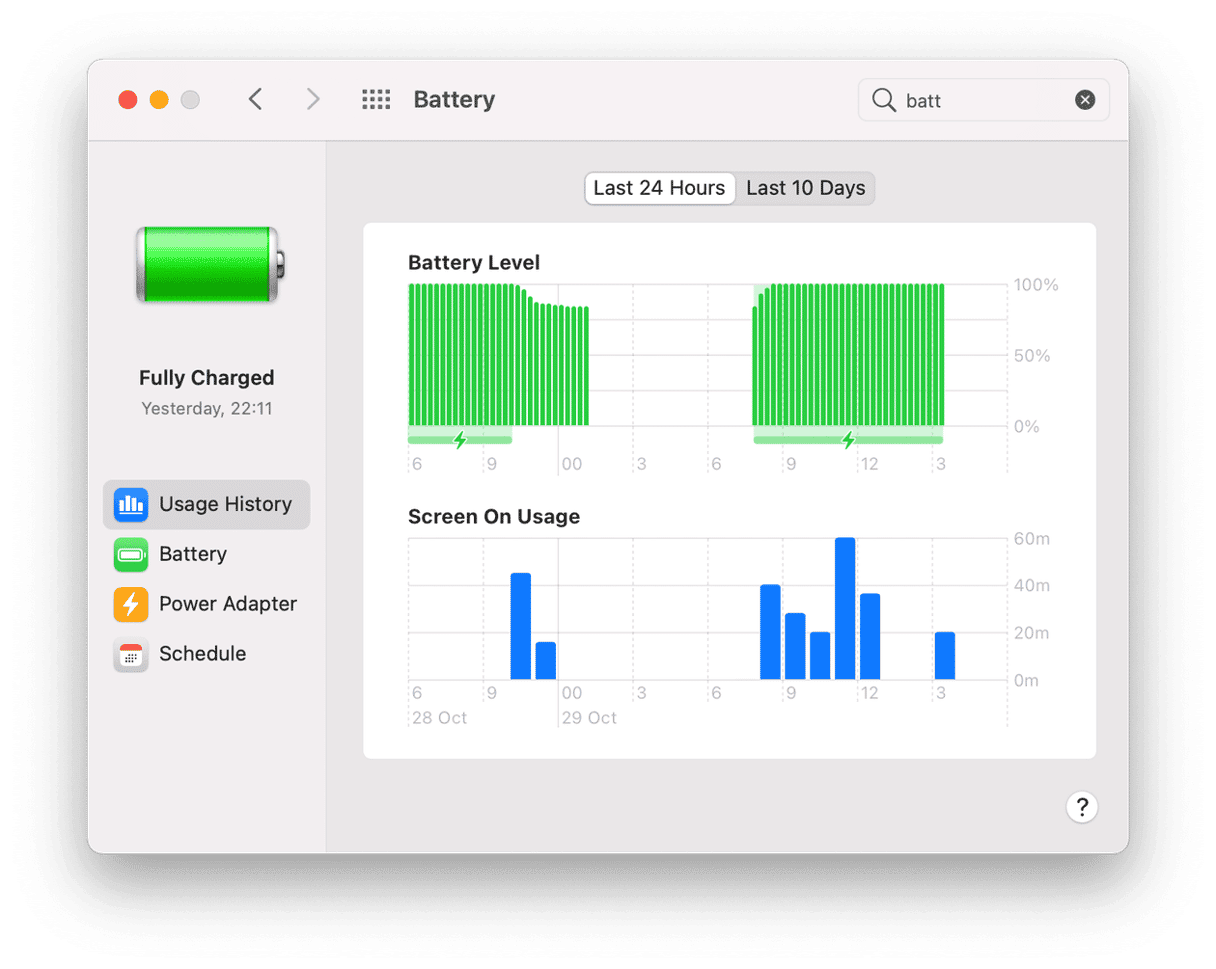
This again should give you an idea of how your battery is performing over time.
Find your hidden background apps
Chrome is known to hog memory (and so the battery) with its various background processes. But it’s not the only app that does so. To check what apps are secretly running, you can use the free tool in CleanMyMac. This is an easy Mac optimizer, which is notarized by Apple.
- Get a free trial of CleanMyMac.
- Click Performance > Scan > View All Tasks.
- Go to Background Items and switch off some of the items you don’t need.
Reset SMC
System Management Controller controls many deep-level settings of your Mac, and battery driver is one of them. In dire situations, you can reset SMC by pressing a special key combination upon startup.
How to reset SMC on a Mac with a T2 security chip
- Shut down your Mac.
- Hold down Control, Option, and Shift (on the right side)
- Keep pressing these keys for 7 secs. Now, press the Power button.
- Continue pressing these four buttons for 7 seconds.
- After a few seconds, start your Mac normally.
How to reset SMC on a Mac without T2
- Shut down your Mac
- Hold down Control, Option, Shift, and press the Power button.
- Continue pressing the keys for about 10 seconds.
- Release the keys.
9. Hide My Email not working on macOS Monterey
Hide My Email is a tool in iCloud that creates random aliases for your email so you can keep your real details hidden. But after you’ve upgraded to Monterey, you may see the message that the feature is “Not available.”
Log out from iCloud and sign back in
Your iCloud details could have been cached, and simple logging out often fixes that.
Restart your computer
This sounds really basic, but it did work for some users on Mac forums. Also, you may wait for a couple of hours and try again. Apple is probably fixing things on the fly, and next time you log in the issue could be fixed on their end.
Update your macOS Monterey
macOS Monterey will have many incremental updates aimed at bug fixing. Go to System Preferences > Software Updates for your less buggy version of Monterey.
Network preferences prevent content from loading
Another email-related issue that people are having on Monterey. The problem, after a quick investigation, seems to do with email security settings.
Check your Mail Preferences
- Open the Mail app.
- Click on Preferences > Privacy
- Try to disable Mail privacy protection from there.
Also, if you use a VPN, turn it off to see if it solves the problem. If the problem is still there, try opening:
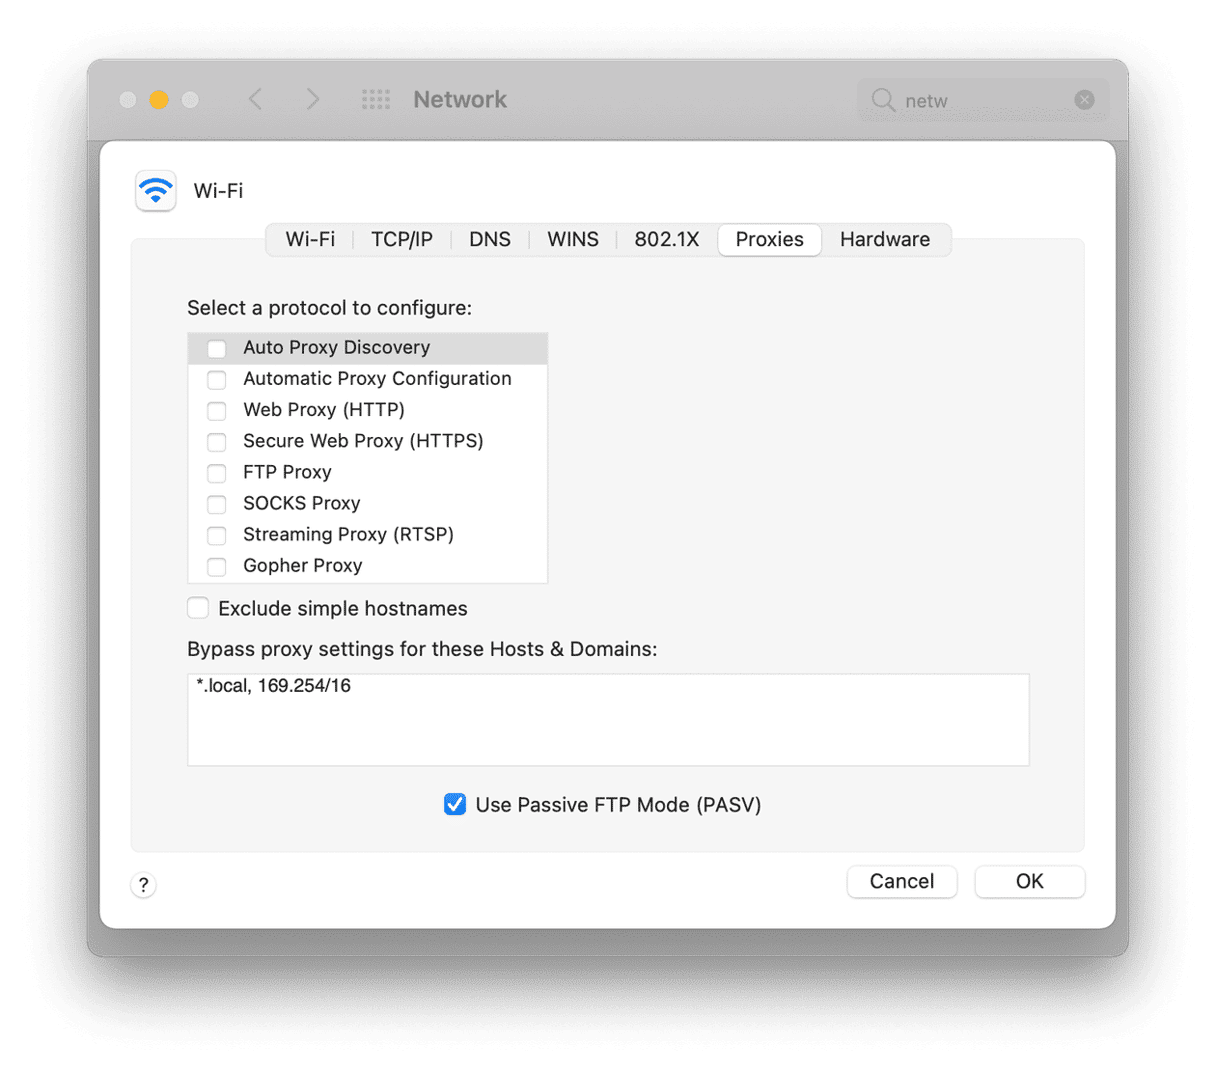
- Apple menu > System Preferences > Network
- Choose a network service from the list on the left.
- Select Advanced > Proxies.
It may be that the email content is restricted on the level of proxies. So this panel may help you figure out what’s going on. But be careful with modifying any settings there.
10. Mac won’t shut down on macOS Monterey
Who would have thought macOS Monterey would be impossible to shut down? What prevents the shutdown is always apps, often not visible on the surface.
Use Activity Monitor to force quit running apps
- Go to the Launchpad and type in Activity Monitor in the search bar.
- Under the Energy tab, you can see apps that are running.
- Use the Stop button to force quit the suspect apps.
Other ideas:
Press and hold the Power button.
Press Command + Control + Power.
11. Mac overheating after the Monterey upgrade
Again, this issue is very common for new operating systems and boils down to memory management. When the processor is hogged, at its peak capabilities, the Mac will get hot. And what loads the processor is, you guessed it, apps.
- You may check your Activity Monitor to close those unwanted apps (see the previous step).
- Also, review your Launch Agents and startup items as suggested in this article.
- If the issue keeps repeating, try resetting the SMC (find the instructions in the chapter about Battery Drain in this article).
Many apps still need to be optimized for Monterey, which will make them more energy effective.
12. Screen saver broken on macOS Monterey
If you try to use your photo as a screensaver, it will not always work on Monterey. Is it a minor bug or is screensaver somehow working differently now? Ken Burns and other slideshow effects seem to be not available with custom photos.
One explanation is that the directory that the photos are taken from cloud refer to a different or empty place after upgrading to Monterey. Try updating the Source link in the dropdown menu. You may try and move your photos to a different folder and set it a source destination.
macOS Monterey is a great new update, but things may go out of control when you upgrade your Mac. Follow this guide to fix the issues that may occur during and after you install the new macOS.


